The First Words
Usually when we are moving our existing Windows Phone 8 / Windows Phone Silverlight projects to Universal Apps, in most of the cases the common question that rises up is what should we use as a local database on it. And SQLite does a perfect job serving the universal apps a perfect local database. So, please keep your eyes posted here if you want to use the same database for both your projects in your universal app. So, why not get started?
Universal Apps
Univeresal Apps are the newest App Models designed for Windows Store to serve Apps in Windows Store and Windows Phone Store from a same project with shared codes as per your liking. To the ones who doesn't know what an Uinversal App is, kindly visit this link so you can get a full idea how it works. To the ones who already know this, please continue.
SQLite With Universal App
To get SQLite going with your universal app, the first thing we should do is get SQLite for both Windows Phone 8.1 and Windows Runtime 8.1as Universal App points to both of the apps.
To install SQLite for Windows Store please visit:
http://visualstudiogallery.msdn.microsoft.com/1d04f82f-2fe9-4727-a2f9-a2db127ddc9a/view/
And you will stumble upon a screen like the following:
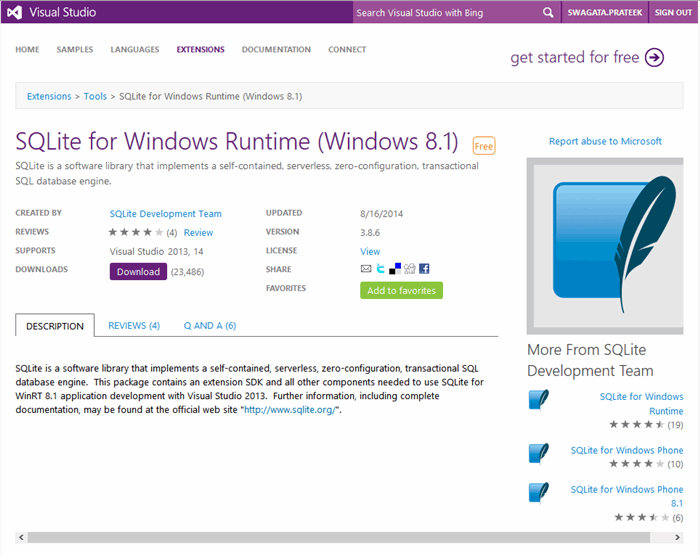
So, definitely the next thing to do is download this one, as soon as the VSIX installer is downloaded, install it. As, now we have SQLite for Windows Store here, let's move so we can have SQLite for Windows Phone.
To install SQLite for Windows Phone 8.1 please visit:
http://visualstudiogallery.msdn.microsoft.com/5d97faf6-39e3-4048-a0bc-adde2af75d1b
This will lead to a similiar page, download the VSIX installer and install it too. The next thing we should check for whether we have installed what we need in our Visual Studio. I'm using a Visual Studio 2013 Ultimate version here and let's go over Tools -> Extensions and Updates and go to the "SDK" section after under "Installed". You will stumble upon SQLite for Windows Runtime and SQLite for Windows Phone 8.1 is listed as installed in your pc.

As now we are pretty sure that we have SQLite for Windows Phone 8.1 and Windows Store Apps, let's create a new Universal App Project in Visual Studio.
SQLite With Universal App
Creating Univresal Apps are pretty same like other projects in Visual Studio. Just go over File->New Project and under Store Apps, let's create a blank Universal App named UniversalSQLite.
In the Solution Explorer, you will see your projects divided into Windows Store, Windows Phone and Shared. Our job now is to reference SQLite into both Windows Store and Windows Phone projects so both of the projects has access to SQLite. In Windows 8.1 Solution, go over your references and add reference to the newly added SQLite libraries under extensions.
And do the same with Windows Phone 8.1 solution too. Go over references and add reference to the newly installed SQLite for Windows Phone 8.1 Libraries.
You will see some yellow excalamtion signs over the newly referenced libraries and the best thing to do right now is to build this. The first problem you are bound to see when you build is this:
Actually the problem says the solution itself. As these native libraries are extremely machine dependent the best thing to do here would be just go over configuration manager and set x86 as Platform for both projects.
Trying out x64 ended up XAML designer not rendering UI. So x86 is the safe choice. Don't worry, this will not prevent you to create the different platform version to be deployed on the store.
When you are ready just use the “Create App Packages" command. The best way to get that would be right clicking on the solution name and move over to store menu. But that's later.
Get sqlite-net from Nuget
Well, if you put a build now, you will see everything has smoothed out. Now, what'd left is using SQLite. The first thing we need is a nuget package to cover all the internal intricacies we have on SQLite, thus comes in help sqlite-net . This little nuget package is extremely handy and all you need to do to use this is to go over references and manage nuget packages. Search for sqlite-net and add it when the search results pop up.
This has to be done for both the Windows 8.1 and Windows Phone 8.1 projects of course as we intend to use this for both of them. You will see two classes named SQLite.cs and SQLiteAsync.cs is created into both of the projects. Just to remove duplicacies we can move them to shared project under a folder if you like.
Let's get our hands dirty
So, lets get busy with some code, shall we?
Creating/Opening A Database:
To create/open a database all you have to do is someting like the following. This will actually create a database if it's non existing or open connection to one if it's existing.
SQLiteAsyncConnection connection = new SQLiteAsyncConnection("Student.db");
So, before doing that you might want to check whether the database exists or not.
public async Task<bool> DoesDbExist(string DatabaseName)
{
      bool dbexist = true;
      try
      {
         StorageFile storageFile = await ApplicationData.Current.LocalFolder.GetFileAsync(DatabaseName);

      }
      catch
      {
         dbexist = false;
      }

      return dbexist;
}
The reason we are looking at ApplicationData.Current.LocalFolder is sqlite-net creates database by default in that place.
Creating/Opening A Database:
Before creating a table you need to have a model to define a row on that specific table. The model might look like the following:
using SQLite;


namespace UniversalSqlLite.Model
{
    [Table("Students")]
    public class Student
    {
        [PrimaryKey, AutoIncrement]
        public int id { get; set; }

        public string Name { get; set; }

        public string EnrolledCourse { get; set; }

    }
}
Now you can just go ahead an create a Table as per your wish.
public async void CreateDatabase()
{
   SQLiteAsyncConnection connection = new SQLiteAsyncConnection("Student.db");
   await connection.CreateTableAsync<Student>();
}
CreateTableAsync will create the table if it's not there. And it will update the table description if the Model is changed in any way than the previous one. As far now, it only supports column addition. It will not destroy any existing SQLite Table. So, you don't have to worry about redoing this with an existing table.
If you look closely, you can see that you can adore the classes and the properties in the model with attributes defined in sqllite-net library. It's almost the same you might see in Entitiy Framework.
The full list is to be found here:
Class attribute:
Property attributes:
- [AutoIncrement]
- [PrimaryKey]
- [Column(Name)]
- [Indexed] | [Indexed(string name, int order)]
- [Unique]
- [Ignore]
- [MaxLength(int length)]
- [Collation(string name)]
- [NotNull]
Dropping a Table:
Dropping table is a piece of cake too:
public async void DropDatabase()
{
    SQLiteAsyncConnection connection = new SQLiteAsyncConnection("Student.db");
    await connection.DropTableAsync<Student>();
}
Adding Records in the Table:
Inserting into SQLite is easy as the following:
SQLiteAsyncConnection connection = new SQLiteAsyncConnection("Student.db");
var Student=new Student()
{
   Name="Swagata Prateek",
   EnrolledCourse="CSE 4203"
};
await connection.InsertAsync(Student);
And if you feel like inserting a lot of stuff at a time why not using a list?
SQLiteAsyncConnection connection = new SQLiteAsyncConnection("Student.db");

var StudentList = new List<Student>()
{
    new Student()
    {
        Name="Swagata Prateek",
        EnrolledCourse="CSE 4203"
        },
        new Student()
        {
            Name="Abidur Rahman",
            EnrolledCourse="CSE 4203"
        },
        new Student()
        {
            Name="Ashiqur Rahman",
            EnrolledCourse="CSE 4203"
        }
    };

await connection.InsertAllAsync(StudentList);
Pursue a Query
You can go for a Query in SQLite in quiet a number of ways. Let's check out if we want to do it using LINQ, how would it be:
SQLiteAsyncConnection connection = new SQLiteAsyncConnection("Student.db");
var queryVar=await connection.Table<Student>().Where(x=>x.Name.StartsWith("Swagata"));
var queryResult = await queryVar.ToListAsync();
foreach (var item in queryResult)
{
}
You can even do a manual SQL query if you feel like that:
SQLiteAsyncConnection connection = new SQLiteAsyncConnection("Student.db");
var result = await connection.QueryAsync<Student>("Select Name FROM Students WHERE EnrolledCourse = ?", new object[] { "CSE 4203"});
foreach (var item in result)
{
}
Update and Delete a Record
Any record can be updated as soon as it's retrieved and updated back into the table.
SQLiteAsyncConnection connection = new SQLiteAsyncConnection("Student.db");
var Student=await connection.Table<Student>().Where(x=>x.Name.StartsWith("Swagata")).FirstOrDefaultAsync();

if(Student != null)
{
    Student.EnrolledCourse = "CSE 4503";
    await connection.UpdateAsync(Student);
}
If you want to delete the same record all you have to do is:
<span style="display: none;"> </span>SQLiteAsyncConnection connection = new SQLiteAsyncConnection("Student.db");
var Student=await connection.Table<Student>().Where(x=>x.Name.StartsWith("Swagata")).FirstOrDefaultAsync();

if(Student != null)
{
    await connection.DeleteAsync(Student);
}
Summing up
We are going to take a little deep dive on the queries and make a sample app out of it in the next post. Meanwhile you can even go through Nicolò Carandini's blog on SQLite with Universal app on the following links.
- Universal App With Sqlite Part -1
- Universal App With Sqlite Part -2
Hope you guys had fun!
Microsoft MVP, Ex Microsoft Student Partner, Windows Phone Enthusiast, Creepy Follower of .net resources.


 General
  News
News  Suggestion
  Question
  Bug
Bug  Answer
  Joke
Joke  Praise
  Rant
Rant  Admin
Admin 


