I was wondering how one can capture a screenshot from an application. I saw many applications were doing them. This thought got me interested in writing an application that can take a screen shot. In this article, I will demonstrate how one can take a screen shot directly from the Desktop area using WinForms and WPF.
WinForms Application
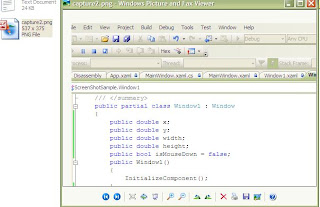
In WinForms application, it is very easy to grab a screen snapshot. To do this, you only need to create an object of Bitmap, on which you want to draw the image, get Graphics object from the Bitmap and then use CopyFromScreen method to actually draw the image into the Bitmap. To demonstrate, let us consider this method:
public void CaptureScreen(double x, double y, double width, double height)
{
int ix, iy, iw, ih;
ix = Convert.ToInt32(x);
iy = Convert.ToInt32(y);
iw = Convert.ToInt32(width);
ih = Convert.ToInt32(height);
Bitmap image = new Bitmap(iw, ih,
System.Drawing.Imaging.PixelFormat.Format32bppArgb);
Graphics g = Graphics.FromImage(image);
g.CopyFromScreen(ix, iy, ix, iy,
new System.Drawing.Size(iw, ih),
CopyPixelOperation.SourceCopy);
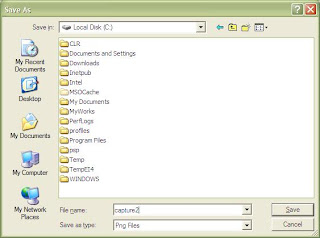
SaveFileDialog dlg = new SaveFileDialog();
dlg.DefaultExt = "png";
dlg.Filter = "Png Files|*.png";
DialogResult res = dlg.ShowDialog();
if (res == System.Windows.Forms.DialogResult.OK)
image.Save(dlg.FileName, ImageFormat.Png);
}
The above code takes Start X, Start Y, width and height and saves the image into the disk. In this method, I created an object of Bitmap where I would be drawing the image. There are large number of PixelFormats supported by the Bitmap object. You can choose any one of them which suits you. As I am working on a 32 Bit true color environment, I used Format32bppArgb.
After doing this, you need to actually draw into the Bitmap object. To do this, you need to get graphics object from the image. I used Graphics.FromImage(image) to grab the graphics object from the image, so that the graphics could draw into the Bitmap object.
Finally I called g.CopyFromScreen which actually captures the screen snapshot, just like what Screenshot does and writes on the Bitmap. The argument that I have passed determines the dimension of the image. The x, y, width and height determines where from on the screen the snapshot should start and its width and height upto where it must go. At last, I used image.Save to save the image in PNG format in the disk.
You should note, if you want transparency in your image, you should use PNG, as it supports transparency.
A Little Depth
If you want to know what exactly happens in background, let us use DllImport to demonstrate the concept. Actually Screen capture is made using an API call to BitBlt. This method can be called with appropriate dimension just as the managed method CopyFromScreen, and gets the image.
To implement using Native code:
internal class NativeMethods
{
    [DllImport("user32.dll")]
     public extern static IntPtr GetDesktopWindow();
    [DllImport("user32.dll")]
    public static extern IntPtr GetWindowDC(IntPtr hwnd);
    [DllImport("user32.dll", CharSet = CharSet.Auto, ExactSpelling = true)]
    public static extern IntPtr GetForegroundWindow();
    [DllImport("gdi32.dll")]
    public static extern UInt64 BitBlt(IntPtr hDestDC, int x, int y,
       int nWidth, int nHeight, IntPtr hSrcDC,
       int xSrc, int ySrc, System.Int32 dwRop);
}
The NativeMethod BitBlt is actually the most useful method in this context. To grab the image using this, you can use:
public void SaveScreen(double x, double y, double width, double height)
{
      int ix, iy, iw, ih;
      ix = Convert.ToInt32(x);
      iy = Convert.ToInt32(y);
      iw = Convert.ToInt32(width);
      ih = Convert.ToInt32(height);
      try
      {
          Bitmap myImage = new Bitmap(iw, ih);
          Graphics gr1 = Graphics.FromImage(myImage);
          IntPtr dc1 = gr1.GetHdc();
          IntPtr dc2 = NativeMethods.GetWindowDC(NativeMethods.GetForegroundWindow());
         NativeMethods.BitBlt(dc1, ix, iy, iw, ih, dc2, ix, iy, 13369376);
         gr1.ReleaseHdc(dc1);
         SaveFileDialog dlg = new SaveFileDialog();
         dlg.DefaultExt = "png";
         dlg.Filter = "Png Files|*.png";
         DialogResult res = dlg.ShowDialog();
         if (res == System.Windows.Forms.DialogResult.OK)
             myImage.Save(dlg.FileName, ImageFormat.Png);
       }
       catch { }
 }
In this function, I am doing the same thing that I did for the earlier one. The difference is that, here I am using NativeMethod to invoke the BitBlt directly rather than using the Managed code CopyFromScreen method.
If you want to capture the whole working area, you can use:
Screen.PrimaryScreen.Bounds.XScreen.PrimaryScreen.Bounds.YScreen.PrimaryScreen.Bounds.Width, and Screen.PrimaryScreen.Bounds.Height
as its arguments.
Sample Application
In this sample application, you will find a WPF application that allows you to capture a part of the screen. Let's look at how it works:
- Run the application, you will be provided with a screen where you can drag the mouse to take a screenshot.

- After you drag the mouse and Release the mouse, you will see a dialog box to save the image.
- Finally after you save, you will see the snapshot in PNG format.
Thus, it is very easy to work with Screen capture.
I hope you will like this application.


 General
  News
News  Suggestion
  Question
  Bug
Bug  Answer
  Joke
Joke  Praise
  Rant
Rant  Admin
Admin 


