Often in this line of work, it’s the simple things that take the longest time. A seemingly simple question came up yesterday on how to lock access to a customer’s website to a specific Windows group. There are a couple of simple gotchas worth documenting in a relatively simple solution presented below.
First, let’s start with the basics. By default, ASP.NET executes code using a fixed account. Assuming you are using IIS 6 or greater, the identity is specified in the application pool. However, if we set impersonation to true, ASP.NET assumes the user’s identity. Combined with Windows authentication, our code will run within the context of the user’s Windows identity.
To achieve this, in the web.config, we set authentication to Windows and impersonate to true. Now we will have an authenticated Windows user, we next need to focus on authorization or what rights and restrictions apply to that user. Our requirement in this case is simple: if you belong to a specified Windows group, you have access, otherwise you do not. When using Windows authentication, roles within ASP.NET translate to Windows groups. To allow a specific Windows group, allow that role within the authorization tag in the web.config. We could add additional lines to allow further roles or users. In this case, we simply want to deny everyone else, so notice the deny users * wildcard below.
Web.config
<system.web>
  <authentication mode="Windows"/>
  <identity impersonate="true"/>
  <authorization>
    <allow roles="BUILTIN\Administrators"/>
    <deny users="*"/>
  </authorization>
</system.web>
Here’s a handy tip: When testing, use the whoami command. This will show you all the groups the logged in user belongs to, which is handy when testing.
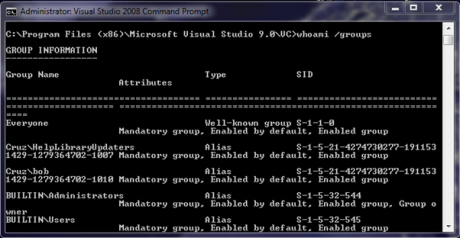
If you are making modifications to local or domain groups for the current user (probably your own account for testing), ensure that you see the group information you expect with the whoami /groups command. If you have just added yourself to a test group, remember that you must logout and log back in to see these changes.
Now you could stop here, your website is secured. However, if you do, the user will get IIS’s rather nasty 401 error page. It would be much nicer to show our own custom error or possibly redirect the user to a registration page of some sort. The problem is we’ve restricted the entire website, so even a harmless error page requires authorization. What we need is an exception, which we can do by adding the snippet below the system.web closing tag:
<location path="AccessDenied.aspx">
  <system.web>
    <authorization>
      <allow users="*"/>
    </authorization>
  </system.web>
</location>
What this has done is specify a specific file to have different authorization requirements to the rest of the website. Optionally, we could have specified a directory where we can place CSS, image files, a masterpage, or other resources we may want to allow access to. In this example, we are only allowing all users to see the AccessDenied.aspx page.
You might think that using the customErrors section in the web.config would be the last step to redirect the user to the AccessDenied.aspx page. However, IIS has other ideas! IIS catches the 401 before it ever consults with ASP.NET and therefore ignores your customErrors section for a 401. Use the below workaround in your global.asax.cs to catch the 401 and redirect the user to our error page before IIS has a chance to interfere.
Global.asax.cs
protected void Application_EndRequest(Object sender, EventArgs e)
{
    if (HttpContext.Current.Response.Status.StartsWith("401″))
    {
        HttpContext.Current.Response.ClearContent();
        Server.Execute("AccessDenied.aspx");
    }
}
If we have further security requirements, we can do further checks any time by getting the IPrincipal from Page.User or HttpContext.Current.User. We could enable a button in our UI with a simple statement such as:
adminButton.Enabled = Page.User.IsInRole(@"domain\domainadmins");
While the solution seems obvious and elegant, it took a bit of searching and playing to get it to work just right. There are other ways of centrally enforcing security such as Application_AuthenticateRequest in global.asax. However, in this case, it is far more configurable to take full advantage of the settings available to us in the web.config.


 General
  News
News  Suggestion
  Question
  Bug
Bug  Answer
  Joke
Joke  Praise
  Rant
Rant  Admin
Admin 


