Introduction
In VS 2010 a new template was introduced called as lightswitch, in this release Microsoft launched it with silverlight, and to be frank i have never been an admirer for sliverlight, which uses XAML. So it was not before VS 2013, where Microsoft launched it with HTML 5 as well , we started using it.
So let’s see why it is used for, if we need an application where business logic is more important, go ahead and use this template, you can do it very quickly.
Why we started using it
Whenever a new template is released, we always have a question why and where to use it, the same question came to us as well, so below is the scenario where this template helped us.
- Now a days, we create applications which is configurable, and we had the same applications.
- But as a developer, we are required to give more time towards our application, and we bother least about creating anything about these configurations, and in the end , we end up doing it manually.
- To avoid this, we started using lightswitch, where a business rule is more important that my original application, and we don’t want many people to have access to it.
Creating our application
As now we are clear why and where, let’s take a simple example and create our first application using lightswitch.
We will create a small application, where we have to save Key and value pairs, so same can be used in our application.We will be using VS 2013 for this example.
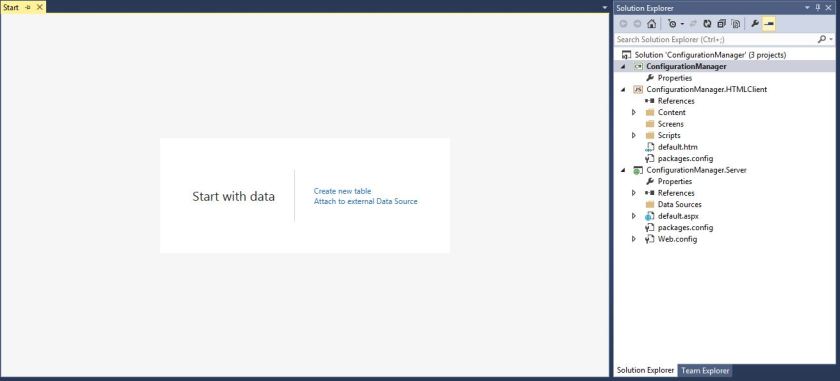
- To create LightSwitch project, click on File->New Project-> Visual C#->LightSwitch , we will get multiple options , just select “LightSwitch HTML Application” and name application as ConfigurationManager and click OK.

- Now once project is loaded, we will be prompted with below screen, which is called start screen, we will have multiple options , from where we can get our data. For this example we will create our own table, so let’s go ahead with “Create new table”
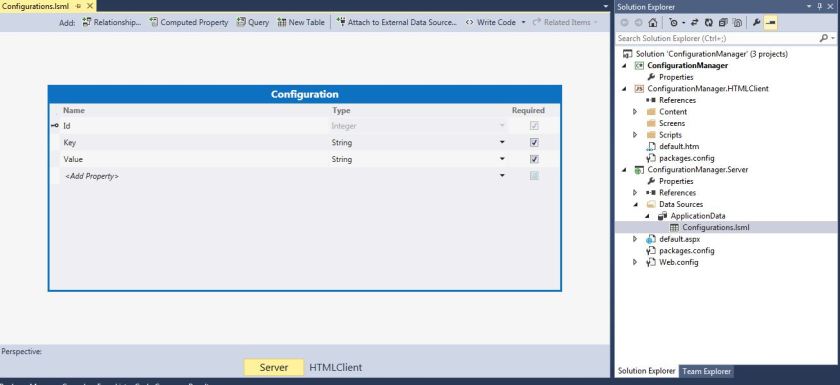
- Now we will be on another screen, where we will be asked to Add table columns.If you notice, by default and column called “Id” is already available, which will be primary key for this table.Let’s go ahead and add 2 columns as “Key” and “Value” both will be string type, and name our table as “Configuration“.
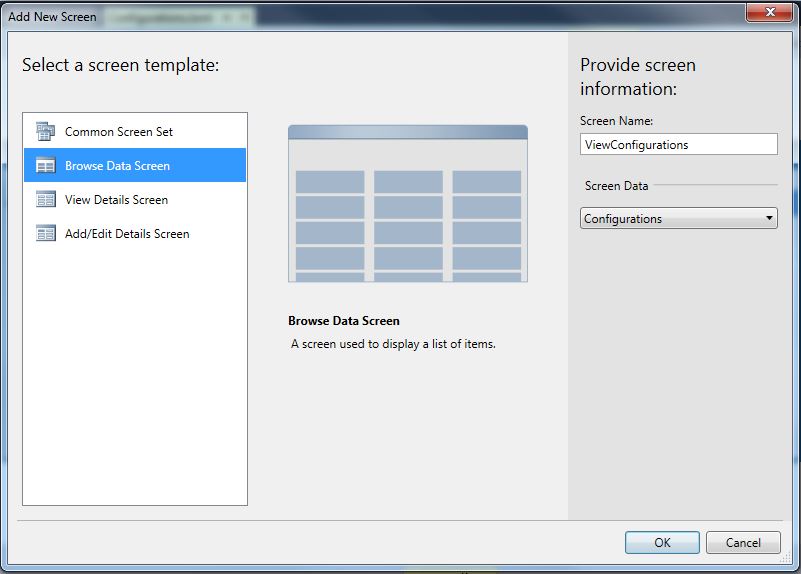
- Now our table is ready, we need some sceens to add/edit and view data. Let’s add some screens, if you notice your table designer, we have 2 Tabs “Server” and “HTMLClient”, Click on HTMLClient , and click on Screen tab, which is located above your table designer on right hand side, we will get “Add New Screen”
- From left hand side, select “Browse Data Screen” and give Screen Name as “ViewConfigurations” and from Screen Data select “Configuration”, and click OK.Our first screen is ready.
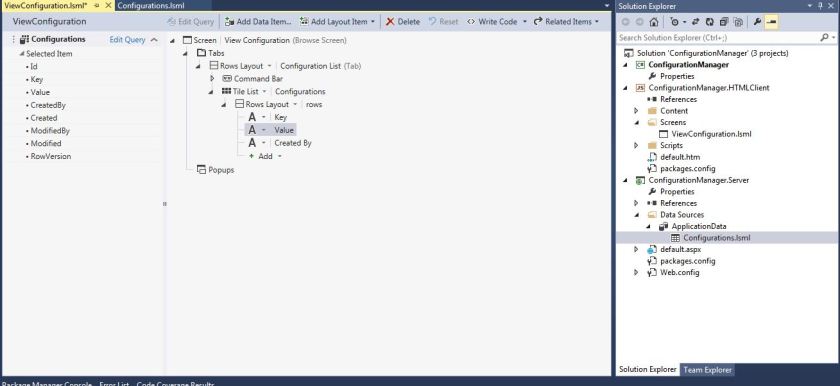
- We will get one new file, which is ViewConfiguration.lsml which is our view/screen.
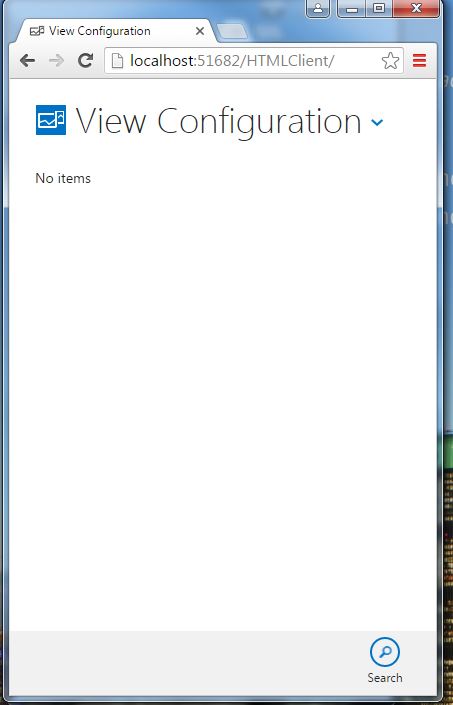
- Just press F5 to see , what we have created till now.We have our browse View/Screen.
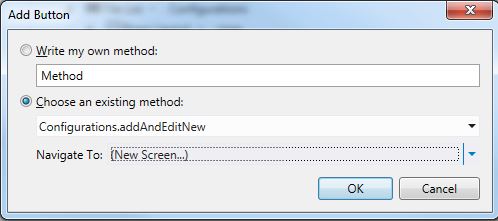
- Now let’s move and add one View/Screen to add values, open your ViewConfiguration.lsml file, and go find Command Bar, Expand the Menu and click on Add.

- We will get a new popup as Add Button with multiple choice , click on “Choose an existing method” and click on drop-down below, which has showTab as default value, select “addAndEditNew” from dropdown under “Configurations“. And in Navigate To: select (New Screen) and click OK.
- Now we will get Add New Screen, do not change anything and click OK.

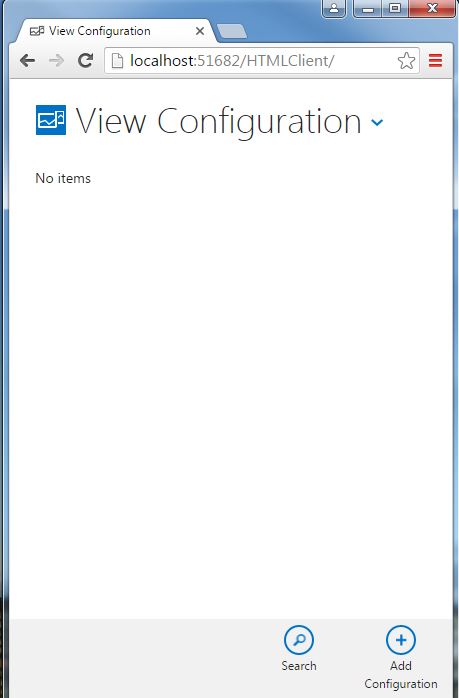
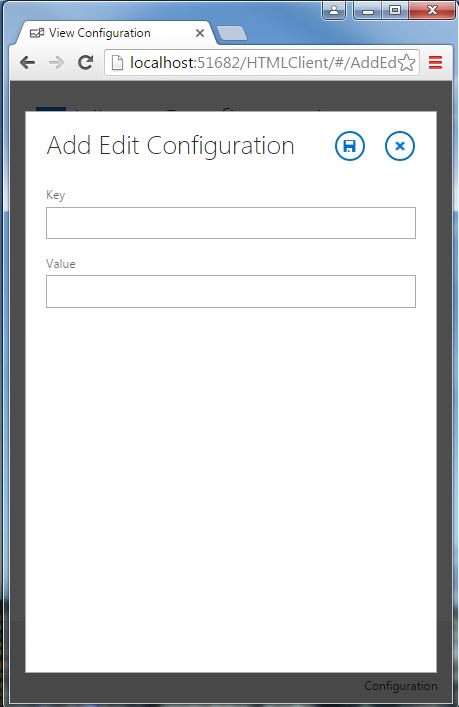
- Now let’s press F5 and check what we have achieved.If you notice in right corner of window, we have a button called Add Configuration. Click on Button and a new pop up comes a View which has Key and Value textbox and Save and Close buttons.
- Now add some Key and Value pair, for testing we have entered “IsRequired” as Key and “True” as Value and click on Save button, we will be redirected to Browse screen post save, which looks like below.
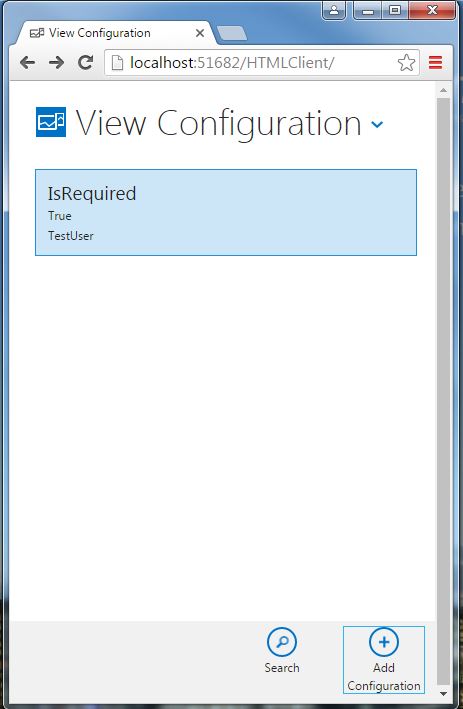
- The browse screen has saved values, but we are not able to figure out which value belongs to which column, this is Tile List, let’s change it to table so we will have a view where we can show columns as well.
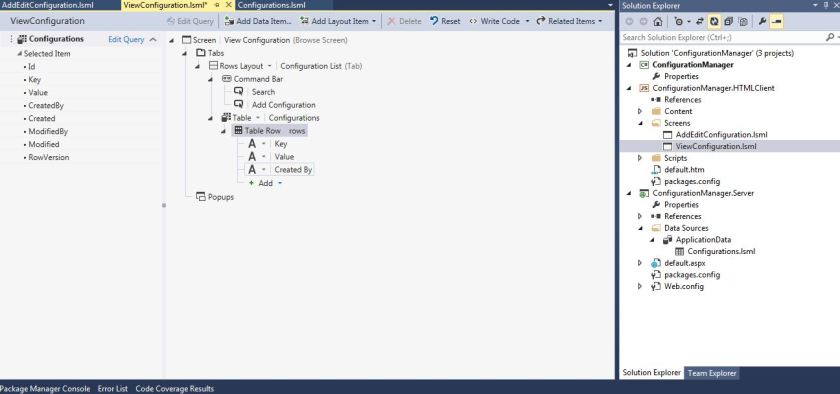
- Go to solution and open ViewConfiguratios.lsml file, we will see Tile List option just below Command Bar, click on arrow next to Tile List, we will have multiple options. Let’s choose Table, now our view is changed to table, if we click on Table Row, we can Add/Remove Columns to be displayed.
- Press F5 and see the UI.
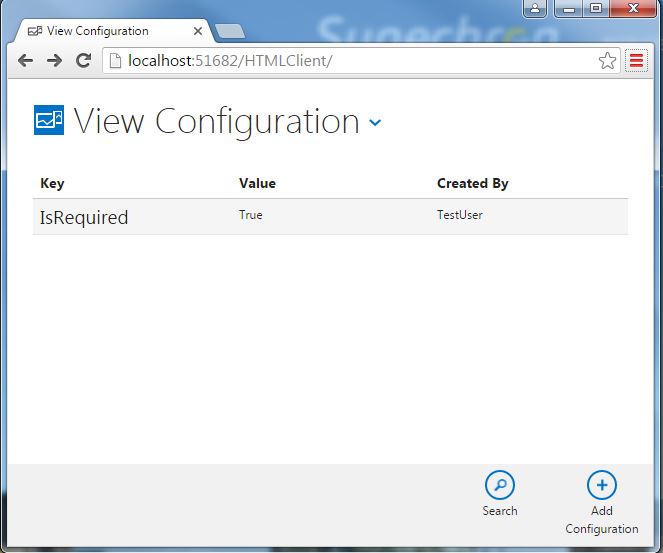
- Now we have our view with table, you might have a question from where CreatedBy column came as we have not added any column by this name, LightSwitch by default adds some columns, whenever we create a new table, following are the columns.
- CreatedBy
- Created (DateTime)
- ModifieBy
- Modified (DateTime)
Conclusion
We create a business application,without using a single line of code , which can add new configurations to your application, we will see in next chapter how to use it with DataBase and we will have Edit screen as well.
Hope you learned something new today, please follow my blog for more topics.


This member has not yet provided a Biography. Assume it's interesting and varied, and probably something to do with programming.


