Introduction
All hail Visual Studio. We all know that as a development environment, it is pretty good – okay, some of us might prefer Visual Studio 6, and others might prefer Textpad; but, all in all, it is pretty good.
Not perfect though. We have probably all seen funky add-ins like Resharper etc., but did you know that it is very easy to create your own add-ins to do just what you want!
In this example, we will go through creating an add-in from scratch, explaining some of the options along the way. We will see how to create an add-in that can perform a set of arbitrary functions. What shall we implement? Well, despite having two huge monitors, I still get irked by extra long lines (sad I know, but there you go), so we will add functionality that flags up long lines at compile time. Whilst we are at it, we will stick in a © notice at the top of each file that doesn’t have one, set the warning level of the project to 4, treat warnings as errors, and perhaps complete some of the information in the assembly.info file. That should give us enough to be getting on with, as well as give us a pretty good jog around the system.
OK then, go for it! Fire up Visual Studio (this example was completed with VS.NET 2003, but should be compatible with 2005 too).
We need a new project, and despite this being in C#, it isn’t listed under “C# projects”, you need to look under “Other projects” and what we want is an Extensibility Project, of type “Visual Studio .NET Add-in”.
Let's call the add-in: MyFirstAddin.
Add-in wizard
You will now see a wizard screen:
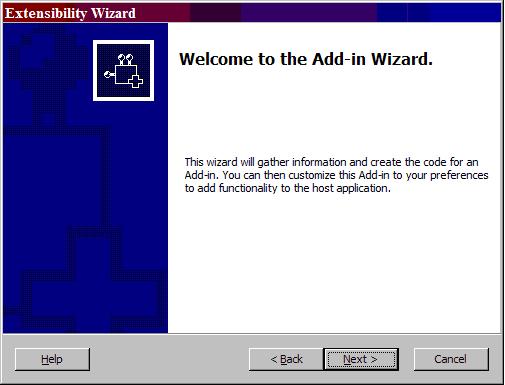
Click Next…

and, of course, we want to do it in C#, so Next…
We are aiming our add-in at Visual Studio .NET, and the VSMacros IDE, so we can clear that check box. Next!
In this dialog, we need to give a name to our add-in, and a description. Both of these are optional, but are used to identify the add-in to the user – so we should give it a sensible name. Let's call it, for the sake of consistency, “MyFirstAddin”.
Next!
Okay, we are nearly done with the wizard now. Whilst we do intend this add-in to run “automagically”, we will also give the user the option of running it from a menu bar, so check the first box.
We might be displaying model message boxes, so we will leave that clear.
Yes, we want the add-in to load when VS.NET starts, and, see as we are not greedy, we will share this with everyone on the machine.
Next!
We don’t really need an ‘About' box here, so we can skip that too.
Down to the code.
The setup project
You will have had a solution created for you. The first is the code behind the add-in itself, and the second is a setup project that installs the add-in with the options that you selected. We’ll have a brief look at that now.
I am assuming here that you are familiar with setup projects, so I will only look at the relevant and interesting options here.
View the registry for the setup project and you will note that keys are installed in HKLM/Software/Microsoft/VisualStudio/7.1/Addins. This key would have been located under HKCU if we had chosen to restrict the add-in to the person who had installed it.
Looking at the sub-key, it is named after the name that we gave in the setup wizard, and the .Connect refers to the function that is called within the add-in. Yes – MyFirstAddin.Connect is the ProgID for a COM object!
Within there are a few keys. Description and FriendlyName need no explanation, but the others might.
CommandLineSafe
- 0 or 1. A boolean that indicates if the add-in is safe to be run from the command line; if it displays a modal dialog, then it isn’t.
CommandPreLoad
- This is used to indicate that the add-in will communicate via a toolbar or not. Boolean.
LoadBehaviour. A DWORD bit field.
- 0 - The add-in is not loaded
- 1 - The add-in is loaded at IDE startup
- 4 - The add-in is loaded when devenv is invoked from the command line with a build switch.
See MSDN for more information.
The add-in
The code for the add-in functionality resides within connect.cs. When the add-in is loaded (in our example, on VS.NET startup; in other examples, it might be when the toolbar button is pushed), the Connect class is instantiated and the OnConnection method is called. In here, we will do our work.
Seeing as we are modifying the project, it might need doing in three ways:
- When the project is built
- When a file is saved
- On user initiated command
For the first two, we need to assign the appropriate delegates.
The EnvDTE namespace makes available some classes, and the ones we will use here are BuildEvents and DocumentEvents.
We need two private member variables:
public class Connect : Object,
             Extensibility.IDTExtensibility2,IDTCommandTarget
{
    …
    BuildEvents m_BuildEvents;
    DocumentEvents m_DocumentEvents;
    …
We will assign these members in the OnConnect method.
public void OnConnection(object application,
         Extensibility.ext_ConnectMode connectMode,
         object addInInst, ref System.Array custom)
{
    applicationObject = (_DTE)application;
    addInInstance = (AddIn)addInInst;
    …
    m_DocumentEvents = applicationObject.Events.get_DocumentEvents(null);
    m_BuildEvents = applicationObject.Events.BuildEvents;
    …
And then use intellisense to generate delegates:
m_DocumentEvents.DocumentSaved +=new
  _dispDocumentEvents_DocumentSavedEventHandler(m_DocumentEvents_DocumentSaved);
m_BuildEvents.OnBuildBegin += new
  _dispBuildEvents_OnBuildBeginEventHandler(m_BuildEvents_OnBuildBegin);
This will have created two blank functions for us (m_DocumentEvents_DocumentSaved and m_BuildEvents_OnBuildBegin) into which we can put our checking code.
Whilst we are in OnConnection, why don’t we add a menu option to the popup window on right mouse click.
if (connectMode == Extensibility.ext_ConnectMode.ext_cm_UISetup)
{
Commands commands = applicationObject.Commands;
_CommandBars commandBars = applicationObject.CommandBars;
object [] contextGUIDS = new object[] { };
try
{
Command command = commands.AddNamedCommand(addInInstance,
"CheckProject",
"CheckProject",
"Checks the project for conformity",
true,
162,
ref contextGUIDS,
(int)vsCommandStatus.vsCommandStatusSupported +
(int)vsCommandStatus.vsCommandStatusEnabled);
CommandBar commandBar = commandBars["Project"] as CommandBar;
CommandBarControl commandBarControl = command.AddControl(commandBar,1);
}
catch (Exception e)
{
String strDebug = e.Message;
}
}
This code checks the connectMode (as detailed below), and if it is during the setup of the add-in, the command is added to the project menu.
Connect mode definitions:
| ConnectMode | Description |
|---|
ext_cm_AfterStartup | The add-in was loaded after the IDE started, probably from the add-in manager. |
ext_cm_Startup | Add-in was loaded when the IDE was started. |
ext_cm_External | Add-in was loaded by a program other than the IDE |
ext_cm_CommandLine | The devenv command loaded the add-in. |
ext_cm_Solution | Add-in was loaded when a project was loaded with a dependency on the add-in. |
ext_cm_UISetup | The add-in is loaded for the very first time. |
There will now be three places where code from the add-in gets called: the two generated delegates, defined above, and the Exec method, when called from the menu bar.
To make our life simpler, we will put the same function call in each method, although in the call to the OnSaved delegate, it is probably overkill, as you could just check that single file.
Now, we will take a look at each of the three methods. We will start with the DoCheck() method.
The main part of this function is to cycle through the projects in the solution and check them for conformity. This can be done with this code snippet:
System.Array solutionProjects =
  applicationObject.DTE.ActiveSolutionProjects as System.Array;
foreach (Project project in solutionProjects)
{
    CheckProject(project);
}
Which brings us onto the implantation of CheckProject:
Setting the warning levels etc. is easy:
foreach (Configuration configuration in  project.ConfigurationManager)
{
    foreach (Property property in configuration.Properties)
    {
        if (property.Name == "TreatWarningsAsErrors")
        {
            property.Value = true;
        }
        if (property.Name == "WarningLevel")
        {
            property.Value = 4;
        }
    }
}
Next, we will fill in the assembly info for the solution. This is a little more complex, so we will split that out into a separate function:
foreach (ProjectItem projectItem in project.ProjectItems)
{
    string strFileName = projectItem.Name.ToUpper();

    if ((strFileName == "ASSEMBLYINFO.CS") ||
        (strFileName == "ASSEMBLYINFO.CPP"))
    {
        if (!FileContainsString(projectItem, s_strCopyright, true))
        {
            FillInAssemblyInfo(projectItem,project.Name);
        }
    }
}
Here, we are using the presence of the © notice at the top of the file to see if that file has been checked already.
After sorting out the assembly info, we need to go through each project item and verify that item:
foreach (ProjectItem item in project.ProjectItems)
{
    CheckItems(item);
}
So, finally, we get to look at the code that manipulates our text. Here is the implementation of “FileContainsString”:
private Boolean FileContainsString(ProjectItem item,
string strMatch, Boolean bFirstLineOnly)
{
Boolean bFound = false;
EnvDTE.Window theWindow = item.Open(Constants.vsViewKindCode);
TextDocument textDoc =
theWindow.Document.Object("TextDocument") as TextDocument;
EditPoint editPoint = textDoc.StartPoint.CreateEditPoint();
if (editPoint != null)
{
string text = null;
if (bFirstLineOnly)
{
text = editPoint.GetLines(1,2);
}
else
{
text = editPoint.GetText(textDoc.EndPoint);
}
if (text != null)
{
bFound = (text.IndexOf(strMatch) != -1);
}
}
return bFound;
}
From hereon in, it is just a matter of parsing the files and adding lines as appropriate using EditPoint::Insert.
Whilst writing add-ins is quite simple, the documentation available leaves a fair bit to be desired and debugging add-ins can be very problematic. You need to compile both projects (add-in & setup) and install the add-in. When you hit F5, a new instance of Visual Studio is started and the add-in is started, and you can debug it from within your original instance of the Visual Studio.
Common problems are caused by not uninstalling the add-in before each debug session. Failing that, you might need to close all instances of Visual S, removing the add-in via the add-in manager on the last surviving instance. A reboot is often a good tactic at this point!
A completed example is attached. Hope this is useful to someone! Enjoy!
I have been developing software since I first got hold of a ZX80 age 10. After a few years with BBC Basic and 6502 assembler (I used to write articles for PCW and Acorn User) I then discovered Pascal with Objects and quickly moved to C++ where I spent 15happy years before finding the joys of c#.
After discovering the wonders of working for myself I founded Hollingside Technologies (www.hollingside.com). We offer c# / c++ / Delphi / SQL and also management consultancy. As well as the consultancy work we have run a number of successful C# and Object Oriented Programming training courses. Past bespoke software that we have written includes mobile software (pocket PC) that integrates with MS Exchange via GPRS for a sales team; Asp.net remote hardware monitoring software; scanning and image recognition software for passport control and a heap of other stuff.
When not being a geek I play guitar in a semi-successful rock band(www.stircrazy.org) and am a competitive fencer.
Other spare time is spent walking my dogs and riding my motorbike.
After all that? Give me a good beer and a splatter movie!


 General
  News
News  Suggestion
  Question
  Bug
Bug  Answer
  Joke
Joke  Praise
  Rant
Rant  Admin
Admin 


