Introduction
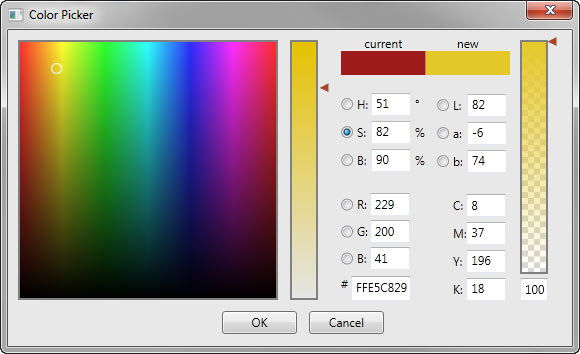
This is an article about making color pickers. It also includes a fully prepared color picker control and dialog that closely resembles Adobe's. In order to make a good color picker, two things are needed. First, one needs to be able to generate dynamic bitmaps quickly. It was my coming upon a way to do this quickly that inspired me to produce color pickers in the first place. Second, a color picker should be easily modifiable. Different applications are bound to want different variants. In order to do this, a modular approach was taken with the connection between the components occurring in XAML.
Background and Credit
This is not the first color picker made for WPF, and almost certainly will not be the last. The following other color pickers may be of interest:
The methods used to manipulate bitmaps were directly inspired by this article: High performance WPF 3D Chart. While it may not be one of the easier articles on CodeProject to read, it is one that one can learn a lot from. Finally, some of the color conversion routines from Manipulating colors in .NET - Part 1 were used as the basis for generating some of the bitmaps. Credit should also be given to the fine people at Adobe who inspired much of the look and feel of this project.
Using the Code
Although explanation of the code will follow, understanding of the intricacies of the code is not necessary. One can use the color pickers through dialogs, picker controls, or color chips. Four different color picker dialogs are included with this article: ColorPickerStandardDialog, ColorPickerStandardWithAlphaDialog, ColorPickerFullDialog, and ColorPickerFullWithAlphaDialog.

Although the dialogs differ in their showing lab color and having alpha selection, the code to use them is effectively the same:
var dia = new ColorPickerDialog();
dia.InitialColor =((SolidColorBrush ) colorRect.Fill).Color ;
if (dia.ShowDialog() == true)
{
colorRect.Fill = new SolidColorBrush(dia.SelectedColor);
}
After the DLLs are referenced, that is all that is necessary in order to use the color picker as a dialog.
The next method of using the color picker is through the color picker controls themselves. They look just like the dialogs minus the OK and Cancel buttons, and are named: ColorPickerStandard, ColorPickerStandardWithAlpha, ColorPickerFull, and ColorPickerFullWithAlpha. They have InitialColor and SelectedColor dependency properties, so they can be used with databinding. There is also a SelectedColorChangedEvent to be used if you prefer working with events. As all of the color pickers are a bit on the large side, one will probably put them in something like an expander. Only a few lines of code are needed to work with such a system.
private void exStandard_Expanded(object sender, RoutedEventArgs e)
{
cpStandard.InitialColor = cdStandard.Color;
cpStandard.SelectedColor = cdStandard.Color;
}
private void btStandardAccept_Click(object sender, RoutedEventArgs e)
{
cdStandard.Color = cpStandard.SelectedColor;
exStandard.IsExpanded = false;
}
private void btStandardCancel_Click(object sender, RoutedEventArgs e)
{
exStandard.IsExpanded = false;
}
If even this is too much coding, one can use color chips instead and rely 100% on XAML. Both a basic ColorChip control and a fancier ForegroundBackgroundChip control are included with this article.
These can be used entirely through XAML, and have a built-in checkerboard, so transparent and light colors can be distinguished. It is also possible to pick the dialog to be used through the properties window. I hope that I have convinced you that these color pickers can be easily used to enhance your WPF applications.
Generating Bitmaps
This application uses WriteableBitmaps to display the gradients used to pick the colors. WriteableBitmaps contain two buffers for pixel information, a front buffer and a BackBuffer. The WriteableBitmaps are declared in the ColorSelector class as follows:
private readonly WriteableBitmap mSelectionPane =
  new WriteableBitmap(256, 256, 96, 96, PixelFormats.Bgr24, null);
private readonly WriteableBitmap mNormalPane =
  new WriteableBitmap(24, 256, 96, 96, PixelFormats.Bgr24, null);
Both WriteableBitmaps use PixelFormats.Bgr24. Their buffers are of the form, a byte for blue, a byte for green, a byte for red, a byte for blue in the next pixel to the right (unless at the end of a row), and so on until the end of the buffer. The other thing to note is the use of the word Normal. It is being used in its mathematical sense as being perpendicular rather than in its common sense of usual or customary. For example, in the usual way of describing the RGB color space, the red, green, and blue values are though of as perpendicular vectors. In terms of the color picker, the selected radio button and the slider both correspond to the same NormalComponent, which contains the rendering instructions.
All of the bitmap updating operations follow the same set of steps:
- An unsafe code block is created in which to process the update.
- The
WriteableBitmap is locked. - A
Pointer to the beginning of the BackBuffer is retrieved. - The pixels are looped through, and blue, green, and red bytes are written to the
BackBuffer. The order of the bytes is determined by the PixelFormats value in the WriteableBitmap constructor. - The pixels are written back through the
AddDirtyRect method. - The bitmap is unlocked.
- The unsafe code block is exited.
The code for updating selectionPlane when using the Red Normal component is as follows:
public override void UpdateColorPlaneBitmap(WriteableBitmap bitmap, int normalComponentValue)
{
unsafe
{
bitmap.Lock();
int currentPixel = -1;
byte* pStart = (byte*)(void*)bitmap.BackBuffer;
for (int iRow = 0; iRow < bitmap.PixelHeight; iRow++)
{
for (int iCol = 0; iCol < bitmap.PixelWidth; iCol++)
{
currentPixel++;
*(pStart + currentPixel * 3 + 0) = (byte)(iCol);
*(pStart + currentPixel * 3 + 1) = (byte)(255 - iRow);
*(pStart + currentPixel * 3 + 2) = (byte) normalComponentValue;
}
}
bitmap.AddDirtyRect(new Int32Rect(0, 0>,
bitmap.PixelWidth, bitmap.PixelHeight));
bitmap.Unlock();
}
}
For all of the color models other than RGB, this routine can become quite involved as the calculation of the red, green, and blue bytes is more complex. Also, this loop is evaluated once for each pixel. For a 256x256 image, that is 65536 times. It is for that reason that the calculation of the byte values is all done inline within UpdateColorPlaneBitmap. Normally, this would be very bad style, but when something is done 65536 times, even small things make a difference. This can be seen when dragging the scrollbar while using the Lab components.
Concerning HSB
It is easy to get HSB (Hue, Saturation, Brightness), HSV (Hue, Saturation, Value), and HSL (Hue, Saturation, Lightness) mixed up as there is a general lack of consistency as to their use. According to current parlance, HSB and HSV are the same thing, while HSL is different. In particular, the System.Drawing.Color structure's GetBrightness() and GetSaturation() methods refer to what is generally considered the Lightness and Saturation of the HSL model rather than the HSB model. This is in contrast to the color picker in Photoshop where the HSB corresponds to what is currently considered HSB. Wikipedia provides a good explanation of this in HSL and HSV.
Concerning CMYK
CMYK (Cyan, Yellow, Magenta, Key) is different from the other color spaces used in the picker in that there are four different color components. As one might suspect, there are many different conversions from RGB to CMYK that are reversed by the same transformation from CMYK to RGB. Discovering the formula that Photoshop uses is a nontrivial task. Unfortunately, I was unsatisfied with the CMYK conversion that can be easily found on the web. It has the quality of always making at least one of C, M, or Y equal to 0. To deal with this, a new parameter was added to the transformation called KGreedieness with a default value of .7. If KGreedieness is set to 0, then you have the conversion from RGB to CMY. If the value of KGreedieness equals 1, you have the commonly seen conversion to CMYK. KGreedieness is intended to lie between 0 and 1.
Concerning Lab
Lab (Lightness, a, b) is a significantly more complex color space than RGB. I used a modification of the code from Manipulating colors in .NET - Part 1. Unfortunately, it does not match the results in Photoshop exactly. It should be noted that the process is not reversible in the Photoshop color picker. If one selects a color and makes a note of the RGB and Lab values, and then changes the color, and then sets the Lab values one noted, one does not necessarily get back the RGB values. (This works with HSB, but fails with CMYK.) On account of this, it would take a significant mathematical derivation to determine the optimal Lab conversion, which I freely admit to not having done yet.
Color Picker Architecture
The first thing to notice is that there are two separate assemblies: ColorPicker and ColorPickerControls. These assemblies differ not just in the types contained, but in their design philosophies. The ColorPickerControls assembly is designed for ease of use for the developer using the types in his own project. The types in ColorPicker assembly were designed to be modular components that can be used in the construction of color pickers. For example, a color picker could be made up of controls as follows:
The various controls in the color picker are bound together by Dependency Properties. For example, the RgbDisplay control binds with the following expressions:
Color="{Binding Path=Color, ElementName=colorSelector}"
NormalComponent="{Binding ElementName=colorSelector,
                  Path=NormalComponent, Mode=TwoWay}"
ColorPickerFull has a SelectedColor Dependency Property that is hooked up to the colorSelector's Color Dependency Property by:
SetBinding(SelectedColorProperty, "Color");
DataContext = colorSelector;
ColorSelector
The ColorSelector control is the central control in that it is what allows one to visually select colors. ColorSelectorControl has code to handle the setting of colors via its Color property as well as actions via the mouse. It does not know anything about color spaces or how to draw gradients. In order to easily support multiple color models, all of the color model information is stored in the NormalComponent property of type NormalComponent.
public abstract class NormalComponent : ColorComponent
{
public abstract bool IsNormalIndependantOfColor { get; }
public abstract void UpdateNormalBitmap(WriteableBitmap bitmap, Color color);
public abstract void UpdateColorPlaneBitmap(WriteableBitmap bitmap,
int normalComponentValue);
public abstract Color ColorAtPoint(Point selectionPoint,int colorComponentValue);
public abstract Point PointFromColor(Color color);
}
This depends on another abstract class ColorComponent.
public abstract class ColorComponent
{
public abstract int MaxValue { get; }
public abstract int MinValue { get; }
public abstract int Value(Color color);
public abstract string Name{ get; }
}
For the RGB color space, there are R, G, and B NormalComponent types. The HSB and Lab color spaces are similarly equipped, while the CMYK space has only color components as it does not participate in the color gradients.
The Color Space Display Controls
For each color space, there is a corresponding display control: RgbDisplay, HsbDisplay, LabDisplay, and CmykDisplay. These controls display the appropriate component values for their Color property. They also serve as the source for the NormalComponent objects used by the ColorSelector. The NormalComponent property is intended to be bound in a two way fashion in order for the individual small groups of radio buttons to act as one large group of radio buttons.
Conclusion
Hopefully this color picker will be of some use to all of you out there. I will discover how difficult porting it to Silverlight is soon. Unfortunately, that task can turn out to be easy or extremely hard.
Updates
- 12/20/2010 - In order to make the sliders for normal color and transparency easier to use, the areas next to the sliders for normal color and transparency have been changed to allow for clicking as well as dragging. Also, the triangles were bolstered by an invisible rectangle to make them easier to use.
- 12/26/2010 - As requested by Aybe, the selection circle has been modified for improved visibility. It is now governed by the
SelectionRingMode property. It is an enumeration with the following values:
White - A single white circle (the previous situation)Black - A single black circleBlackAndWhite: Two concentric circles, the inner one being white and the outer one black (this is the default)BlackOrWhite: A single circle that is either white or black depending on the selected color
Written software for what seems like forever. I'm currenly infatuated with WPF. Hopefully my affections are returned.


 General
  News
News  Suggestion
  Question
  Bug
Bug  Answer
  Joke
Joke  Praise
  Rant
Rant  Admin
Admin 


 . thanks.

 --the one I have has been last modified Dec. 26th 2010.