Introduction
This article is about getting started with Win32 programming through
creating a window with minimum code and complexity.
The problem of complexity
I believe that the default Win32 project in Visual Studio which autocreates
10 files*,
191+ lines of code**, and which utilizes what I consider advanced Win32 programming concepts like
multiple callbacks, advanced UNICODE, resource files, precompiled headers, dialogs,
etc.
is not a good starting point for learning about the beauty and fun of programming for the Microsoft Windows operating system.
Solved with simplification
So I wrote the bare minimum required for a window to be created, and sustained into one file and about 50 lines of code in an attempt to open up the key concepts behind Win32 programming and what every window has in common, so the the user first learns the basics of what every window must have in order to exist.
Documentation was done through structured comments which assume that the user has almost or no experience at all in Win32 programming, and it was done for every line of code intentionally so in case the user has any doubts, they can just check the previous line for a comment describing whats happening.
If you follow the instructions presented below in this article, I think you can learn something valuable about the Win32 API and what all windows have in common, without all the extra trickery that's packed into the automatically generated win32 app template of Visual Studio.
The minimum requirements of a sustained Win32 Window***
#include <windows.h>
LRESULT CALLBACK WndProc(HWND hWnd, UINT message, WPARAM wParam, LPARAM lParam);
int WINAPI WinMain(HINSTANCE hInstance, HINSTANCE hPrevInstance, LPSTR lpCmdLine, int nCmdShow)
{
MSG msg = {0};
WNDCLASS wc = {0};
wc.lpfnWndProc = WndProc;
wc.hInstance = hInstance;
wc.hbrBackground = (HBRUSH)(COLOR_BACKGROUND);
wc.lpszClassName = L"minwindowsapp";
if( !RegisterClass(&wc) )
return 1;
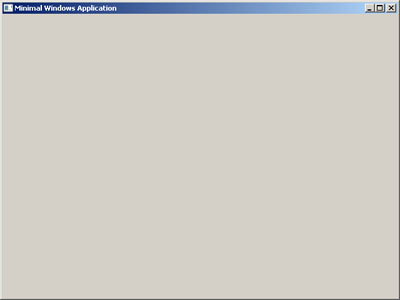
if( !CreateWindow(wc.lpszClassName,
L"Minimal Windows Application",
WS_OVERLAPPEDWINDOW|WS_VISIBLE,
0,0,640,480,0,0,hInstance,NULL))
return 2;
while( GetMessage( &msg, NULL, 0, 0 ) > 0 )
DispatchMessage( &msg );
return 0;
}
LRESULT CALLBACK WndProc(HWND hWnd, UINT message, WPARAM wParam, LPARAM lParam)
{
switch(message)
{
case WM_CLOSE:
PostQuitMessage(0);
break;
default:
return DefWindowProc(hWnd, message, wParam, lParam);
}
return 0;
}
All this will be explained below, its up here for slightly older programmers.
Using the code
Here is a visual guide to how to use the code, just start your Visual Studio and follow the steps in the following images to get the code working, or download the project.
Step 1: Create a New Project

Step 2: Select Project Template, Name and Location
Step 3: Press Next, don't press Finish
Step 4: Selection Application type, additional options, and press Finish
Step 5: Right click on the Source Files filter, choose Add, choose New Item
Step 6: Select C++ File as template, fill in name, press Add
Step 7: Open main.cpp, copy paste this code or and press F5 to try it out " />
Detailed explanation of this programs functionality
This section describes and provides extra information about the code of our program.
#include <windows.h>
This enables access to Microsoft Windows specific data types and
functions that make life easy when programming with apps for Windows. (MSG,
WNDCLASSEX, etc.)
LRESULT CALLBACK WndProc(HWND hWnd, UINT message, WPARAM wParam, LPARAM lParam);
This is a
Forward Declaration of a
Window Procedure. The Window Procedure is crudely simplified, an 'event handler' of sorts. It receives events, which in Windows, are called 'messages'.
Every window in Windows has a Window Procedure. This will be covered in
depth more when we reach the implementation of this declaration.
int WINAPI WinMain(HINSTANCE hInstance, HINSTANCE hPrevInstance, LPSTR lpCmdLine, int nCmdShow)
{
This is the 'entry' point of the program, specifically, a graphical Windows-based program. Console programs use the simpler
main(...).
The four parameters you see are automatically received from the
Microsoft Windows operating system when your application is started. The
first parameter(hInstance, meaning Instance Handle)
being the most important. It functions as a unique 'identifier'(these are often called
handles
in Win32 programming) for this particular instance of your program you
have started. Every program running on Windows has one and it allows you
to create multiple instances of your programs window without having to
worry it already existing since they both use their own unique instance
'handles'.
More information about
WinMain: Click here
More information about
hInstance: Click here
MSG msg = {0};
This is a data structure that contains message information for
example when a user clicks a mouse button on top of your window etc.
This is required for a normal Win32 application main loop which you will
see later in the code. Its initialized here to conform to my favourite
C89 coding standard which requires that all variables are declared at
the start of the scope. Remember, C89 is your friend, because you can use all C89 in C++. More information about the
MSG data structure by clicking here.
WNDCLASS wc      = {0};
wc.lpfnWndProc   = WndProc;
wc.hInstance     = hInstance;
wc.hbrBackground = (HBRUSH)(COLOR_BACKGROUND);
wc.lpszClassName = L"minwindowsapp";

if( !RegisterClass(&wc) )
  return 1;
The Window Class. This is an important concept to grasp in Windows programming.
A
window class must be successfully
registered
to the Windows operating system before a window can be created. We will
create our own custom window class and try to register it to the
operating system. Trying to register a window class to the operating
system is not something that always succeeds, because the operating
system simply might not have enough memory available for any new window
classes anymore. If this is the case it will return a zero and not a
sensible unique identifier for our class, which is why the call should
always be error checked.
The minimal member variables of the WNDCLASS struct that are required for a window are as follows:
lpfnWndProc
Contains a function pointer to which function this windows messages should go to for processing and handling.
hInstance
The
unique instance handle we received from the operating system into our
first entry point parameter when our program started, will be bound here
into the window class data structure.
hbrBackground
Without
defining this, we would have no background to our window meaning it the
background of the window would become whatever was under the window
when it was created, and when moved, it would cause all kinds of
graphical errors to appear on your window.
lpszClassName
This
is the human readable name of the window class we are about to create.
This name works as a reference when telling windows what kind 'style' of
a window we want to create and what function receives its window
messages (WndProc in this case). We could then for example create multiple windows using a class named "myredwindowclass" which all had red backgrounds if the class was already registered to the operating system.
Important note:
Why do you put an L infront of a normal string? Click here.
if( !CreateWindow(wc.lpszClassName,
                       L"Minimal Windows Application",
                       WS_OVERLAPPEDWINDOW|WS_VISIBLE,
                       0,
                       0,
                       640,
                       480,
                       0,
                       0,
                       hInstance,
                       NULL) )
       return 2;
After the necessary 'raindancing' above the CreateWindow snippet is complete, we are finally ready to attempt the
creation of a window. If this fails, our program will exit with the return code of 2. If the function succeeds, the return value is a handle of the type HWND, to your new window, which you can use for example, like this:
ShowWindow(handle,SW_MINIMIZE); which will minimize your window to the taskbar
The parameter list is as follows:
lpClassName
Here we need to assign CreateWindow a valid, already registered
window
class name. A sweet example of already registered class names are
common controls, like the edit controls etc. where you type your text in
Windows. As those are usually always registered already, and everything visible in windows is a window, even buttons!, you can try replacing the
wc.lpszClassName with this: L"EDIT"
and you will see how changing the windows class affects the window. You
can now select and deselect text and your whole window has turned into a
text control!
" /> Click the following hyperlink and scroll down to the part where EDIT is also presented, and feel free to try out more common controls!
MSDN About Common Controls
lpWindowName
This is pretty self-explanatory, you can decide yourself what kind of a name you give to your window.(more details)
x
The initial X position of the window, or some would call it the initial horizontal position.
CW_USEDEFAULT could be used here
(more details)
y
The initial Y position of the window.(more details)
nWidth
The initial width of the window.
(more details)
nHeight
The initial height of the window.(more details)
hWndParent
Here could be a 'handle' to the parent or owner window of this window,
this is nearing advanced topics so lets leave this for now.(more details)
hMenu
This
is a little bit more advanced tool for this tutorial, leave it to null
for now. Its good for you to know that this has a deep and useful
connection with those resource files that you might have seen when creating the default template win32 app with visual studio.
hInstance
Nothing new here.
lpParam
This parameter is used in advanced windows programming also, for example: abstracting functionality of
WndProc etc.
Note: Generally there is a call to
TranslateMessage before
DispatchMessage, but it is intentionally left out for this tutorial to provide you with the distilled functions to learn and master instead of everything at once.
TranslateMessage produces
WM_CHAR messages only for keys that are mapped to ASCII characters by the keyboard driver. See the this msdn link for more information:
TranslateMessage
    while( GetMessage( &msg, NULL, 0, 0 ) > 0 )
        DispatchMessage( &msg );

    return 0;
}
The Main Loop, also known as,
the Message Loop
The programs in the Microsoft Windows operating system
communicate with each other using messages, which in some systems are
called 'events'. Something happens somewhere, like a mouse is clicked on
a windows top right X icon, a message is sent throughout the operating
system that 'hey, that window just died, hide it and start freeing up
the memory it was eating, remove its classname from the registered
class names list etc.'.
Here we check for any messages for our window, and we send them along until our window receives a posted message.
DispatchMessage does the sending.
This is not the place for reacting to received messages, the WndProc WindowProcedure is the place where that should happen.
When all messages have been processed and we've received a posted message that is 0 or below 0 by its value (like the
PostQuitMessage(0) command produces), we return 0 for a sign of successfull/natural program termination.
LRESULT CALLBACK WndProc(HWND hWnd, UINT message, WPARAM wParam, LPARAM lParam)
{
    switch(message)
    {
    case WM_CLOSE:
        PostQuitMessage(0);
        break;
    default:
        return DefWindowProc(hWnd, message, wParam, lParam);
 }

 return 0;
}
The
Window Procedure - also known as:
Callback function.
This is the place where the messages from
DispatchMessage
end up in, if they were targeted for your window. For example: If the
user clicks on your windows top right X, your window procedure would
receive the WM_CLOSE message, which is actually a cleverly disguised number, but more on those later.
You
can intercept many kinds of messages here and create functionality and
reactions to those messages like key presses and mouse clicks and window
resizing etc. All window messages are prefixed with WM_ like WM_CLOSE.
WM_CLOSE is a default window message just like WM_KEYUP and
WM_RBUTTONUP.
You can have your own custom window messages aswell, which are most commonly used with making your own default GUI components or menus to produce results upon clicks, but that is a more
advanced topic, although not really hard, so dont worry.
hWnd is the handle to your window
message is the WM_ window message received which you can choose to capture
wParam and lParam can change based on what the message was that was received and handled by you.See my
WM_MOUSEMOVE example below about this.
The DefWindowProc gets called when we specified no actions for the received message (WM_KEYDOWN,
WM_SIZE), it then passes the message along to others.
I hope you benefit, learn, or maybe even enjoy some of this code!
So, now I have a window, what next? - Extending
There are plenty of ways to extend the functionality of this basic window and
next I will present a few of my suggestions what you could do. If you would like more information on extending this example, let me know in the discussion section below.
Capturing Basic Keyboard Input
Navigate to this row of code:
switch(message)
{
and add the following code:
case WM_KEYUP:
{
    switch(wParam)
    {
        case VK_ESCAPE:
        {
        PostQuitMessage(0);
        }
        break;
    }
    break;
}
break;
and when you recompile and run with F5, you can press Escape and you window will close automatically!
I really recommend using MSDN as a source for the Windows API and reading about the wonderful virtual keys that we can utilize and also about the
WM_KEYDOWN to complement the WM_KEYUP that we've seen. Heres are example links to MSDN that describe more indepth what virtual keys are about and the keyup window message:
Click here for Virtual-Key Codes on MSDN
Click here for WM_KEYUP Window Message on MSDN
Capturing Basic Mouse Input
The mouse input functions a lot like the keyboard input, but I'll show you a useful trick I've learned along the way to get the useful information out of mouse movement a bit easier than every other tutorial on the block. We'll capture mouse coordinates and print the results into your Visual Studio 'Debug Output' window and show a message saying Hello World when the window is clicked with the left mouse button.
Just add this code where your WndProc function begins from:
WCHAR mouseCoordinates[4] = {0};
LRESULT CALLBACK WndProc(HWND hWnd, UINT message, WPARAM wParam, LPARAM lParam)
{

    switch(message)
    {
    case WM_MOUSEMOVE:
        wsprintf(mouseCoordinates, L"X:%d Y:%d\n", HIWORD(lParam), LOWORD(lParam));
        OutputDebugString(mouseCoordinates);
        break;
    case WM_LBUTTONUP:
        {
            MessageBox(0,L"Hello World!",0,0);
        }
        break;
This modification I leave for you to explore forwards, there is a wondrous amount of useful functionality within the Microsoft Windows operating system and I hope I have sparked an interest into delving deeper into it, successfully and without frustrations
Points of Interest
This was my first article for the Code Project and I learned alot about making articles. This stuff is fun! ...and hopefully I managed to create something useful too!
Writing this article also increased my knowledge about the Microsoft Windows API because I had to dig deep back into the 16 bit windows times to be able to more accurately understand the history and usage of
HINSTANCE and its similarities with HMODULE to be able to describe and understand it better
http://blogs.msdn.com/b/oldnewthing/archive/2004/06/14/155107.aspx
It seems like learning how to describe something technical to others really serves as a good learning experience to myself too and was well worth the work I put in this
Further reading material
MSDN: Creating Win32-Based Applications
theForger's Win32 API Tutorial
FunctionX Win32 Programming lessons
References
| * | 6 .h/.cpp files, 2 .ico files, 1 .rc file, 1 .txt file. |
| ** | (in just the main.cpp) |
| ***
| Forward declaration and WM_CLOSE not required, but I believe every program
should have a start and finish (WM_CLOSE). The forward declaration makes the program look more beginner friendly with an easily spottable
main() function. |
History
- Version 0.95 + Updated Visual Studio and Mingw project files to match updated code in the article.
- Version 0.94 + Slight optimization to line count to reduce visual clutter for readers and users.
- Version 0.93 + Fixed a FAILED macro issue pointed out by Mr.
David Nash of the
Win32++ project
- Version 0.92 + Added Code::Blocks GnuGCC project for people who dont own Visual Studio.
- Version 0.91 + Added a note about TranslateMessage based on feedback from
Alain Rist
- Version 0.90 + Added further reading material links to article.
- Version 0.89 + Rearranged code & description based on feedback from
Richard MacCutchan
- Version 0.88 + Fixed some typos, cleaned up some wording, rephrased wndproc stuff.
- Version 0.87 + Finished first draft of reformat. Resized images. Uploaded new project.
- Version 0.86 + Deleted all comments in code. Will attempt feedback based reformat.
- Version 0.85 + Fixed typos, condensed intro text, etc.
- Version 0.84 + Moved the bare bone code snippet up, for advanced users to quickly grab.
- Version 0.83 + Condensed problem and solution descriptions, removed stuff about me.
- Version 0.82 + Indented also the endresult and intro sentence.
- Version 0.81 + Added end result picture. Added project Visual Studio version number.
- Version 0.80 + Added references, rewrote some of the intro, minor other fixes.
- Version 0.70 + Added better descriptions to each step. Added link to code earlier.
- Version 0.60 + Removed second sentence, sounded like I was bragging or something.
- Version 0.50 + Added mouse input and movement extension instructions.
- Version 0.40 + Added extension instructions for keyboard input.
- Version 0.30 + Fixed code formatting, added an uncommented version, minor fixes to everything.
- Version 0.20 + Improved article code formatting, the formatting is still WIP, for now, dl the project.
- Version 0.10 + Uploaded to Code Project. Oh, btw, this was my first article
Hello world!


 General
  News
News  Suggestion
  Question
  Bug
Bug  Answer
  Joke
Joke  Praise
  Rant
Rant  Admin
Admin 


![Java | [Coffee]](https://www.codeproject.com/script/Forums/Images/coffee.gif)


