Introduction
In this article I would like to show a basic implementation of HTML5 client/server application. The client is implemented using HTML5, the server is implemented in C++.
Background
The client/server application implies sending data between participants. This task will be accomplished by using a new HTML5 feature called WebSocket, which is described in RFC6455. At the moment the most complete support of RFC6455 is implemented by Mozila Firefox (15.0), Google Chrome (21.0.1180.89) and Internet Explorer 10 (10.0.8400.0) web browsers, they were used to test the application.
The server-side socket support is implemented using the boost.asio library, the server’s code pretends to be a cross-platform one.
The Client
The client’s code is based on a simple chat client example from www.html5demos.com, credits to Remy Sharp.
The client is implemented as a web page, which creates a websocket object and subscribes to its events: open, close, error and message.
To connect to a server we need to call the websocket constructor with the following string as a parameter:
var wsUri = "ws://127.0.0.1:7777";
websocket = new WebSocket(wsUri);
As you can see here, the wsUri string contains an IP address and a port of a server application. In our case the server application runs on a localhost and the port number is 7777.
The client uses the following procedure:
- Initializing variables to access web page elements.
connected = document.getElementById("connected");
log = document.getElementById("log");
chat = document.getElementById("chat");
form = chat.form;
state = document.getElementById("status");
- A check whether a web browser supports the WebSocket feature.
if (window.WebSocket === undefined)
{
state.innerHTML = "sockets not supported";
state.className = "fail";
}
else
{
window.addEventListener("load", onLoad, false);
}
- Creation of a websocket object and subscibing to its events.
function onLoad()
{
    var wsUri = "ws://127.0.0.1:7777";

    websocket = new WebSocket(wsUri);
    websocket.onopen = function(evt) { onOpen(evt) };
    websocket.onclose = function(evt) { onClose(evt) };
    websocket.onmessage = function(evt) { onMessage(evt) };
    websocket.onerror = function(evt) { onError(evt) };
}
Below are the event handlers.
function onOpen(evt)
{
state.className = "success";
state.innerHTML = "Connected to server";
}
function onClose(evt)
{
state.className = "fail";
state.innerHTML = "Not connected";
connected.innerHTML = "0";
}
function onMessage(evt)
{
var message = evt.data;
if (message.startsWith("log:"))
{
message = message.slice("log:".length);
log.innerHTML = '<li class="message">' + message + "</li>" + log.innerHTML;
}
else if (message.startsWith("connected:"))
{
message = message.slice("connected:".length);
connected.innerHTML = message;
}
}
function onError(evt)
{
state.className = "fail";
state.innerHTML = "Communication error";
}
Note, there are two types of messages the server sends to the client:
- a chat participant message itself, the "
log:" message, - a message with a number of connected chat participants, the "
connected:" message.
Based on a message type we show its content in a corresponding web page element.
To send a message to the server the send function is used:
function addMessage()
{
    var message = chat.value;

    chat.value = "";

    websocket.send(message);
}
The Server
The server’s code is based on the Chat application example from the boost.asio library, credits to Christopher M. Kohlhoff.

The server works with sockets in an asynchronous manner, using I/O completion ports, and can easily be extended to run two or more threads.
Below is a class diagram for the chat application.
The logic behind is the following:
- The server contains a room object, which is a container for chat participants.
- When a client connects to the server, the server creates a
chat_session object and adds the object to the room. - Each
chat_session object contains a socket to interact with the client. When a message from the client arrives it is being delivered to all the room participants.
The WebSocket
The client code is based on the example from www.html5demos.com, the server code is based on the boost.asio example, where is your code, one may ask? Here you are! A basic implementation of the WebSocket protocol.
A websocket session consists of two consecutive phases: a handshake and data exchange.
Handshake
In order to establish a websocket connection, a client (a web browser) sends a HTTP GET request with a number of HTTP headers. Among those headers there is the Sec-WebSocket-Key header, which contains a handshake key. According to the WebSocket protocol, the server should:
- Concatenate the handshake key with the magic guid {258EAFA5-E914-47DA-95CA-C5AB0DC85B11}.
- Take the SHA1 hash of the concatenation result.
- Send the base64 equivalent of the hash in HTTP response to the client.
The following code illustrates the handshake procedure.
namespace websocket {
namespace http {
void request_handler::handle_request(const request& req, reply& rep)
{
std::string key;
for (std::vector<header>::const_iterator h = req.headers.cbegin();
h != req.headers.cend(); ++h)
{
if (h->name == "Sec-WebSocket-Key")
{
key = h->value;
break;
}
}
if (key.empty())
{
rep = reply::stock_reply(reply::bad_request);
return;
}
const std::string magic_guid("258EAFA5-E914-47DA-95CA-C5AB0DC85B11");
std::string buffer(key + magic_guid);
std::string accept(to_base64(to_sha1(buffer)));
rep.status = reply::switching_protocols;
rep.headers.resize(3);
rep.headers[0].name = "Upgrade";
rep.headers[0].value = "websocket";
rep.headers[1].name = "Connection";
rep.headers[1].value = "Upgrade";
rep.headers[2].name = "Sec-WebSocket-Accept";
rep.headers[2].value = accept;
}
} }
Once the HTTP response is sent to the client, the handshake phase considered as complete and we can start data exchange. Coming back to our chat application, below is a state diagram of the chat session.
Data Exchange
The data exchange between a websocket client and server is done by means of messages. Each message consists of a number of frames. The following picture shows a structure of a websocket data frame.
The meanings of the fields can be found in RFC6455. Here is a structure to work with a data frame:
namespace websocket {
struct dataframe
{
dataframe();
bool fin;
enum operation_code { continuation_frame, text_frame, binary_frame, connection_close, ping, pong, reserved } opcode;
bool mask;
boost::int8_t fin_opcode;
boost::int8_t mask_payload_len;
boost::int8_t payload_len;
boost::uint64_t extended_payload_len;
boost::array<boost::uint8_t, 4> masking_key;
std::vector<boost::uint8_t> payload;
std::vector<boost::asio::const_buffer> to_buffers();
};
}
The Demo
To run the demo:
- Start the server app using the following command line:
server 0.0.0.0 7777
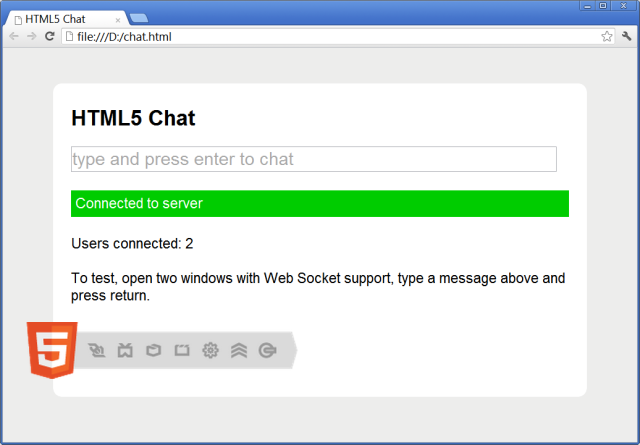
- Open the chat.html web page in the Google Chrome or Mozilla Firefox web browsers.
Any questions, remarks, and comments are welcome.
History
- March 5, 2015 - Fixed a bug with payload length.
- September 26, 2012 - Added support for Internet Explorer 10.
- September 15, 2012 - Added a demo for Ubuntu.
- September 2, 2012 - Initial version.
Niko Bellic (Serbian: Niko Belić) is the main protagonist and playable character in the video game Grand Theft Auto IV. He is a 30 year old former soldier who moved to Liberty City to escape his troubled past and pursue the American Dream.


 General
  News
News  Suggestion
  Question
  Bug
Bug  Answer
  Joke
Joke  Praise
  Rant
Rant  Admin
Admin 


