Click here to Skip to main content

Displaying Raw Images Using WPF

By , , 27 Apr 2010
 

DisplayRawImage.PNG

Introduction and Background

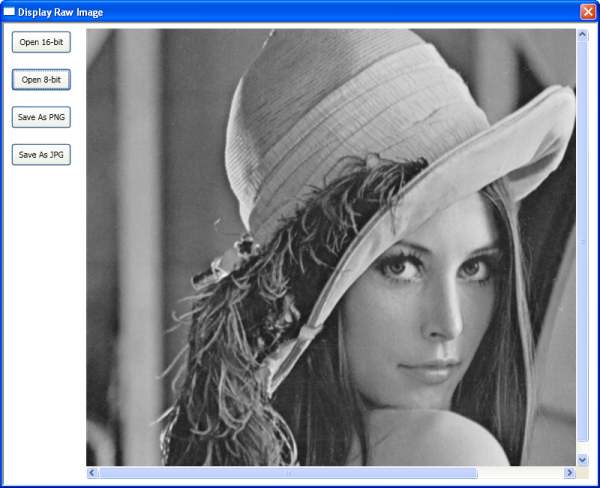
Displaying images on the screen is like writing the Hello World program for image processing amateurs. Here is an attempt to use WPF to display a rectangular grayscale raw image. This program enables the user to view a raw image file after specifying:

  • Whether it is 8-bit or 16-bit, and
  • Dimensions (width and height) of the image.

A raw image file is one which has just the pixel data arranged in a top down, left-to-right manner; it does not have any header. In the absence of a header, the above two pieces of information are needed to view the file. Since the dimensions of the image may be such that the corresponding image may not fit on the screen, we also provide scrollbars (if necessary) to scroll through the image. It is possible to display images using C# and .NET. Viewing images in WPF is inherently different from that in the C# world.

This small application is an extension to Displaying 16-bit Images Using C#. In that article, the C# language was used to display a raw image. Here, the same thing is achieved through WPF.

Description of the Image Display Code

The raw image file format is perhaps the simplest gray scale image file format. As we know, it doesn't contain any header, but directly contains the pixel values. So the user has to enter the width and height of the image.

The user interface is fairly simple and straightforward, with some Buttons and an Image control. DockPanel and StackPanel are used to arrange them neatly.

Since this is a raw image, the usual WPF methods for loading images cannot be used here. We need to read in the pixel values using a BinaryReader. Once the file is read, the number of pixels is computed based on the file size (and also whether it is an 8-bit image or 16-bit image). After this, an ImageDimensions dialog is invoked, prompting the user to enter the width and height of the image. This ImageDimensions dialog gives an initial guess for the width and height (for which it computes the factors), and allows the user to change them. Based on this, the image is created and then displayed. All of the above are enclosed in the code snippet given below.

private void DisplayImage16(string fileName)
{
    // Open a binary reader to read in the pixel data. 
    // We cannot use the usual image loading mechanisms since this is raw 
    // image data.
    try
    {
        BinaryReader br = new BinaryReader(File.Open(fileName, FileMode.Open));
        ushort pixShort;
        int i;
        long iTotalSize = br.BaseStream.Length;
        int iNumberOfPixels = (int)(iTotalSize / 2);

        // Get the dimensions of the image from the user
        ID = new ImageDimensions(iNumberOfPixels);
        if (ID.ShowDialog() == true)
        {
            width = Convert.ToInt32(ID.tbWidth.Text);
            height = Convert.ToInt32(ID.tbHeight.Text);
            canvas.Width = width;
            canvas.Height = height;
            img.Width = width;
            img.Height = height;
            pix16 = new ushort[iNumberOfPixels];

            for (i = 0; i < iNumberOfPixels; ++i)
            {
                pixShort = (ushort)(br.ReadUInt16());
                pix16[i] = pixShort;
            }
            br.Close();

            int bitsPerPixel = 16;
            stride = (width * bitsPerPixel + 7) / 8;

            // Single step creation of the image
            bmps = BitmapSource.Create(width, height, 96, 96, 
                                PixelFormats.Gray16, null, pix16, stride);
            img.Source = bmps;
            bnSaveJPG.IsEnabled = true;
            bnSavePNG.IsEnabled = true;
        }
        else
        {
            br.Close();
        }
    }
    catch (Exception e)
    {
        MessageBox.Show(e.Message, "Error", 
               MessageBoxButton.OK, MessageBoxImage.Error);
    }
}

A similar method is used for displaying 8-bit images. Saving these images as PNG or JPEG is a breeze with WPF - using PngBitmapEncoder and JpegBitmapEncoder, respectively.

The dialog for entering image dimensions is shown below:

ImageDimension.PNG

In the attachments, there are two rectangular raw images of dimension 800 x 600, one each of 8-bit and 16-bit depth.

Closure

This completes the simple WPF application to display rectangular raw images. This can be extend to display other file formats like DICOM.

Acknowledgements

The authors would like to thank Nagesh Rao for testing the application.

History

  • Version 1: 12 April 2010.
  • Version 2: 27 April 2010.

License

This article, along with any associated source code and files, is licensed under The Code Project Open License (CPOL)

About the Authors

Harsha T
Software Developer
India India
Member
No Biography provided

Amarnath S
Architect
India India
Member
Programming computers since about 1987, my first computer language was Fortran 77. Later I learnt C, C++ and C#. Also programmed a little in VB .Net. Worked with Enterprise Java for a while. Currently, interested in image processing. I love watching Kannada movies, and listening to Kannada songs.
 
I hold a Doctorate degree in Engineering from the Indian Institute of Science, Bangalore.

Sign Up to vote   Poor Excellent
Add a reason or comment to your vote: x
Votes of 3 or less require a comment

Comments and Discussions

 
You must Sign In to use this message board.
Search this forum  
    Spacing  Noise  Layout  Per page   
QuestionHow to display an image in the form TIFF (uncompressed) or as raw data using c #memberignasius fajar22 Feb '13 - 16:58 
how to display images TIFF (uncompressed) or as raw data using C #. because images can only be opened by the application ImageJ (http://rsbweb.nih.gov/ij/index.html)
and the example file can be downloaded at:
https://www.dropbox.com/s/z75v3v37bkhmvw7/tes.tiff
 

Thnx
GeneralMy vote of 1membergomoku@sina.com25 Oct '10 - 14:08 
x
GeneralRe: My vote of 1groupAmarnath S12 Nov '10 - 6:09 
Why? Anything else to be added, according to you?
GeneralDostorted OutputmemberMember 36831155 Jul '10 - 23:47 
I am not getting the output as you posted in this article. I suspect the values of Height, Width and Stride of the calculation. If you could give the e-mail address,i can send screen shot of the output.
Note: I am getting distorted image like three distorted image strand kind of output.
GeneralRe: Dostorted OutputgroupAmarnath S6 Jul '10 - 7:24 
My email id is amarnaths.codeproject@gmail.com Please also send the raw image you have, along with its width and height values.
GeneralOposite drirectionmemberbdubas4 May '10 - 5:54 
Hi,
 
Thanks for the example i was looking this long long time and i do not suspect that it is so simple, even if i use the BitmapSource almost every day Smile | :) .
 
Becouse i work with lots of hardware and native libraries moust of them use the raw formats. Till today i use to GDI library but when i start to deal with the WCF i want to use one library for image operations. The only one thing stops me now how to convert back ImageSource to the RAW format.
 
Anu help or possible path are welcomed.
Best Bart
GeneralRe: Oposite drirectionmemberHarsha T4 May '10 - 23:51 
It is easy to convert back to raw image. One can just write the pixel buffer to file using BinaryWriter or one can copy the pixels from BitmapSource.
Here is the code snippet for converting back to raw image using BitmapSource.
Use this code to convert and write to 8 Bit raw image.
 

  //Converting Bmps back to raw Files
  byte[] targetPixels = new byte[bmps.PixelHeight*bmps.PixelWidth];
  bmps.CopyPixels(targetPixels, (bmps.PixelWidth * 8 + 7 )/8, 0);
  using (BinaryWriter bw = new BinaryWriter(File.Open(@"C:\TestWPFRaw08.raw", FileMode.Create)))
  {
    bw.Write(targetPixels);
    bw.Close();
  }
 
And here is the 16Bit version, use this code to convert and write to 16 bit raw image.
 
 //Converting Bmps back to raw Files
 byte[] targetPixels = new byte[2* bmps.PixelHeight * bmps.PixelWidth];
 bmps.CopyPixels(targetPixels, (bmps.PixelWidth * 16 + 7) / 8, 0);
  using (BinaryWriter bw = new BinaryWriter(File.Open(@"C:\TestWPFRaw16.raw", FileMode.Create)))
   {
    bw.Write(targetPixels);
    bw.Close();
   }
 
 
Hope this helps. Write back for anything else.
Harsha

GeneralRe: Oposite drirectionmemberbdubas5 May '10 - 1:52 
Thats is also very easy and excatly what i was looking for.
 
It will be very hellpfull if you could also point me to some resources about operating on the new imaging API in WPF. Mayby you know some book about it. The new API looks beter than the one form windows forms with relation to GDI, its cleaner.
 
Thanks for the consistent and quick answer.
Bart.
GeneralRe: Oposite drirectiongroupAmarnath S5 May '10 - 6:46 
I wish there was a book already written. Unfortunately, it is not. Maybe you and us can write one!!
 
One useful article we found is http://msdn.microsoft.com/en-us/magazine/cc534995.aspx
Generalwhy +7membersupermanns23 Apr '10 - 0:22 
thanks for your great example. I searched a long time for a solution to view 16bit images in WPF.
 
Why did you use the +7 in this expression:
stride = (width * bitsPerPixel + 7) / 8;
 
Best regards,
unclejay

General General    News News    Suggestion Suggestion    Question Question    Bug Bug    Answer Answer    Joke Joke    Rant Rant    Admin Admin   

Permalink | Advertise | Privacy | Mobile
Web04 | 2.6.130523.1 | Last Updated 27 Apr 2010
Article Copyright 2010 by Harsha T, Amarnath S
Everything else Copyright © CodeProject, 1999-2013
Terms of Use
Layout: fixed | fluid