Introduction
Wouldn’t it be great to quickly create reusable controls using C++ so that applications can have a consistent look and developers can be more productive? With .NET Framework 2.0 and Visual Studio 2005 C++/CLI, you can. I created a user control named ListNavigator using Visual Studio 2005 Beta 1 written in C ++/CLI. It was easy to create the ListNavigator control, and with little effort I am able to use it in many different projects. Adding the ListNavigator to a Form that contains a ListView control provides the ability to search every row and column of the ListView control. Enter the search text in ListNavigator’s ComboBox and then use the ListNavigator’s Button to navigate the item(s) found in the list. As each ListView item is highlighted, an event is fired to any SelectItem event subscribers. The number of items found in the ListView can be optionally displayed. Also, the contents of the search ComboBox’s list can be optionally stored to and restored from XML.
Please note: This source will only run with .NET Framework 2.0 and greater. It employs some of the new features of C++/CLI.
I’ll first discuss how to add the ListNavigator control to a project, and afterwards explain the implementation details of the ListNavigator control which demonstrates several .NET Framework 2.0 and C++/CLI features including delegates/events, properties, exception handling, collections, reflection, flow layout, XmlWriter, and XmlReader.
Using ListNavigator user control in a Form
In this article, we will construct an example project to demonstrate how to use the ListNavigator control. Begin by running Visual Studio 2005. Create a new project whose type is a Windows Forms Application (.NET). Name it TestLN. Build the solution. The ListNavigator.dll assembly contains the ListNavigator control. Copy the ListNavigator.dll, which is included in this article's download, into the same directory as TestLN.exe. From Visual Studio 2005, view the Solution Explorer. Display the project's context menu by right clicking on the project. Make sure you select the project TestLN, not the solution TestLN. Display the Toolbox view. Display the General Tab context menu by right clicking on the General tab. From the menu, select the menu Choose Items… The Choose Toolbox Items displays. Select the Browse button. Locate and then select the ListNavigator.dll. Close the dialog. The ListNavigator control is now available on the Toolbox just as .NET Framework class library controls. ListNavigator can be dragged and dropped onto a Form, or you can modify the source code manually to add the ListNavigator to a Form.
Changes to the Form
In the TestLN project, only one Form property needs changing. Under the Form Padding property, set the Top property to 40. Left, Right, and Top Padding properties should be set to zero. This causes an empty area at the top of the Form which is where we place the ListNavigator control later.
Adding a ListView Control
Next, from the Toolbox, drag a ListView onto the Form. Change the ListView properties as follows:
- Set the
View property to List.
- Set the
HideSelection property to False.
- Set the
FullRowSelect property to True.
- Set the
GridLines property to True.
- Set the
MultiSelect property to False.
- Set the
Dock property to Fill.
- The
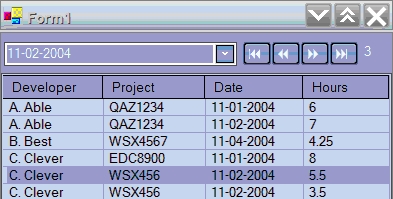
ListView should have some columns, so add to the ListView’s Columns collection property the columns: Developer, Project, Date, and Hours with width set to about 100.
- For this example, the
ListView also needs rows. Add the following items to the ListView’s Items collection property. Do not enter the column headings.

Adding the ListNavigator Control
The Listview control reference needs to be assigned to the ListNavigator’s Listview control reference. From the Form Designer context menu, select View Code menu item. In the Form’s constructor, after the line InitializeComponent(), call the method SetListView(…). Your code should look something like this.
Form1(void)
{
    InitializeComponent();
    listNavigatorControl->SetListView(listView1);
                 . . .
}
By the way - I tried to make the ListView collection a property of the ListNavigator control, but the IDE reported an error each time the project was reloaded. I reported the error to Microsoft and created the SetLiewView method instead. Since I am using Visual Studio 2005 Beta, exceptions are not unexpected.
Handling the ListNavigator Event
ListNavigator triggers the SelectItem event. For each row selected while navigating a ListView control with ListNavigator, the SelectItem event is triggered indicating a list item has been selected. To process this event, in the Form’s constructor, create an event handler and register it with the ListNavigator’s delegate. Your code should look something like this:
public: Form1(void)
{
    InitializeComponent();
                   . . .
    listNavigatorControl->SelectItem +=
        gcnew listNavigator_SelectItem(this,
        & Form1::navigatorControl_SelectItem)
                  . . .
protected: System::Void navigatorControl_SelectItem(ListViewItem^ item)
{
    String^ msg = String::Format( "Handling event for item {0}",
                                  item->Text);
    MessageBox::Show(msg);
}
Test it Out!
Build and run the project. Enter the search text in the ListNavigator’s ComboBox. Press tab or click on the "|<<" button. This activates the search. The number of search items found in the list is displayed to right of the ListNavigator control. The ">>" button now has the focus. Pressing the space bar or clicking on the ">>" button highlights the next item in the ListView that matches the search criteria. Selecting the "<<" button highlights the previous item in the ListView that matches the search criteria. Selecting the ">>|" button highlights the last item in the ListView that matches the search criteria. Repeat the search a few times by entering different text into the search ComboBox and then selecting the "|<<" Button to activate a new search.
Serializing the ComboBox Dropdown List
In a prior step, we set the ListNavigator’s SerializeSearches property to True. This implies that when the application is terminated, any items in the ListNavigator’s ComboBox dropdown list are saved to the XML file specified by ListNavigator’s SerializeFilename property. The default setting for this property is ListNavigator.ListNavigatorControl.xml. Since we did not specify the complete file path, ListNavigator.ListNavigatorControl.xml will be located in the working directory of our TestLN application. Close the TestLN application. Run TestLN application again. The ListNavigator’s ComboBox list is populated with the search text that was entered the last time the application was run. Below is a sample of the contents of the XML file generated by the ListNavigator control.
Creating the custom control ListNavigator
The following discussion on how to create the ListNavigator control will provide the implementation details and the usage of such features as delegates/events, properties, exception handling, collections, XmlWriter, XmlReader, reflection, and flow layout.
Designing the ListNavigator control
Run Visual Studio 2005. Create a new project whose type is a Windows Control Library (.NET). Name it ListNavigator. Build the solution. The ListNavigator.dll is created. From the Solution Explorer, view the source code of file ListNavigatorControl.h. Notice that the ListNavigator control class is derived from Windows::Forms::UserControl. A UserControl is a container of other controls. It can be composed of one to many existing controls. From the Solution Explorer, open the file ListNavigatorControl.h in the Designer. A Form is displayed. You will create the ListNavigator control by adding controls to the Form. Start by resizing the Form so that the Size property’s Width and Height are set to about 400 and 28 respectively. Select the menu item properties from the Form’s context menu. In the Properties view, select Events. Next, add an empty implementation of the Load, BackColorChanged, and ForeColorChanged events by double clicking on each. We’ll fill in the source code later.
The first control to add to the Form is the FlowLayoutPanel. As the Form size changes, the FlowLayoutPanel control dynamically places any controls it contains one after another. From the Toolbox, drag and drop a FlowLayoutPanel onto the Form. Only a few properties of the FlowLayoutPanel need changing.
- Set the
Name property to flowLayoutPanelSearch.
- Set the
Dock property to Fill.
Next, we’ll add the ComboBox that will be used to enter the search text. From the Toolbox, drag and drop a ComboBox onto the Form. Modify the following properties:
- Set the
Name property to comboBoxSearch.
- Resize the
ComboBox so that the Size properties of Width and Height are set to about 220 and 24 respectively.
- Set the
Anchor property to Top.
We’ll now add the four buttons that are used to navigate the ListView’s search. From the Toolbox, drag and drop a Button to the right of the ComboBox.
- Set the
Name property to buttonFirst.
- Delete any text for the
Text property.
- Set the
Font property to Webdings, 9pt.
- Set the
TextAlign property to MiddleLeft.
- Set the
Anchor property to Top.
- Set the
CausesValidation property to False.
- Resize the
Button so that the Size properties of Width and Height are set to 28 and 23 respectively.
Copy the buttonFirst Button. Paste the copy three times onto the Form as far to the right as possible. Change the Name property of the three new Buttons. For the Button to the immediate right of the buttonFirst Button, set the Name property to ButtonPrev. For the Button to the immediate right of the buttonPrev Button, set the Name property to buttonNext. Finally, set the Name property of the Button to the immediate right of the buttonNext Button to buttonLast. For each of the Buttons, set the Text property to the appropriate Webdings character. You can select and copy the Webdings character by using the CharMap application located in the system32 directory.
For each of the Buttons, the Click event must be handled. Select the menu item Properties from the Button’s context menu. On the Properties view, select Events. Next, add an empty implementation of the Click event by double clicking it. We’ll fill in the source code later.
The last control that we will add to ListNavigator, is a Label control which is used to display the number of search items found. From the Toolbox, drag and drop a Label control to the right of the buttonLast Button.
- Set the
Name property to labelCount.
- Delete any text for the
Text property. This will cause the Label to become very small. That’s fine, it resizes when the Text property is set again.
- Set the
Anchor property to Top.
Now that all the controls have been added to the Form, verify that the TabIndex property for each control is appropriately set.
- The
comboBoxSearch control TabIndex property should equal 0.
- The
buttonFirst control TabIndex property should equal 1.
- The
buttonPrev control TabIndex property should equal 2.
- The
buttonNext control TabIndex property should equal 3.
- The
buttonLast control TabIndex property should equal 4.
- The
labelCount control TabIndex property should equal 5.
Implementing the ListNavigator’s Properties
Close the Forms Designer view since we will now be working with the source code in the file ListNavigatorControl.h. When we added the ListNavigator control to a Form, we set several ListNavigator properties. Most of the properties are inherited from Windows::Forms::UserControl, but not all. Next, we will add the ListNavigator’s properties that are not inherited from Windows::Forms::UserControl. The ShowCount property determines whether the number of search items found is displayed. The CaseSensitive property is used when performing the ListView search. The MaxListSearchItems property limits the number of items in the searchComboBox control list. The ComboBox control allows a maximum of 100 items in a list. So we must also enforce this restriction by throwing an error if the user attempts to set the the MaxListSearchItems property to an invalid number. The SerializeSearches property affects the storing and restoring of the contents of the search ComboBox’s list to and and from an XML file. Finally, the SerializeFilename property is the name of the XML file where the searches are stored/restored. Listed below are the properties' accessor methods.
public: property Boolean ShowCount
{
    Boolean get(){ return showCount; }
    void set(Boolean value) { showCount = value; }
}
private: Boolean showCount;

public: property Boolean CaseSensitive
{
    Boolean get(){ return caseSensitive; }
    void set(Boolean value) { caseSensitive = value; }
}
private: Boolean caseSensitive;

public: property Int32 MaxListSearchItems
{
    Int32 get(){ return maxListSearchItems; }
    void set(Int32 value)
    {
        if (value < 0 || value > 100)
            throw gcnew ArgumentOutOfRangeException("MaxSearchListItems" +
                                 " must be between 0 and 100, inclusive");
        maxListSearchItems = value;
    }
}
private: Int32 maxListSearchItems;

public: property Boolean SerializeSearches
{
    Boolean get(){ return serializeSearches; }
    void set(Boolean value) { serializeSearches = value; }
}
private: Boolean serializeSearches;

public: property String^ SerializeFilename
{
    String^ get() {  return serializeFilename;  }
    void set(String^ value)
    {
        value->Trim();
        serializeFilename = value;
    }
}
private: String^ serializeFilename;
Initialize these properties in the constructor. Notice the defaultSerializeFilename assignment. It is using a service provided by the CLR to access an assembly’s metadata information. Your code should look something like this:
using namespace System::Reflection;
        . . .
public: ListNavigatorControl()
{
    showCount = true;
    maxListSearchItems = 100;
    defaultSerializeFilename = String::Format( "{0}.xml",
                               this->GetType()->ToString() );
    serializeFilename = getDefaultSerializeFilename();
        . . .
}
Redefining the BackColorChange and ForeColorChange Properties
The properties BackColorChange and ForeColorChange are defined in ListNavigator’s base class Windows::Forms::UserControl. Their implementation is not applicable for the ListNavigator control. When a user of the ListNavigator control changes the BackColorChange property, the ListNavigator’s background color should change as well. When ForeColorChange property is modified, the ListNavigator’s ComboBox foreground color should be the same. Earlier, we added the empty implementations for the Form’s BackColorChanged and ForeColorChanged events in order to redefine these properties. This source code implementation is listed below:
private: System::Void ListNavigatorControl_BackColorChanged(System::Object^,
                                             System::EventArgs^)
{
    this->flowLayoutPanelSearch->BackColor = BackColor;
    this->comboBoxSearch->BackColor = BackColor;
}

private: System::Void ListNavigatorControl_ForeColorChanged(System::Object^,
                                                         System::EventArgs^)
{
    this->comboBoxSearch->ForeColor = ForeColor;
}
Triggering the ListNavigator Control Event
Events allow a class to execute methods in other classes. One class triggers the event and another class handles the triggered event. The ListNavigator triggers the SelectItem event. A delegate class must be defined before the ListNavigatorControl class is defined. The event must be specified within the ListNavigatorControl class. Your code should look something like the following:
public delegate Void listNavigator_SelectItem(ListViewItem^ item);
            . . .

public ref class ListNavigatorControl : public Windows::Forms::UserControl
{
    public: event listNavigator_SelectItem^ SelectItem;
            . . .
}
Handling the buttonFirst_Click event
Next, we’ll fill in the implementation of a firstButton’s Click event. An empty implementation was added earlier. The buttonFirst button activates the search. It needs to generate the list of search items from the ListView control, display the updated search count, if applicable, and then set the focus to buttonNext. See source code below:
private: Void buttonFirst_Click(Object^, EventArgs^)
{
    GenerateSearchItemsList();
    UpdateSearchCount();
    if ( SelectListItem(0) )
      this->buttonNext->Focus();
}
I won’t discuss the logic used to search the rows and columns of the ListView since that deviates from the discussion of creating a user control, and you can download the source and review that logic if you like. Of interest is the ArrayList^ itemsFound which is a container used to store the search items found. It is created in the ListNavigator constructor. The itemsFound must be sorted by the ListView item index to ensure the items are navigated as displayed in the list. The code that generates a sorted list in shown below:
using namespace Collections;
               . . .
private: Void GenerateSearchItemsList()
{
    String^ searchText(this->comboBoxSearch->Text);
    searchText->Trim();

    if ( ! searchText->Length)  return;

    AddSearchText(searchText);

    if ( ! caseSensitive)
      searchText->ToLower();

    itemsFound->Clear();
    for (int rowIndex =0; rowIndex  <
             this->searchList->Items->Count; rowIndex++)
    {
      SearchListItem^ currentItem = gcnew
          SearchListItem(searchList->Items->Item[rowIndex]);
      for (Int32 columnIndex = 0; columnIndex <
          this->searchList->Columns->Count; ++columnIndex)
      {
        if ( (caseSensitive &&
          currentItem->getListViewItem()->SubItems->
                 Item[columnIndex]->Text->Contains(searchText))
          ||  ( ! caseSensitive &&
          currentItem->getListViewItem()->SubItems->
                 Item[columnIndex]->Text->ToLower()->Contains(searchText)))
        {
          itemsFound->Add(currentItem);
          columnIndex = this->searchList->Columns->Count;
        }
      }
    }
    itemsFound->Sort();
}
The SearchListItem class defines the the items found. Because ArrayList^ itemsFound is a container of SearchListItems, the SearchListItem class needs to implement the IComparable interface for sorting. The IComparable interface requires the implementation of the CompareTo(…) method to test whether one item is less than another. The SearchListItem class is defined in the file SearchListItem.h and is displayed below:
using namespace System;
using namespace Windows::Forms;

public ref class SearchListItem : public IComparable
{
  public: SearchListItem(ListViewItem^ item)
  {
    this->searchItem = item;
  }
  public:  ListViewItem^ getListViewItem() { return searchItem;}
  public: int CompareTo(Object^ obj)
  {
        ListViewItem^ objItem = dynamic_cast < ListViewItem^ > (obj);
        if (objItem == nullptr ) return -1;
        return objItem->Index.CompareTo(searchItem->Index );
  }
  private: ListViewItem^ searchItem;
};
Handling the Button Prev_Click, buttonNext_Click, and buttonLast_Click events
The implementation of the other Buttons' Click events consists of incrementing/decrementing the ListView items found index, selecting the item in the ListView, and then setting the focus to the appropriate Button. Arrays can throw exceptions, so exception handling is used. The implementation for selecting the item is displayed below:
private: Boolean SelectListItem(Int32 itemIndex)
{
    Boolean rtn = true;
    try
    {
      SearchListItem^ searchItem = dynamic_cast  < SearchListItem^
                      > (itemsFound->Item[itemIndex]);
      searchItem->getListViewItem()->Selected = true;
      currentIndex = itemIndex;
      SelectItem(searchItem->getListViewItem());
    }
    catch(Exception^)
    {
      rtn = false;
    }
    return rtn;
}
Store to and Restore from XML
If the ListNavigator’s SerializeSearches property is True, then the ListNavigator’s ComboBox dropdown list is saved as the XML file specified by ListNavigator’s SerializeFilename property whenever the application exits. On startup, The ListNavigator’s ComboBox list is then populated with the search text items entered when the application was run previously. To accomplish this, the ComboBox events HandleCreated and HandleDestroyed should be handled. Their assignment to the delegate takes place after the components are initialized in the Form class. The VS Studio Beta 1 Designer View does not list these events, so you will need to enter them manually. In reviewing the code shown below, notice the HandleCreated assignment is commented out. In the version I am using, there is a bug in the .NET Framework 2.0 beta which causes an exception when the event HandleCreated is handled. To work around the bug, the Form’s Load event must be handled instead of the ComboBox’s HandleCreated event.
public: ListNavigatorControl()
{
InitializeComponent();
. . .
&ListNavigatorControl::comboBoxSearch_HandleCreated);
this->comboBoxSearch->HandleDestroyed += gcnew System::EventHandler(this,
&ListNavigatorControl::comboBoxSearch_HandleDestroyed);
. . .
}
Creating the XML file from the ComboBox dropdown list could not be simpler. The XmlWriter object is created. Using the CLR's service reflection, the root element name is the name of the class that creates the XML. Next, the ComboBox dropdown list is traversed and its list items are added as elements to the XML. This implementation is shown below. A sample of the XML generated was listed previously.
using namespace System::Xml;
       . . .
private: System::Void comboBoxSearch_HandleDestroyed(System::Object^,
                                                  System::EventArgs^)
{
    if ( ! serializeSearches)   return;

    try
    {
      if ( ! SerializeFilename->Length)
        SerializeFilename = getDefaultSerializeFilename();
      XmlWriter^ writer = XmlWriter::Create(SerializeFilename);
      writer->WriteStartElement(this->GetType()->ToString() );
      for ( Int32 index = 0; index <
            this->comboBoxSearch->Items->Count; ++index)
      {
        writer->WriteElementString(serializeSearchElementText,
               this->comboBoxSearch->Items->Item[index]->ToString() );
      }
      writer->WriteEndElement();
      writer->Flush();
      writer->Close();
    }
    catch(Exception^ e)
    {
      MessageBox::Show(e->Message);
    }
}
Reading the XML file is just as easy as creating it. First, determine if a serialized file exists. If it does not, return to the caller since there is nothing to do. Create the XmlReader object. Read each element, verify the type, and then add the text to the ComboBox. See source code below:
using namespace System::Xml;
using namespace System::Reflection;
using namespace System::IO;
          . . .
private: System::Void ListNavigatorControl_Load(System::Object^, System::EventArgs^)
{
    if ( ! serializeSearches) return;

    try
    {
      if ( ! SerializeFilename->Length)
        SerializeFilename = getDefaultSerializeFilename();
      if ( File::Exists( SerializeFilename ) )
      {
        XmlReader^ reader = XmlReader::Create(SerializeFilename);
        while (reader->Read())
        {
          if (reader->NodeType == XmlNodeType::Element &&
              reader->Name->Equals(serializeSearchElementText) )
            AddSearchText(reader->ReadString());
        }
        reader->Close();
      }

    }
    catch(Exception^ e)
    {
      MessageBox::Show(e->Message);
    }
}
Conclusion
As you can see, with .NET Framework 2.0 and Visual Studio 2005 C++/CLI, creating and using user controls is straightforward. User controls guarantee a consistent look to your application and are not difficult to code. If you use the Navigator control in many different projects, it should be added to the Global Assembly Cache.
A successful information technology professional with a passion for software development who through research, innovation, and applying best engineering practices consistently exceeds the client's desired expectations. Researching mobile technologies, designing and developing cross-platform Android/Windows/iOS apps using C#/Xamarin, and C++/Qt/QML technologies. These apps implement various technologies including RESTful JSON web services, sync, storage, maps, location, and Android API.


 General
  News
News  Suggestion
  Question
  Bug
Bug  Answer
  Joke
Joke  Praise
  Rant
Rant  Admin
Admin 


