Click here to Skip to main content
15,889,992 members
Articles / Programming Languages / C#
Article

Nice Line - A simple shaded line

Rate me:
Please Sign up or sign in to vote.
4.30/5 (16 votes)
21 Aug 20032 min read 84.9K   2.6K   50   7
A simple line control with multiple purposes

Demo showing uses off NiceLine

Introduction

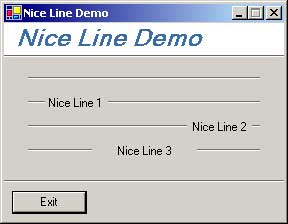
NiceLine is a pretty simple line that can be used to separate controls on a form or to make a title with a color background effect. The same effect can be obtained with 2 colored lines but is easier to just drag-drop this control on a form.

The code

The C# control class NiceLine is derived from System.Windows.Forms.UserControl. It overrides the OnPaint method to draw itself.

The main part of the code will draw the lines depending on the properties set (alignment, text caption, etc.)

C#
// ------- 
// |      ...caption...
e.Graphics.DrawLines(new Pen(Color.DimGray, 1), 
new Point[] { 
    new Point(0, ym + 1), 
    new Point(0, ym), 
    new Point(beforeCaption, ym)
    }
);

There are 5 properties that modify the appearance of NiceLine:

  • Caption - represents the caption text displayed on the line. If the caption is "" (the default) the line is not broken
  • CaptionMarginSpace - represents the distance in pixels form the control margin to caption text
  • CaptionPadding - represents the space in pixels around text caption
  • CaptionOrizontalAlign - will tell where the text caption is aligned in the control. Can be Left, Center or Right
  • LineVerticalAlign - represent the vertical alignment of the line within the space of the control. Can be Top, Middle or Bottom
C#
/// <SUMMARY>
/// The space in pixels around text caption
/// </SUMMARY>
[Category("Appearance")]
[DefaultValue(2)]
[Description("The space in pixels around text caption")]
public int CaptionPadding
{
    get { return _CaptionPadding; }
    set 
    {
        _CaptionPadding = value;
        Invalidate(); 
    }
}

The LineVerticalAlign property require some explications. The necessity arrived because the control has a height that depend on the font chosen (to allow the text to be drown).

Control bonds and the line drown in middle

C#
protected override void OnResize(System.EventArgs e)
{
    base.OnResize(e);
    this.Height = this.Font.Height + 2;
    this.Invalidate();
}

So the line is drawn by default to the middle of the control but this can be changed with LineVerticalAlign property.

Title with background effect

Control bonds and the line drown in middle

This effect can be achieved using a Panel with the background color changed (in demo it's white), a colored label and a NiceLine control with LineVerticalAlign set to Top.

Transparent background

At the beginning I tried to make a transparent background (thus the LineVerticalAlign property is not necessary to make the title effect) but I ran in some problems in design mode (the control was not paining itself every time) so I decided to remove this. The code is still in the class (commented).

License

This article has no explicit license attached to it but may contain usage terms in the article text or the download files themselves. If in doubt please contact the author via the discussion board below.

A list of licenses authors might use can be found here


Written By
Web Developer
Romania Romania
This member has not yet provided a Biography. Assume it's interesting and varied, and probably something to do with programming.

Comments and Discussions

 
GeneralMy vote of 5 Pin
Manoj Kumar Choubey22-Feb-12 0:14
professionalManoj Kumar Choubey22-Feb-12 0:14 
GeneralUsing a static control with a thinness of 2 Pin
Ziv G17-Jul-07 20:56
Ziv G17-Jul-07 20:56 
GeneralAuto Resize Function Added Pin
Paw Jershauge5-Jan-07 3:12
Paw Jershauge5-Jan-07 3:12 
GeneralInteresting Pin
bsargos14-Nov-04 11:31
bsargos14-Nov-04 11:31 
GeneralSource doesn't work Pin
mikelb3-Oct-03 5:27
mikelb3-Oct-03 5:27 
GeneralGood job... some suggestions Pin
Jacob Slusser25-Aug-03 13:15
Jacob Slusser25-Aug-03 13:15 
Good job Adrian. I have written a similar control in the past and had a suggestion or two to the great work you've done.

A simpler approach to drawing the horizontal lines might be to use a HatchBrush with HatchStyle.Horizontal and a width of 2 pixels. Then just set both colors of the Hatch, draw your line and 'presto'--two lines for only the price of one.

**Update** (I previously had wrong information here. D'Oh! | :doh: )
I also noted that you're using basically a white color and a Color.DimGray to paint the 3D line. A careful observation would reveal that those should actually be SystemColors.ControlDark and SystemColors.ControlLightLight. This way, they will be affected properly if a user changes their themes (WinXP) or color preferences.
**

Here is some sample code just in case it might be helpful:

protected override void OnPaint(PaintEventArgs pe)
{
	// Calling the base class OnPaint.
	base.OnPaint(pe);
		
	// Creates a brush with a horizonatal hash style.
	System.Drawing.Drawing2D.HatchBrush aHatchBrush = new
		System.Drawing.Drawing2D.HatchBrush
		(System.Drawing.Drawing2D.HatchStyle.Horizontal,
		SystemColors.ControlDark,
		SystemColors.ControlLightLight);
		
	// Creates a pen with the same display properties as 
	// myBrush and a default thickness of 2.
	Pen myPen = new Pen(aHatchBrush, 2);
		
	// Draw a horizontal line with myPen the width of the client area.
	pe.Graphics.DrawLine(myPen, 0, 1, ClientRectangle.Width, 1);
		
	// Dispose of all drawing objects.
	myPen.Dispose(); aHatchBrush.Dispose();
	
}


--Jacob
GeneralRe: Good job... some suggestions Pin
Adrian Tosca25-Aug-03 23:10
Adrian Tosca25-Aug-03 23:10 

General General    News News    Suggestion Suggestion    Question Question    Bug Bug    Answer Answer    Joke Joke    Praise Praise    Rant Rant    Admin Admin   

Use Ctrl+Left/Right to switch messages, Ctrl+Up/Down to switch threads, Ctrl+Shift+Left/Right to switch pages.