LEADTOOLS is a product of LEAD Technologies, Inc. In existence since 1990, this company has helped pioneer the OCR and imaging industry. Due to its extensive history, the LEADTOOLS product suite contains the most comprehensive imaging suite I have ever seen. With features (too many to list here) such as OCR (optical character recognition), ICR (intelligent character recognition – for hand written characters), document imaging (including medical), image processing (with a great selection of effects!), and document conversion (to PDF, docx and more).
For this article I am going to focus on document viewing and document conversion. The problem I am looking to solve while evaluating the LEADTOOLS SDK is to use a photo of a hard copy page of text taken with my phone, have it processed and displayed in the document viewer, then have it converted to Word format so that it can be easily edited. This can come in handy when only hard copies of a document are available, and a digital format is requested.
Obtaining the Software
The LEADTOOLS SDK is available in a multitude of platforms including .NET, C (Windows), Linux, iOS, OS X, Android and HTML5 (JavaScript). In this article we will be using the .NET SDK with Visual Studio 2015. You will need to download and install the fully featured evaluation of the SDK. The evaluation is good for 60 days.
As part of the evaluation, you will receive an email with a link to a zip file containing your evaluation license file and key. This is a very important step to evaluating this product suite! I will outline how to use these files soon.
Getting Started
With the breadth of features available in this SDK it is normal to feel overwhelmed at first. Rest assured, in reality it is quite easy to get started using the LEADTOOLS SDK. This is due to there being a wealth of documentation, demos (with source code), videos and tutorials available to help you get productive quickly. In fact, sample source code to implement your first document viewer is readily available on the Document Viewer feature website page. It is important to note that if you wish to use the Document Viewer, support is only provided for Windows Forms and HTML5/JavaScript. We will be implementing a Windows Forms solution for this article.
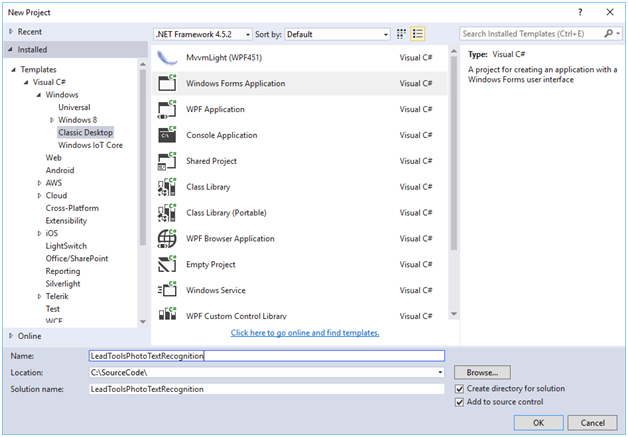
Creating the Project
In Visual Studio 2015, create a new C# Windows Forms application. I named my project LeadToolsPhotoTextRecognition.
Once the project has loaded, add a reference to LeadTools.dll (in my case it is located in the install directory here: C:\LEADTOOLS 19\bin\DotNet4\x64).
Next we will add some code to set our license. Create a new folder called license in your solution. Then right click the folder, and select to Add an Existing Item. Select the license file and key file that you obtained from your evaluation email. Be sure to set the Copy to Output Directory property on these files to Always.

In the code-behind for Form1. Add the following using statements at the top of the file:
using Leadtools;
using System.IO;
Then, add the following methods to the Form1 class to initialize your license for your application:
protected override void OnLoad(EventArgs e)
{
    try
    {
        SetLicense();
    }
    catch(Exception ex)
    {
        MessageBox.Show(ex.Message);
    }
    base.OnLoad(e);
}

private void SetLicense()
{
    RasterSupport.SetLicense(Application.StartupPath +@"\license\eval-license-files.lic",
        File.ReadAllText(Application.StartupPath +@"\license\eval-license-files.lic.key").Trim());
}
Laying out the User Interface
In the designer for Form1, add a Menu Strip (I added a File top-level menu item, that contains an Open submenu item). In the rest of the form add a SplitContainer control. These panels will be used to house components of our Document Viewer.
Implementing the DocumentViewer
To use the DocumentViewer, add the following references:
- Leadtools.Documents.dll
- Leadtools.Documents.Pdf.dll
- Leadtools.Documents.Raster.dll
- Leadtools.Documents.UI.WinForms.dll
Next, in the code-behind for Form1, add the following using statement:
using Leadtools.Documents.UI;
Then add the following method to the Form1 class:
DocumentViewer _documentViewer = null;
private void InitDocumentViewer()
{
var createOptions = new Leadtools.Documents.UI.DocumentViewerCreateOptions();
createOptions.ViewContainer = this.splitContainer1.Panel2;
createOptions.ThumbnailsContainer = this.splitContainer1.Panel1;
_documentViewer = DocumentViewerFactory.CreateDocumentViewer(createOptions);
_documentViewer.View.PreferredItemType = DocumentViewerItemType.Svg;
_documentViewer.Commands.Run(DocumentViewerCommands.InteractivePanZoom);
}
From this code, you can see that the DocumentViewer is not a control in itself. It is created by assigning different views to existing containers in an application, in our case, the panels from the SplitContainer. Find out more about the elements available with the DocumentViewer on this web page.
Now we need to call the InitDocumentViewer method from within the OnLoad method directly following the SetLicense method call.
InitDocumentViewer();
If you run the application now, it won’t look like much is happening. We’ll change that now!
Loading Files into the DocumentViewer
Due to the fact that we will be using JPG photographs from a phone, we will need to add the following CODEC references:
- Leadtools.Codecs.dll
- Leadtools.Codecs.Cmp.dll
- Leadtools.Codecs.Tif.dll
Let’s now implement the Open functionality from our menu. Double-click on the Open menu item in the Form1 designer. This will allow us to implement the selection of a file to open in the DocumentViewer. To get started, add the following using statements to your code file:
using Leadtools.Documents;
using Leadtools.Documents.UI;
using System.IO;
Then implement the menu item click handler as follows:
private void openToolStripMenuItem_Click(object sender, EventArgs e)
{
    OpenFileDialog fileDialog = new OpenFileDialog();
    fileDialog.InitialDirectory = "c:\\";
    fileDialog.Filter = "jpg files (*.jpg)|*.jpg|All files (*.*)|*.*";
    fileDialog.RestoreDirectory = true;

    if (fileDialog.ShowDialog() == DialogResult.OK)
    {
        LoadDocument(fileDialog.FileName);

    }
}
Finally, we will implement the LoadDocument method in the Form1 class:
private void LoadDocument(string path)
{
var document = DocumentFactory.LoadFromFile(
path,
new LoadDocumentOptions { UseCache = false });
_documentViewer.SetDocument(document);
}
Now you can run the application and open a document to be loaded in the DocumentViewer. It is important to note that while we are using jpg images in this example, you are not limited to this file type. Feel free to experiment opening word files, PDFs and more, just be sure to add the appropriate Leadtools.Codecs.*** reference, where *** is typically the file extension. Here is a documentation page that tells you exactly what DLL is needed for each file type.
Performing Optical Character Recognition from the Photo
The document viewer has many built-in commands that allow you to perform many common tasks. One of these commands is the Text.Get command. This command will perform OCR on the document loaded on the viewer. After executing this command, the text is parsed and available for other functions such as text selection and document conversion.
Let’s set up the OCR engine. Add the following references:
Leadtools.Forms.DocumentWritersLeadtools.Forms.OcrLeadtools.Forms.Ocr.Advantage
In Form1.cs add the following using statement to the file:
using Leadtools.Forms.Ocr;
Then add the following code in the Form1 class to initialize the OCR engine:
private IOcrEngine _ocrEngine = null;
private void InitOcrEngine()
{
    try
    {
        _ocrEngine = OcrEngineManager.CreateEngine(OcrEngineType.Advantage, false);
        _ocrEngine.Startup(null, null, null, null);
    }
    catch (Exception ex)
    {
        MessageBox.Show(string.Format("Failed to start the Advantage OCR engine.",            ex.Message));
    }
}
In the OnLoad method of the class, add a call to InitOcrEngine() immediately following the InitDocumentViewer() function call.
Lastly, we’ll need to assign the OCR engine to the document that is being loaded in the viewer. In the LoadDocument method add the following code, directly above the SetDocument call:
document.Text.OcrEngine = _ocrEngine;
Now let’s implement a new menu item that will execute the OCR on the image. In the menu of the Form1 designer, add a Get Text menu item.
Double-click the Get Text menu item to implement its functionality as follows:
private void getTextToolStripMenuItem_Click(object sender, EventArgs e)
{
    var thisOperation = new DocumentViewerAsyncOperation
    {
        Error = (DocumentViewerAsyncOperation operation, Exception error) =>
        {
            MessageBox.Show(error.Message);
        },
        Always = (DocumentViewerAsyncOperation operation) =>
        {
            MessageBox.Show("DONE!");
        }
    };

    _documentViewer.Commands.RunAsync(thisOperation, DocumentViewerCommands.TextGet, _documentViewer.CurrentPageNumber);
}
This code initiates an asynchronous call for the Document Viewer to get the text of the current page of the document loaded in the viewer (in our case our document is a single image, treated as a single page). This will in turn engage the OCR engine assigned to the document. Upon completion, a message box displaying the word "DONE!" will be displayed.
Selecting and Copying Text
Since we’ve been able to get the text from the image, we can now select text, and copy it to the clipboard so you can paste it in other applications. To do this, create two new menu items, Select Text and Copy Text.
Double click on each of these new menu items, and implement them as follows in the code-behind:
private void selectTextToolStripMenuItem_Click(object sender, EventArgs e)
{

    _documentViewer.Commands.Run(DocumentViewerCommands.InteractiveSelectText);
}

private void copyTextToolStripMenuItem_Click(object sender, EventArgs e)
{
    _documentViewer.Commands.Run(DocumentViewerCommands.TextCopy);
}
Select Text puts the document viewer in an interactive mode that allows for the user to highlight text. It is fantastic that we can Select Text directly on the image! When you run the application again, be sure to Get Text prior to attempting to select text. This step can be circumvented if you set the Document Viewer’s AutoGetText property to true in the InitDocumentViewer() method. By setting this property, the Document Viewer will issue a Get Text if it hasn’t already been performed prior to making the text selectable.
_documentViewer.Text.AutoGetText = true;
Run the application again, select the Get Text menu item, followed by the Select Text menu item. You can no select text on the document. Once text is highlighted, select the Copy Text command, then open notepad and paste the resulting text.
Saving the image document as a Microsoft Word file
The last thing that I set out to do with this investigatory project is to save the resulting document as a Word file. The OCR engine will break things down into an SVG intermediary layer prior to any conversion. What is neat about this, is that even fonts are matched where possible.
To implement the document conversion to Word, add references to the following assemblies:
Leadtools.Codecs.DoxLeadtools.Documents.Converters
Next, add another menu item to the form, name it Save.
Implement the Save menu item as follows:
private void saveToolStripMenuItem_Click(object sender, EventArgs e)
{
    var converter = new DocumentConverter();
    converter.SetOcrEngineInstance(_ocrEngine, false);

    var jobData = new DocumentConverterJobData() {
        Document = _documentViewer.Document,
        DocumentFormat = Leadtools.Forms.DocumentWriters.DocumentFormat.Docx,
        JobName = "SaveToDocx",
        OutputDocumentFileName = "sample.docx"
    };

    var job = converter.Jobs.CreateJob(jobData);

    converter.Jobs.RunJob(job);

    if(job.Status== DocumentConverterJobStatus.Success)
    {
        MessageBox.Show("Word Document Created");
    } else
    {
        MessageBox.Show("Word Document Creation Failed");
    }
}
This code instantiates a Document Converter, assigns the OCR engine and creates a job to convert the document loaded in the Document Viewer to the Microsoft Word (docx) format and saves it with the file name sample.docx. As we assigned our initialized OCR engine to the Document Converter, it isn’t necessary to perform Get Text prior to saving the document. When you run the application, and load the image, simply click the save menu item and the file will be created.
You aren’t limited to converting the image to only Microsoft Word format. The Document Converter supports a multitude of different file types.
Conclusion
This article covers only a small portion of the LEADTOOLS SDK. I was able to successfully implement a solution to the problem I set out to solve in this article’s introduction. My experience with the SDK was positive. It is definitely overwhelming at first, just due to sheer size. This was alleviated by having the full source code for demos installed with the evaluation, as well as a very responsive developer support system (available through online forums and email). I found it to be a bit tricky to figure out what references are needed for different pieces of functionality, but overcame these issues through a combination of support from LEADTOOLS and trial and error. I was also a little surprised that there wasn’t Document Viewer support available for WPF, but on the flip side, I was ecstatic that it is available in JavaScript/HTML5.
Overall I am very satisfied with the LEADTOOLS SDK and recommend it for any OCR or imaging requirements that you may have.
Source Code Download
Carey Payette is a Senior Software Engineer with Trillium Innovations, a Progress Developer Expert, as well as an ASPInsider. She has interests in IoT and is a member of the Maker community. Carey is also a wife, and mom to 3 fabulous boys. She is a 2nd degree black belt in TaeKwonDo and enjoys coding for fun!


