Introduction
If you're targeting dotnet Core Razor Pages then you've probably done some ASP.NET MVC (with Razor) and you probably hope that things work similarly. While they do most of the time, I learned (very painfully) that implementing a PartialView was far more difficult than it should be. I almost gave up and then I stumbled upon the one thing that made it all work.
Note; I even found a Microsoft article that supposedly shows you how to do this (Partial Views in ASP.NET Core | Microsoft Docs[^]) but the article is a bit convoluted and doesn't explain the one thing that caused me so much grief.
Main Discovery
@Page directive - If you create a Razor Page and then attempt to turn it into a PartialView you will never be able to pass the Model class into the View because it is always null. I struggled with that from the article above and only after 8 hours of guessing did I delete the @Page directive from the Razor View and succeed. That's a large part of why I decided to write this article up.
Note dotnet core version: I'm running this on dotnetcore version 2.1.x (preview) but it _should_ run on dotnet core 2.0.x Probably if you have Visual Studio 2017 it will all work fine. If you want to know which version of dotnet core you have, go to a command prompt and type:
c:\>dotnet --version<ENTER>
Background
I'm working on creating a web site / web api which will allow users to :
- *Create their own sub page which they can post content to (yes a bit like Facebook)
It will use a few features like SSO (single sign-on) via Social accounts (Twitter, FB, GitHub, etc).
*All of this is basically a project to help me learn the underlying technologies.
A while ago, I had created a Login Control that was based upon AngularJS and I wanted to now use this control in my Razor Pages project. Since this Login Control (html div) was just some HTML I wanted to drop onto the page I hoped I could drop it in as a PartialView, but dotnet Core changes some things and made that very difficult.
Sample Project
Instead of working you through everything my site is doing, I decided to create a basic dotnet Core Razor Pages project from the template and then walk you through creating content that loads as a PartialView.
Why Use a PartialView?
PartialViews are very nice because you can load each section of your page as if it is a separate control. This (obviously) allows you to separate out your Controller code from your Views and Models. They are also nice because they are so easy to use. Well.... they're easy to use once you understand the tricks. That's what this article is all about.
Get Sample Project
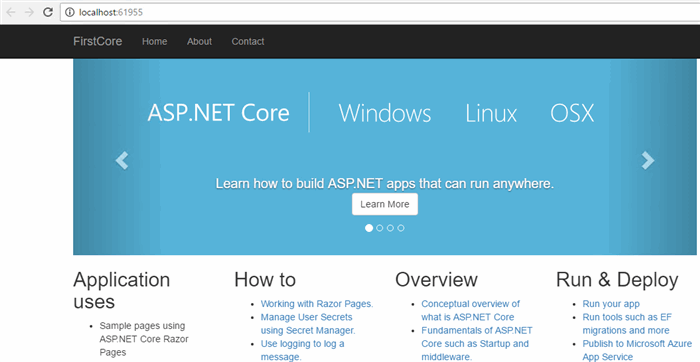
The first thing I did was create a dotnet core Razor Pages project from the Visual Studio 2017 template.
When you do that and then build and run it, you will get something that looks like the following:
I'm going to add one <div> to the top of the page (Index.cshtml) which will host our LoginControl and then I'll add the project to the top of this article (FirstCore_v001.zip) so you'll have it to start with if you like.
At this point it will just be a div with an id and one word in it so it will show up below the navbar and above the jumbotron.
<div id="LoginControl">
    Test
</div>
The Point of the LoginControl
The entire point of the LoginControl is that once the user is logged in a different set of buttons show up so the user is guided into how the Login/Logout works.
Using CSS
To get things to look right, we need to implement some styles (CSS) that change according to whether the user is logged in or logged out.
I've already worked these styles out through trial and error so I'll just give them to you (and place them in our site.css and then we'll see how we use them:
.visible-item{visibility:visible;}
.hidden-item{visibility:hidden;display:none;}

.the-legend {
    border-style: none;
    border-width: 0;
    font-size: 14px;
    line-height: 20px;
    margin-bottom: 0;
    font-weight: bold;
    font-family: sans-serif;
}

.the-fieldset {
    border: 2px groove threedface #444;
    -webkit-box-shadow: 0px 0px 0px 0px #000;
    box-shadow: 0px 0px 0px 0px #000;
}
Also Using Bootstrap Styles
Dotnet Core Razor Pages (along with ASP.NET MVC projects) use Bootstrap styles and include them in the project template so they are easy and available. I've also worked out what I want my basic LoginControl to look like so I'll give you that HTML structure here. This is the code we will copy into the <div> we created that previously only contained the word "test".
Here's the entire updated <div> so you can see it all:
<div id="LoginControl">
    <fieldset class="well well-sm the-fieldset">
        <legend class="the-legend">Login</legend>
        <button class="btn btn-primary btn-xs @((false)?" hidden-item":"visible-item")" onclick="login('facebook')">Facebook</button>
        <button class="btn btn-primary btn-xs @(!(false)?" hidden-item":"visible-item")" disabled>Facebook</button>
        <button class="btn btn-primary btn-xs @((false)?" hidden-item":"visible-item")" onclick="login('google')">Google</button>
        <button class="btn btn-primary btn-xs @(!(false)?" hidden-item":"visible-item")" disabled>Google</button>
        <button class="btn btn-primary btn-xs @((false)?" hidden-item":"visible-item")" onclick="login('twitter')">Twitter</button>
        <button class="btn btn-primary btn-xs @(!(false)?" hidden-item":"visible-item")" disabled>Twitter</button>
        <button class="btn btn-primary btn-xs @(!(false)?" hidden-item":"visible-item")" onclick="logout()">Logout</button>
        <span class="loginStatus @(!(false)? " hidden-item":"visible-item")">Logged in as: {{currentUser.screenName}}</span>
    </fieldset>
</div>
Razor Code : Hard-coded Value
For now, you can see that there is some Razor code in there (notice the @ symbols) but it is all based upon a hard-coded boolean value of false.
That's all part of what we want to fix to make this code actually run instead of being static. For now though, these changes will render the LoginControl basically as I want it. It's not terrible looking and it looks quite good even on a mobile device.

When User Logs In
What we want is that when the user logs in, then those buttons all go to disabled and a logout button appears.
I'll change all of the false values to true and run it again and show you what I mean.
Oh, I forgot that I will also implement a feature to display the current user's screen name also, but we won't mess with that right now. After you understand how to do this PartialView thing, it will be trivial anyways, because you'll just need to add the screen name to the PartialView's ViewModel and the PartialView will display it to.
Get the Code: FirstCore_v002.zip
That's our basic control and you can get the FirstCore_v002.zip and examine the site.css and LoginControl HTML more closely if you want to.
However, now what we want to do is move the code inside that <div> to a View which will end up being a PartialView.
This Is Where Things Get Weird
So since we are adding a View to a dotnet core app things are a little different. In the past (under ASP.NET MVC) you would add a Controller and then from that Controller you could add a View quite easily. Now there is a different convention used by Razor Pages. We can see this slight difference in our project when we examine the files from Solution Explorer.
You can see that Razor Pages are added into the \Pages directory.
This Is How Razor Pages Are Different From ASP.NET MVC
Each cshtml files in turn have cshtml.cs files associated with them. Those .cs files are the Controller which is behind the cshtml (Views). In the past, ASP.NET MVC had completely separate Controllers which then would be connected to a View class.
Also in the past, we had \Controllers and \Views folders where we stored each of those items. Those are also gone since a Razor Page contains both the View and the Controller.
First, Let's Add A Controller
The first thing we'll do is add a Controller. However, since I'd like to keep things organized I will go ahead and add a Controller folder at the same level as the Pages folder. You can do that in Solution Explorer by right-clicking the project and choosing Create Folder...
Add the New Controller
After you add the new folder, right-click it and select Add => Controller...
Once you make that selection, a dialog box with a number of choices will appear.
We are choosing the MVC Controller with read/write actions. Once we click the [Add] button another dialog box pops up so we can name our controller. It defaults to DefaultController but I changed it to LoginController and then clicked the [Add] button.
When you click that button to add the controller a lot of things begin to happen. Nuget adds some packages and then it lets you know it is building some code.
Here's one of the dialog boxes that goes by:
I've actually had that fail before too and then I just did a rebuild or maybe I had to add the controller again. Hey, it's nascent technology so things happen. :)
Finally, once it completes, you'll be staring at a LoginController.cs which contains some stubbed out methods. We won't need or use all of them, but I think it's easier to let the Visual Studio Template add them and remove the ones I don't use later.
LoginController : Testing To Learn
If you take a look at the LoginController as it is stubbed out, you will see that the comments even help you understand what the route to the controller should be. Check out the highlighted Action (method) in the controller in the image that follows:
Get The Code And Try It : FirstCore_v003.zip
If you get FirstCore_v003.zip and build it and run it you can try getting to the LoginController so you can see it do something. You can try hitting the url: http://localhost:61955/Login/Details/5
However, it's a trick, it won't work. Why not? I told you it would get weird.
When you hit that URL you will see an error like the following:
That is a bad one. It is telling you it cannot even find that location in your MVC (Razor Pages) web. This is a routing problem.
Configure Dotnet Core App Routes
That's because dotnet core doesn't have that route set up yet. To do that we need to add some code to the Startup.cs file. That's where Dotnet Core configures and runs services to help you app run.
Just so you know what it looks like here's the entire Startup class which is called by Program.cs when the app starts.
public class Startup
{
public Startup(IConfiguration configuration)
{
Configuration = configuration;
}
public IConfiguration Configuration { get; }
public void ConfigureServices(IServiceCollection services)
{
services.AddMvc();
}
public void Configure(IApplicationBuilder app, IHostingEnvironment env)
{
if (env.IsDevelopment())
{
app.UseBrowserLink();
app.UseDeveloperExceptionPage();
}
else
{
app.UseExceptionHandler("/Error");
}
app.UseStaticFiles();
app.UseMvc();
}
}
You can see that the AddMvc and UseMvc methods are called to configure MVC for our use.
We can also add a route in the file. It's quite simple, we just add the following code at the bottom right after the app.UseMvc() call.
app.UseMvc(routes =>
            {
                routes.MapRoute(
                    name: "default",
                    template: "{controller=Login}/{action=Index}/{id?}");
            });
Rebuild and try again. Yes, I tricked you again, because now we are closer but you get another error.
However, look very closely at the error (I've highlighted the interesting part). This is what we in the dev bidness call a good error. :)
It is actually telling us that the controller fired and attempted to find a matching view but could not.
Keep in mind that the Controller code at the Login/Details/5 action tries to return a View(). As you can tell from the original code in the LoginController:
public ActionResult Details(int id)
{
return View();
}
The error also tells us the location and file name it was looking for (to resolve the View). This makes makes our lives a bit easier, because we can create a View that is in the appropriate location and has the appropriate name.
Or, even better, we can use the info to target the LoginController into a View that we create. That is what we will do.
Create Views/Login Folder
I'm going to create the Views/Login folder now, just as I did with the Controllers folder.
Inside that folder I am going to add a new View named LoginControl.
Once I've created the two folders then I just right-click and select Add => View...
Once you make that selection you will see another dialog box that prompts you to create your View.
Here's what the default looks like, but we will change some of these values.
Let's change the View name to : LoginControl
We also want this to be a partial view so we select that checkbox.
For now we are not using a Model class. More about that later.
Click the [Add] button and the class will be added and the file will be opened. It is bare minimum so I'm adding a <h1> tag with LoginControl in it just so we can display something.
Here's the entire View file:
<h1>LoginControl</h1>
@*
For more information on enabling MVC for empty projects,
visit http:
*@
Now, if you run it right now, it will still fail. That's because the Details action in the LoginController is still looking for a View named Details and we didn't create one named that. Let's go back to the LoginController and change the view that is returned so it'll point to our newly created LoginControl View.
Alter that method so the returned View() now takes a string which represents the name of the View class (LoginControl) that should be retrieved.
public ActionResult Details(int id)
{
return View("LoginControl");
}
Get Code and Build and Run : FirstCore_v004.zip
Get the code and run it and you will see.
It ain't much, but we is getting there. :) Wow, this was going to be a short article.
Now it's probably going to get even weirder.
What we really want to do is load that View when the Index.cshtml renders the <div> we originally added.
However, to do that we need to call a LoginController method that will generate our Partial View (LoginControl) for us. That means we need to alter the LoginController and add a method that we can call.
This method will return the View() the same way the Login/Details/ one did so it will look the same, but it will have a better name (DisplayLoginControl). Add the following Action (method) to the LoginController:
public ActionResult DisplayLoginControl()
{
    return View("LoginControl");
}
That is the method we are going to call from the Index.cshtml file, but first we need to move our original control HTML into our view file. I'm simply going to cut the HTML out of the Index.cshtml and paste it into the LoginControl.cshtml.
Here's a snapshot of it in the LoginControl.cshtml.
Alter Index.cshtml
Now, we need Index.cshtml to load this view inside that original <div>.
To do that, we have to implement a Razor method in the Index.cshtml. I found that information in that article I posted at the top of this article.
This is also an asynchronous method since web pages render on more than one thread.
Here's a snapshot of the top of the Index.cshtml file so you can see the entire <div>
Notice that we now call that Razor method Html.RenderPartialAsync() and we pass the location and name of the LoginControl View class which is our LoginControl.cshtml.
You see there is some odd pathing in there (with the ../ up one directory) but it works.
First Pass of Working Code: FirstCore_v005.zip
Get the FirstCore_v005.zip and try it out. Now, the control renders properly from the View file.
Why Is This Significant?
This is important because now we will be able to call the LoginController from JavaScript as an asynchronous call so that when the user logs in and out the control will be updated (instead of using the hard-coded values it is currently using).
Moving Away From Hard-coded Values
To move away from hard-coded values we want to use the IndexModel that is provided from the Index.cshtml page. We want to use it because it is provided for us and we can add a simple property to the IndexModel which will represent whether or not the user is logged in. Let's add that value to the IndexModel now.
Go to the Pages folder in Solution Explorer and click the right-arrow next to the Index.cshtml file. That will display the Index.cshtml.cs file and that is where we want to add the property. Double click the .cs file and it will open up in the editor.
We just want to add the one line to the IndexModel class:
public bool isLoggedIn = false;
I will not discuss the virtues and vices of public properties at this time. This is an example and that discussion isn't in the scope of this article. :)
Now that we've added that value, we can use it, if we have access to the IndexModel. We do have access on the Index.cshtml page, but we have to provide our LoginControl.cshtml file access to it be altering our call to the Html.RenderPartialAsync() method.
Alter that call in Index.cshtml to look like the following:
<div id="LoginControl">
@{
    await Html.RenderPartialAsync("../Login/LoginControl", Model);
}
</div>
That passes in the IndexModel to the LoginControl View when the RenderPartialAsync method is called.
However, for the View to know it is available it has to be declared at the top of the LoginControl.cshtml file.
But when we add the IndexModel, the View doesn't know about that type and complains:
Add A Using Directive
We need to add a using directive that points to the namespace that IndexModel is created in.
Now, you can see everything has settled out.
And, now we can use the isLoggedIn value of the IndexModel in our View.
You will even get Intellisense help on the Model object now.
We update all of those lines to use the Model.isLoggedIn (which is defaulted to false):
<fieldset class="well well-sm the-fieldset">
    <legend class="the-legend">Login</legend>
    <button class="btn btn-primary btn-xs @((Model.isLoggedIn)?" hidden-item":"visible-item")" onclick="login('facebook')">Facebook</button>
    <button class="btn btn-primary btn-xs @(!(Model.isLoggedIn)?" hidden-item":"visible-item")" disabled>Facebook</button>
    <button class="btn btn-primary btn-xs @((Model.isLoggedIn)?" hidden-item":"visible-item")" onclick="login('google')">Google</button>
    <button class="btn btn-primary btn-xs @(!(Model.isLoggedIn)?" hidden-item":"visible-item")" disabled>Google</button>
    <button class="btn btn-primary btn-xs @((Model.isLoggedIn)?" hidden-item":"visible-item")" onclick="login('twitter')">Twitter</button>
    <button class="btn btn-primary btn-xs @(!(Model.isLoggedIn)?" hidden-item":"visible-item")" disabled>Twitter</button>
    <button class="btn btn-primary btn-xs @(!(Model.isLoggedIn)?" hidden-item":"visible-item")" onclick="logout()">Logout</button>
    <span class="loginStatus @(!(Model.isLoggedIn)? " hidden-item":"visible-item")">Logged in as: {{currentUser.screenName}}</span>
</fieldset>
No More Hard-coded Values : FirstCore_v006.zip
Get FirstCore_v006.zip and build it and run it and you'll see that now the user is not logged in because the value is read from the IndexModel which sets it to false initially.
Wire Up the Functionality : Make the Buttons Work
Now, all we have to do is wire up the functionality and we are done. And, what do we use to wire up the functionality? It's everyone's favorite : JavaScript! I scream, you scream, we all scream for JavaScript!!!
Site.js : Razor Page JavaScript Convention
The Razor Page project creates a default site.js which is located under the wwwroot\js\ folder.
It's actually a nice convention because then when you publish your app to your web server your code is in the same place. Dotnet core projects really are quite a bit cleaner.
I will use that file to add our JavaScript button click handlers and the rest of the code to wire up the functionality.
If you go back to the LoginControl.cshtml (LoginControl View) and scroll over to the right you will see that I already have some method names stubbed out for the onclick event handler of each of the buttons.
There are really two methods.
login() - takes a string representing the service being logged intologout()
Since those are already set, we can add the functions to the site.js and test them real quick.
Here's the initial code I added to site.js:
function login(ssoService) {
    alert("I'm logging into " + ssoService);
}

function logout() {
    alert("Logging out of service.");
}
Normally I would just use console.log() but for snapshots the alert works a bit better.
Now, when you run the code and click one of the buttons you will see something like the following:
Logout Button Never Shows Up
Of course, you can't actually get to the logout() function because the Logout button never shows up. That's because the isLoggedIn value never gets changed. Changing the isLoggedIn value is key to making the control work in a way that is useful.
Making the LoginControl Refresh In Front of User's Eyes
However, we need the LoginControl to refresh right in front of the user's eyes as the user is actually logged into the service.
For this article I won't walk you through all the stuff of really logging the user into the real SSO (Single Sign-On) service because that is beyond the scope of this article. However, we will simulate it and then if you decide to use the control you can plugin the functionality. Also, if you want to see it actually work -- you can try it at my real site NewLibre.com[^]. Howeer, at the moment (2018-04-24) it only works with Twitter. No worries it doesn't store anything except a user token indicating that your login succeeded.
jQuery Ajax (via jQuery.Load() method)
What we need to do is make a call to our a LoginController method (DisplayLoginControl) asynchronously. Then the Controller method can set the IndexModel.isLoggedIn value and pass the IndexModel to the View() so that it will be rendered in the appropriate way (logged in or logged out).
I started adding the IndexModel to the method and since it is in another namespace the editor complains a bit and then Intellisense tries to help out. Once again, we just need a using statement for FirstCore.Pages.
Here's how we are going to handle that method. I've altered it slightly so it'll take a boolean representing the isLoggedIn value so we can pass that value in on the call and we can use this same method for logging in or logging out.
We also create IndexModel and set the isLoggedIn property to the value that comes into the method.
Finally, we simply pass the IndexModel into the View() so it can use it to display the control properly.
public ActionResult DisplayLoginControl(bool isLoggedIn)
        {
            IndexModel im = new IndexModel();
            im.isLoggedIn = isLoggedIn;
            return View("LoginControl", im);
        }
Now we just need to call the LoginController DisplayLoginControl action from our JavaScript when the user logs in or out.
We need to call that method asynchronously and we want the result (the LoginControl View()) to be rendered inside our original <div> in Index.cshtml.
jQuery provides a perfect method to do that, called Load().
Here's the code we add to our JavaScript:
$("#LoginControl").load(hostRoot + "Login/DisplayLoginControl/?isLoggedin=true");
That line selects our original <div> (with id="LoginControl") and calls the jQuery Load() method on it.
We pass in the URL which is made up of the hostRoot and the path to the LoginController and Action (DisplayLoginControl) and finally we pass a queryString variable named isLoggedIn with the value of true (or user is logged in).
The DisplayLoginControl() method will take the queryString and match it to the bool value we are looking for and set up our control accordingly.
Here's the entire listing of the site.js:
hostRoot = "http://" + window.location.host + "/";
function login(ssoService) {
    alert("I'm logging into " + ssoService);

    $("#LoginControl").load(hostRoot + "Login/DisplayLoginControl/?isLoggedin=true");
}

function logout() {
    alert("Logging out of service.");
    $("#LoginControl").load(hostRoot + "Login/DisplayLoginControl/?isLoggedin=false");
}
That's it. That makes the entire thing work.
Get Final Code: FirstCore_v007.zip
Download the final version and try it out. It only simulates the login / logout, but the control itself updates just as you expect. I will leave it to you to throw the user's screenName on the IndexModel and display it too.
Once the user is logged in:
History
First publication of article and all code: 2018-04-24


 General
  News
News  Suggestion
  Question
  Bug
Bug  Answer
  Joke
Joke  Praise
  Rant
Rant  Admin
Admin 


 .
.