I often wonder why Cloud Drive is
not as popular as other storage mechanisms, although it has so many nifty uses.
The need out of which CloudDrive was born was migration of Windows applications
to Azure while still using File APIs for R\W data. But as always imagination is
the limit.
Today I would build a "Hello
World" CloudDrive application with minimum LOC and with a to-the-point
activity. Through a small activity we would be creating a CloudDrive and
creating a VHD from the files we collect in emulator. I would also give you
some tips on how not to get your hands burned if you are going to use this
feature anytime soon. Source code of the application is attached with the
article.
Steps
1. Creating a CloudDrive
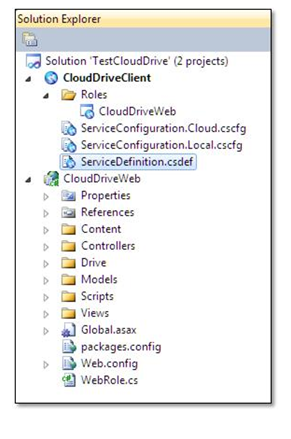
- Create a new Cloud Project
with a WebRole (I have used MVC template but you can use the ASP.net template
as well).
- Add a
button to your page\view and generate event handler for the button. Inside the
event handler code, create a cloud drive and load it with files. Follow the
(liberally added) comments:
var account = CloudStorageAccount.DevelopmentStorageAccount;
var blobClient = account.CreateCloudBlobClient();
CloudBlobContainer container = new CloudBlobContainer("drives", blobClient);
container.CreateIfNotExist();
CloudPageBlob pageBlob = container.GetPageBlobReference("TestDrive.vhd");
pageBlob.DeleteIfExists();
pageBlob.Create(20 * 1024 * 1024);
foreach (var drive in CloudDrive.GetMountedDrives())
{
var mountedDrive = account.CreateCloudDrive(drive.Value.PathAndQuery);
mountedDrive.Unmount();
}
CloudDrive myDrive = account.CreateCloudDrive(pageBlob.Uri.AbsoluteUri);
myDrive.CreateIfNotExist(25);
var drivePath = myDrive.Mount(0, DriveMountOptions.None);
Directory.CreateDirectory(Path.Combine(drivePath, "Data").ToString());
var fStream = System.IO.File.Create(Path.Combine(drivePath, "Data","First.txt").ToString());
fStream.Close();
fStream.Dispose();
System.IO.File.WriteAllText(Path.Combine(drivePath, "Data","First.txt").ToString(), "First File Data");
var sStream = System.IO.File.Create(Path.Combine(drivePath, "Data","Second.txt").ToString());
sStream.Close();
sStream.Dispose();
System.IO.File.WriteAllText(Path.Combine(drivePath, "Data","Second.txt").ToString(), "Second File Data");
data = new DriveData();
data.LocalDrivePath = myDrive.LocalPath;
string localPath = myDrive.LocalPath;
if (Directory.Exists(localPath))
{
var folder = Directory.GetDirectories(localPath).First();
data.FolderName = folder;
var files = Directory.GetFiles(folder);
data.File1Name = files[0];
data.File1Content = System.IO.File.ReadAllText(files[0]);
data.File2Name = files[1];
data.File2Content = System.IO.File.ReadAllText(files[1]);
}
myDrive.Unmount();
return View(data);
Output

- To
see what is in your drive open your storage emulator and navigate to File —> Open Azure Drive —> Navigate through directory.
Notes
- In
local emulator you cannot mount a drive without first creating it. In case you
want to do so, you need to copy paste files into storage emulator location
where it reads data from.
- If
you are in cloud and want to mount a VHD in a page blob without first creating
it, then directly call the
Mount() method with the page blob URI.
- You
can cache content of drive to your local storage by keeping a Snapshot of drive
and keep it persistent across role recycles to save on storage costs and
increase speed of operations.
- Do
not forget to unmount drive once you are done using it as it saves space.
Now that you are done using the
drive, you can package the emulator folder as a VHD and upload it to a page
blob. Thus, you can refer to VHD without first creating one unlike as we did in
the sample. To upload the VHD to page blob you could either code one for
yourself or use a GUI tool such as Cerebrata cloud storage studio. The next
step shows how you can create VHD from a given folder.
2. Creating a VHD (The longest
stage).
- On
Start Menu, type Disk Management and select the Disk Manager.
- Select
Action —> Create VHD and save the VHD to a location and
give it a name and a size (>= 16MB).
- Initialize
the VHD you just created by right clicking on Disk1 —> Initialize —> OK
- Format
your VHD by right clicking on the new partition —> New Simple Volume —> Next —> Next (Let the
volume size remain as it is) —> Assign
Drive a Letter (V) —> Format as NTFS
(ONLY) —> Finish.
- Add the
folder "Data" from emulator location to this new drive.
- You
have your VHD ready, but to copy it you need to detach it. Go back to Disk
Management and right click on Disk2 icon —> Detach —> OK(Delete
VHD checkbox should be unchecked, obviously)
3. Upload VHD to PageBlob
- Use any of GUI tools, PWS scripts, Custom code
to upload this VHD to your storage account and use it in your application.
Rohit started Embedded Programing in his college days and now he is a Software Developer by Profession. Mainly he interested in cutting edge technology offer by Microsoft (i.e Azure,MVC). He Loves coding and his passion is always been towards Microsoft Technologies. Apart from coding his other hobbies include reading books and hang out with friends is his most favorite past time hobby.
1. 20 Apr 2014: Best Mobile Article of March 2014 - First Prize
Rahul has worked on several technologies in Microsoft's technology stack. He has been in field of software developemnt for two years. He started with ASP.net and graduated to Windows application develeopment. His technology experience includes C#, LINQ, T-SQL,T-SQL, XML, PL\SQL, C, C++, VB, WebServices..
Apart from all these he is working on some of the most recent technology offerings such as Windows Azure, SQL Azure, SQL Azure Sync framework, MS Dallas, Powershell etc.
His goal of knowledge is to possess knowledge that is sky high and earth deep.


 General
  News
News  Suggestion
  Question
  Bug
Bug  Answer
  Joke
Joke  Praise
  Rant
Rant  Admin
Admin 


