
Apps in SharePoint 2013
3.67/5 (3 votes)
Creating a SharePoint 2013 Provider-hosted App
Introduction
Basically in SharePoint, the application can be hosted by three types:
- Provider-hosted
- Hosted in the cloud (Windows Azure auto hosted)
- Hosted in a SharePoint environment
Creating a SharePoint 2013 Provider-hosted App
I want to create a Provider-Hosted App in 2013 using Visual Studio Ultimate 2012.
I have installed Windows server 2012, enabled all required features. Installed Office 2010, SharePoint 2013, Visual Studio Ultimate 2012 and Developer tools for SharePoint 2013.
Now let’s create a Provider-hosted app for a SharePoint 2013 Team site created on Office 365.
Step 1
Open Visual Studio 2012 and select Apps->App for SharePoint 2013.

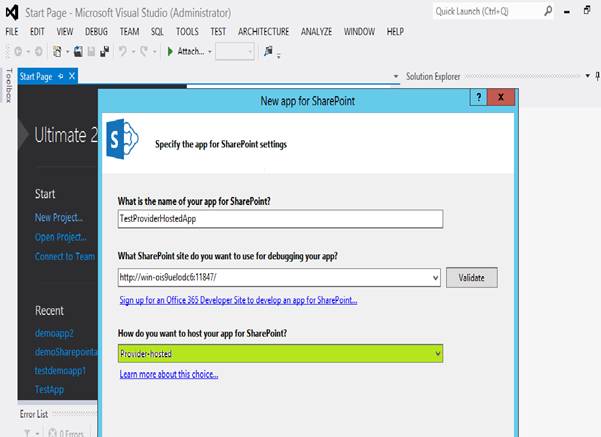
Step 2
Enter the URL of the Site collection where you wish to deploy the app and select Provider Hosted option. Click Next button.
Step 3
On the second page, the Visual Studio wizard for creating a provider-hosted app asks you to choose between a client secret and a certificate.
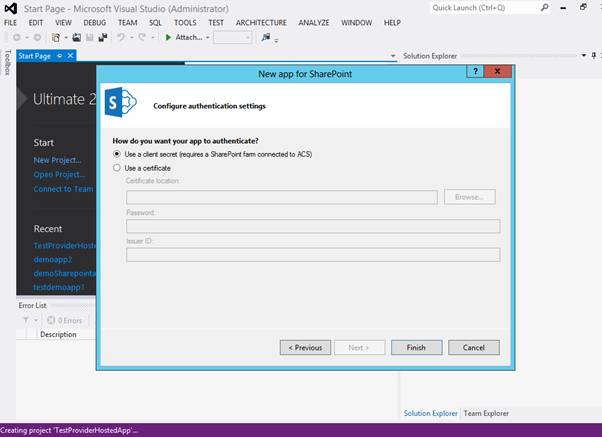
Select use a client secret and click Finish.

Step 4
You will notice that there are two projects, i.e., one for app and the other for web created under the solution.

Go to the Default.aspx and we will enter some HTML tags and text to display.

Step 5
Right click on the TestProviderHostedApp and select publish.
Step 6
The following window will pop up.

From the Drop Down, select New option and provide a name for the Profile. Click OK and then Next button.

Step 7
In the next page, you will be asked to provide the url where the site is hosted, a Client ID and a Client Secret.

For creating the Client ID, go to the AppRegNew.aspx page. The URL would be something like this:
https://<SharePointWebsite>/_layouts/15/ AppRegNew.aspx

Now click on Generate Button of App Id and App Id will be created. Copy the Id and Paste in Client ID as shown below:

Click Next Button.

Now click Finish button.

Step 8
Once the app is published, the folder containing the .app file will open.

Step 9
Now open the SharePoint site where you wish to deploy the app and click on the "new app to deploy" link.

The below popup will appear. Click on the upload link.

Upload the .app file location for uploading the app to the site.

Enter the .app file location for uploading the app to the site.

Once the file is successfully uploaded, then click ok.

Once the app is successfully installed, click on Deploy button to deploy the app.
