Automatic Translation of Resource Files
Translate your RESX files by using your own translation storage
Problem
In multi-language Microsoft .NET Projects, there are usually many resource files, which are typically difficult to keep synchronized and consistent. Moreover, translation of many RESX files requires a lot of work and in many cases, texts are redundant. Thus, translation of similar or equal texts is done again and again.
Solution
A couple of years ago, I decided to write a tool which makes it easier to consolidate, synchronize and translate resource files. It does not support auto translation with one-click, as you might expect from the headline, but more or less one-click. Indeed, modern corporate translation management systems work like this.
The idea is simple. Whenever texts have been translated, these text pairs are stored into a database. If a new text needs to be translated, the program will first look up the text in that database. By this procedure, translation quality is guaranteed, as context information is included in the stored translations by the way it is done. For this reason, I expect this procedure to be much better than letting Google Translate do the job, which has been proposed in other articles.
In case there is no matching translation, missing texts can be exported to a simple Excel file and imported after translation. The translation itself can be done by professional translators or by yourself.
Configure Database
- Download RESX Manager. The latest version and further documentation can be found on Codeplex here
- Extract the archive and run ResxManager.exe
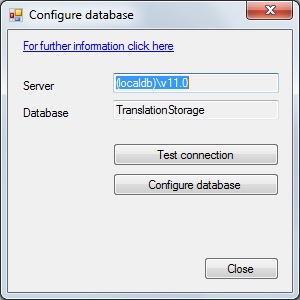
- Setup the database, by opening Translations -> Configure database. I recommend using LocalDB of SQL Server, but you may use any SQL Server of your network. The settings are read from the configuration file ResxManager.exe.config. Please modify the settings to match your configuration.
- Click Configure database:

Prepare Database
- Open the solution which contains good translations.
- Check the culture mappings. Cultures are detected automatically, but you have to take care of the Invariant Culture. I recommend using English as Invariant Culture, which in my projects is the fallback culture by default. In this case, you should assign English to all resource files, which are “
Invariant”, by opening the context menu and selecting English from the dropdown list. If you are always using the same language as invariant culture, you don't have to take care about this setting. - Click Translations -> Store all translations to database
Repeat these steps for every solution.

Translate New Projects
- Open the solution that needs to be translated.
- Check the culture mappings as above.
- Click translate in the toolbar. RESX Manager searches in the database for any text in the source language and stores the corresponding results in the target language.
You might as well translate only selected languages by expanding the language node which is the source language of the translation. Then open the context menu by clicking right on the target language. Automatic translation will do the job. - For the remaining texts, click Export to translate them with Excel.
- After translation, click Import and select the translated Excel file. You may split the file in different parts for the translation by different persons.
- Don't forget to store the newly imported texts to your database.
