Installing .NET 3.5 service pack 1 along with application setup
5.00/5 (1 vote)
Installing .NET 3.5 service pack 1 along with application setup.
Many of us would have been creating setups for applications either using WinForms or WPF and other such, but we really ignore the fact that users might not have all the prerequisites that our application requires to work.
Possibilities for that might be one or more as below:
- User do have .NET Framework even installed.
- Users .NET framework installation is older or newer but not the required one.
- For example, user have .NET Framework version 3.5 but not 3.5 SP1
- You have disabled to check .NET Framework exists before application installs so application will not start all after installation, so users frost and uninstalls your application.
- You have enabled to check and install .NET framework along with your application online, but you have ignored the fact that user might have no internet access on their system.
So what could we do for this ?
Solution is to include the .NET Framework standalone setup installation in your application setup.
And steps to install the .NET Framework 3.5 with the application are as follows:
Step 1 – Download the combined installation package for the .NET Framework 3.5 from Microsoft download site dotnetfx35.exe.

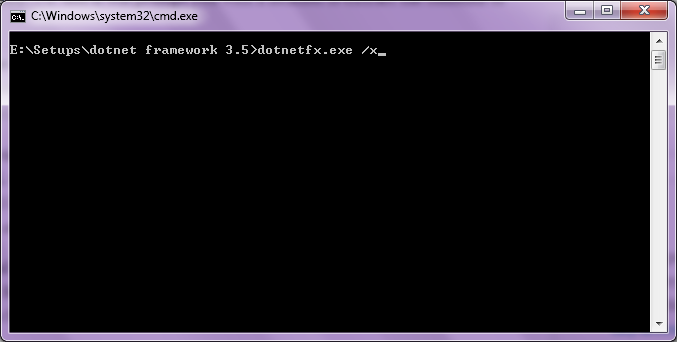
Step 2 – After downloading this package, you have to extract the contents by running dotnetfx35.exe /x and it will prompt you with a location to extract the contents to a path.

Step 3 – Copy the contents of files and folder from {extracted path}\WCU\dotNetFramework to C:\Program Files\Microsoft SDKs\Windows\v7.0A\Bootstrapper\Packages\DotNetFX35SP1. Please note that to change ‘Program Files’ to ‘Program Files (x86)’ in above path if working on 64-bit system.
Step 4 – If you wish to get rid of the build warnings, you can update your PublicKey in the Product.XML with the following
value: 3082010A0282010100A2DB0A8DCFC2C1499BCDAA3A34AD23596BDB6CBE2122B794C8EA AEBFC6D526C232118BBCDA5D2CFB36561E152BAE8F0DDD14A36E284C7F163F41AC8D40B146880DD98194AD9706D05744765CEAF1FC0EE27F74A333CB74E5EFE361A17E03B745FFD53E12D5B0CA5E0DD07BF2B7130DFC60 6A2885758CB7ADBC85E817B490BEF516B6625DED11DF3AEE215B8BAF8073C345E3958977609BE7AD77C1378D33142F13DB62C9AE1AA94F9867ADD420393071E08D6746E2C61CF40D5074412FE805246A216B49B092C4B239C742A56D5C184AAB8FD78E833E780A47D8A4B28423C3E2F27B66B14A74BD26414B9C6114604E30C882F3D00B707CEE554D77D2085576810203010001.
Use this for both of the XPSEPSC* files. Product.xml is located in ‘DotNetFX35SP1′ directory itself
Step 5 – In Visual Studio 2010, right-click on Setup project > Properties -> Prerequisites -> Select .NET Framework 3.5 SP1 > Below select the option “Download the prerequisites from the same location as my application” > Save changes
Step 6 – And last step is to rebuild the setup project and Test.
Reference links:
- Installing .NET Framework 3.5 offline with standard application setup
- Know where .NET Framework 3.5 setup tries to connect to the Internet and avoid them”
- Creating an installable layout for the .NET Framework 3.5
- Visual studio 2010 setup project problems faced..
- VS2008 SP1 – Selecting .NET 3.5 SP1 prerequisite in setup project causes build error
