Table of Contents
- Website and Source
- Introduction
- Challenge 1 - Overview - The Plan
- Challenge 2 - D.O.T.S. Website
- Easter Egg
- Key Principles and Building Site
- HTML 5 Design
- CSS and Responsive Design
-
JavaScript - DOTS Map
Website and Source
Introduction
Communication - exchange of information: the exchange of information between people, e.g., by means of speaking, writing, or using a common system of signs or behavior.
D.O.T.S. is a systematic relationship of simple colored and textured circles (dots) which are used as a common system of signs to help two or more people or systems to communicate anonymously.
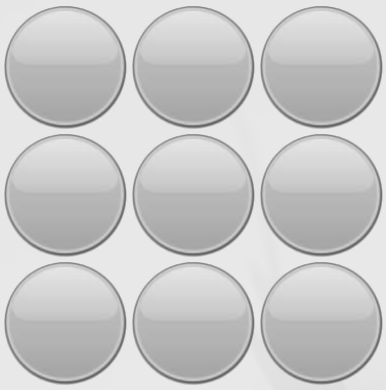
DOTS is fundamentally a very simple idea. At the core of the project will be a 3 x 3 grid of circles that can be clear or hold up to three colored and textured patterns. This grid when loaded with a pre-determined pattern can transmit a coded message between two or more participants as long as all participants are aware of the pattern.
Challenge 1 - Overview - The Plan
This article is being written as a submission to the 2013 CodeProject Azure Challenge.
DOTS, while simple in idea, holds a larger challenges. There will be many different interfaces that will be available to the final project. I'm hoping to have the website, a mobile app, many types of APIs using many technologies such as HTML, JavaScript, Web API, and WCF all hosted and backed by Azure. The plan is that while DOTS will have a base website, it will be able either interactively or read-only to almost any technology that can be linked to the cloud.
There can be endless uses for DOTS as a communication protocol. A website could have an imbedded DOTS map to show a system status; corporate employees could use DOTS to convey messages that they don't want in writing; lovers could whisper sweet nothings as only symbols. The ideas are endless. I'm hoping to demonstrate how the DOTS protocol can be defined to make much larger applications on top of the pre-determined DOTS maps.
First Challenge: Getting Started
This article
Second Challenge: Building a website
This website will not be hooked to a database so I'm hoping to get the JavaScript, Mobile first responsive design (CSS), and possibly the start of how to use Web API hooked up during this challenge. While the site will be based in HTML5, I am planning on using JavaScript to make sure older browsers have accessibility to the site.
Third Challenge : Using SQL on Azure
In this challenge, I will hookup the social network part of DOTS. Users will be able to anonymously register and make a new groups to share their DOTS maps. There will be an easy way for other users to join a DOTS group without registering. Any one in the group will have access to the DOTS map. DOTS will not have access rights by design because of the equal access design it will possess.
Forth Challenge: Virtual Machines
In this challenge, I will setup my Windows Azure services that will clean up the DOTS groups as well as the WCF services which I will use as an API for the Mobile Challenge and as a general access point.
Fifth Challenge: Mobile Access
The mobile app will be aimed at the Windows 8 phone (because that's what I own) but will use JavaScript, Web API, or WCF calls to interact with Azure. My goal here is not to tie it to any one operation system so I will try to keep it as generic HTML5 and JavaScript. This will make it easy to transition to the app to many mobile environments.
I'm new to Mobile Apps so this will be the hardest challenge for me to tackle.
Challenge 2 - D.O.T.S. Website
Easter Egg
My Easter Egg has Bob spinning for the Dots and Talking. To see him, make a Green letter C with the DOTS filled in with Blue like the image below. The Easter Egg that pops up is NOT a animated PNG. It is done with jQuery Rotate plugin and is all JavaScript. I ran out of time so I didn't expand on how I did it in the article but check out the source code above if you are interested.

Key Principle and Building Style
I purposely did this first challenge as a very basic website. I didn't put it into the larger framework so I could show how powerful JavaScript and CSS are by themselves. From here on out, my source will be within a much larger framework (probably MVC 4).
Domain-driven Design is not a methodology, framework, or design pattern per se. It's more of a way of thinking. It puts the focus on the domain logic and all work is centering around that logic. It's just a way to make sure all design is focused at a central goal.
The DOTS project's main design principle is going to be the extensible model of the protocol based on technology. By doing the front end website first, I needed to make sure there was the ability to wrap it into a larger framework and hook it up to a database and other technology. For this reason, I concentrated heavily on CSS, JavaScript, and the basic way the DOTS mapping will be work.
Wherever possible, I will try to use Buy versus Build methods of designing. I try to only use well known 3rd party frameworks most of the time. In this article, I will stick to only using open source frameworks except for Microsoft Azure, .NET, and Visual Studio products.
HTML5 has given us a bunch of new tools for web developing. Many of these new extensions are in response to new dynamic areas happening in the website world. In the past, we would design a website to be viewed on a computer and computer monitor only. In today's world, we need the website to be available through many types of media viewers such as phones, tablets, hybrids, as well as the desktop. The websites also need to have a much stronger client side presence with the clients (browsers) doing a lot more work than ever in the past.
Because of the contest's time challenges, I cannot go into every term and its meanings, so this article will be geared toward the intermediate or advanced web developer. I'm going to assume the reader has basic knowledge HTML, CSS, JavaScript, and maybe jQuery. I will try to show examples and show the frameworks that are used. Mostly, it will be an overview and when time permits, I will get into some of the cooler coding of some functions. Feel free to contact me in the future, if someone would like me to elaborate on why or how I did something specific.
CSS and Responsive Design
Responsive design is the idea to make sure the web pages have a clean look on any type of media without writing a new website for each device. The CSS styles around responsive design are known as media queries. Before we dive into those, let's discuss a very popular framework that does a lot more than responsive design; Twitter Bootstrap.
Twitter Bootstrap is an awesome set of interface elements, CSS layouts, and JavaScript tools packaged together and freely available to use for website design. If anyone is designing a new website, I highly encourage you to take a look at this framework. I'm sure you will find something of use inside it.
Twitter Bootstrap Scaffolding is part of the framework that helps a developer setup responsive design and is the first key technology I used in the website. Scaffolding uses a 12 column grid system that will try to keep sections of your webpage together, defined by specific Bootstrap classes. As a webpage's width becomes smaller, the groupings from the right will fall below the groupings on the left until finally all groups are lined up. This way, smaller devices you read the webpage from top to bottom where as on a monitor, group of elements can be read left to right then up and down.
Bootstrap Scaffolding responsive functions also offer predefined CSS/JavaScript classes that will hide or show sections of code based on if they are intended for certain types of media. This is very cool for easily defining to show and hide based on the device you are designing for. I didn't use these classes that much on the initial website only because I want to demonstrate different ideas of how to use media queries.
Twitter Bootstrap
Both Mobile First and Degradation responsive design is the idea to use CSS3 Media Tags to change the design look and feel based on the width of the page. The idea of degradation is to first code the Default Layout for larger media like a desktop, and then use the media queries to adjust the layout in smaller widths. Mobile first design on the other hand typically progresses further in design in each media query as the browser grows larger. Think of Mobile First as progressive enhancement of the CSS where with Degradation, you are starting with the full CSS and gracefully taking away the styles you do not need in smaller widths. Both of these design patterns are useful and should be considered based on the need of the project.
The main reason I chose degradation over mobile first is because older browsers such as IE 6-8 do not recognize media queries so the user will see the full site rather then mobile version of it. There are JavaScript libraries that will give these older browsers the ability to use media queries but I just choose not to use them unless needed.
Shown below is how the media queries work in the CSS file. The default website CSS goes on top and then each change for Table, Wide Mobile, and Non-smart phones will go underneath.
@media only screen and (min-width: 768px) and (max-width: 991px) {
}
@media only screen and (min-width: 480px) and (max-width: 767px) {
}
@media only screen and (min-width: 1px) and (max-width: 479px) {
}
Responsive design mainly deals with the width of the site because scrolling down is usually not a problem. However, on my DOTS site, I purposely added a footer so I could show how to drop a element if it collides with another element. This is one area that is important to know how to do but can't always be done with CSS.
Basic HTML Footer
<div class="footer">
<div>
© DOTS 2013. All Rights Reserved
</div>
</div>
Footer CSS. Notice in this CSS code, an absolute position with the bottom of 0 and a width of 100% of the screen forces this footer to always stay at the bottom.
.footer {
position:100%;
height:50px;
margin:0 10px;
padding:0;
}
JavaScript to hide footer if goes over the .dotsTable class.
$(function () {
$(window).resize(function() {
$('.footer').show();
var dotsTable = $(".dotsTable");
var tablebottom = dotsTable.position().top + dotsTable.height();
var footertop = $(".footer").position().top;
if (footertop <= tablebottom)
$('.footer').hide();
});
});
In the above jQuery code, notice I first make sure the footer is shown. You can't get a position of an object if it's hidden. jQuery has a position function that returns the top and left pixels of where the element is within the DOM window. By adding the height function to this value, you can get the bottom which I do here on the dotsTable.
I then test to see if the top of the footer is above the table bottom and if it is, I then hide it. It's pretty straight forward code but important when testing and fixing elements that cross each other during a window resize.
JavaScript - DOTS Map
The DOTS map is a simple HTML table. I decided not to use <img> tags for the buttons but instead put the buttons as background images. This is a lot better because the table becomes responsive and let's the images grow and shrink with it but there's a trick to making this happen. Let me show this in the HTML and CSS that let's this functionality happen.
The HTML is extremely simple which is the goal for HTML5 page design. Notice it's just a blank table with no content.
<div class='dotsMap'>
  <div id="dotsSelect">
    <table class="dotsTable">
       <tr>
         <td id="r1c1"></td>
         <td id="r1c2"></td>
         <td id="r1c3"></td>
       </tr>
       <tr>
         <td id="r2c1"></td>
         <td id="r2c2"></td>
         <td id="r2c3"></td>
       </tr>
       <tr>
         <td id="r3c1"></td>
         <td id="r3c2"></td>
         <td id="r3c3"></td>
       </tr>
    </table>
  </div>
  <div id="colorSelect">
      Select color
      <div class="colors" id="red"></div>
      <div class="colors" id="green"></div>
      <div class="colors" id="blue"></div>
  </div>
</div>
Here's the CSS responsible for the default background dots. Please notice here that we make the background images of each <td> have the background-size style of 'contain'. This allows the images to grow or shrink with the sizing of the cell. It's a nice way to make the table truly responsive. Alternatively, if we put <img> tags inside the cells, we would have to use JavaScript or substitute new images based on certain widths.
.dotsTable tr td  {
    background:url(../images/dots/silverDot.png);
    background-size:contain<;
   width<: 124px;
   height: 124px;
}</</
From here, the jQuery takes over and gives us the full functionality of changing the dot's colors. The three events trigger the DOTS to be set are mousedown, mouseenter, and mouseup. These are all mouse events so currently only the mouse on the desktop or a finger on a touch screen will be able to set the dots. I'm considering ideas of how to let a keyboard select the dots in the future but for now, it's not possible.
var _imgFolder = "./images/dots/";
var _silverDot = "silverDot.png";
var _redDot = "redDot.png";
var _greenDot = "greenDot.png";
var _blueDot = "blueDot.png";
var _mouseDown = 0;
var _currentColor = "rgb(255, 0, 0)";
$(function () {
$('.dotsTable td')
.mousedown(function () {
_mouseDown = 0;
var silverPath = (_imgFolder + _silverDot);
var img = _redDot;
if (_currentColor == 'rgb(255, 0, 0)')
img = _redDot;
else if (_currentColor == 'rgb(0, 128, 0)')
img = _greenDot;
else if (_currentColor == 'rgb(0, 0, 255)')
img = _blueDot;
var bgImage = $(this).css('background-image');
if (bgImage.indexOf(img) < 0)
{
$(this).css('background-image', 'url(' + _imgFolder + img + ')');
if (img == _redDot)
{
$(this).data('toggle', "1");
$(this).data('color', "1");
}
else if (img == _greenDot)
{
$(this).data('toggle', "1");
$(this).data('color', "2");
}
else if (img == _blueDot)
{
$(this).data('toggle', "1");
$(this).data('color', "3");
}
else
{
$(this).data('toggle', "0");
$(this).data('color', "0");
}
}
else
{
$(this).css('background-image', 'url(' + silverPath + ')');
$(this).data('toggle', "0");
$(this).data('color', "0");
}
_mouseDown = 1;
})
.mouseenter(function () {
if (_mouseDown == 1)
{
var silverPath = (_imgFolder + _silverDot);
var img = _redDot;
if (_currentColor == 'rgb(255, 0, 0)')
img = _redDot;
else if (_currentColor == 'rgb(0, 128, 0)')
img = _greenDot;
else if (_currentColor == 'rgb(0, 0, 255)')
img = _blueDot;
var bgImage = $(this).css('background-image');
if (bgImage.indexOf(img) < 0)
{
$(this).css('background-image', 'url(' + _imgFolder + img + ')');
if (img == _redDot)
{
$(this).data('toggle', "1");
$(this).data('color', "1");
}
else if (img == _greenDot)
{
$(this).data('toggle', "1");
$(this).data('color', "2");
}
else if (img == _blueDot)
{
$(this).data('toggle', "1");
$(this).data('color', "3");
}
else
{
$(this).data('toggle', "0");
$(this).data('color', "0");
}
}
else
{
$(this).css('background-image', 'url(' + silverPath + ')');
$(this).data('toggle', "0");
$(this).data('color', "0");
}
}
})
.mouseup(function () {
_mouseDown = 0;
saveDots();
});
$('.colors').click(function() {
$(this).fadeTo("fast", 0.40)
.css('border', '2px solid black');
_currentColor = $(this).css("background-color");
$('.colors').not(this).fadeTo("fast", 1)
.css('border', '0');
});
$(document).ready(function() {
$('.colors#red')
.fadeTo("fast", 0.40)
.css('border', '2px solid black');
$('#r1c1').data('toggle', "0");
$('#r1c2').data('toggle', "0");
$('#r1c3').data('toggle', "0");
$('#r2c1').data('toggle', "0");
$('#r2c2').data('toggle', "0");
$('#r2c3').data('toggle', "0");
$('#r3c1').data('toggle', "0");
$('#r3c2').data('toggle', "0");
$('#r3c3').data('toggle', "0");
$('#r1c1').data('color', "0");
$('#r1c2').data('color', "0");
$('#r1c3').data('color', "0");
$('#r2c1').data('color', "0");
$('#r2c2').data('color', "0");
$('#r2c3').data('color', "0");
$('#r3c1').data('color', "0");
$('#r3c2').data('color', "0");
$('#r3c3').data('color', "0");
});
});
function saveDots() {
var dot1 = $('#r1c1').data('toggle') + '.' + $('#r1c1').data('color');
var dot2 = $('#r1c2').data('toggle') + '.' + $('#r1c2').data('color');
var dot3 = $('#r1c3').data('toggle') + '.' + $('#r1c3').data('color');
var dot4 = $('#r2c1').data('toggle') + '.' + $('#r2c1').data('color');
var dot5 = $('#r2c2').data('toggle') + '.' + $('#r2c2').data('color');
var dot6 = $('#r2c3').data('toggle') + '.' + $('#r2c3').data('color');
var dot7 = $('#r3c1').data('toggle') + '.' + $('#r3c1').data('color');
var dot8 = $('#r3c2').data('toggle') + '.' + $('#r3c2').data('color');
var dot9 = $('#r3c3').data('toggle') + '.' + $('#r3c3').data('color');
if ((dot1 == "1.2") && (dot2 == "1.2") && (dot3 == "1.2")
&& (dot4 == "1.2") && (dot5 == "1.3") && (dot6 == "1.3")
&& (dot7 == "1.2") && (dot8 == "1.2") && (dot9 == "1.2"))
sayHiBob();
}
The Mousedown event starts the selection of the DOTS. At that time, the user can drag the mouse over other buttons using the Mouseenter event or release the mouse triggering the Mouseup event. Whenever the Mouseup event happens, we trigger the SaveDots method that will eventually make an AJAX call to the server to save the current state of the DOTS.
Notice in the JavaScript, I'm saving the DOTS information by using jQuery .data command. This is a nice way to save information but there are some catches with this. The data is stored in the jQuery cache so you must retrieve the data by using the .data command and not the .attr command. The reason people tend to make this mistake is because the .data function in JQuery will attempt to convert the variable stored into a type based on the data. In the example, "1.4" will be returned as number and not a string whereas the storing the data with a .attr function will always make it a string.
Publishing to Azure
This article is focused around building websites in Azure so there needs to be instructions on how to do this. Attached is a great video which shows the simple process of creating and publishing your website to Azure. Azure really does make it simple to get a website up quickly.
<OBJECT type="application/x-shockwave-flash" codebase="http://download.macromedia.com/pub/shockwave/cabs/flash/swflash.cab#version=3,0,0,0" WIDTH="640" HEIGHT="300" data="http://www.youtube.com/v/TZgFPdcKSkM?hl=en_US&version=3"><param name="movie" value="http://www.youtube.com/v/TZgFPdcKSkM?hl=en_US&version=3" /><param name="quality" value="high" /><param name="wmode" value="transparent" /></OBJECT>
Third Challenge: Using SQL on Azure
Bringing IT ! - Defining the Domain
Strap in and hold tight because Challenge 3 is where we really start moving in the DOTS article. Previously, I've talked about domain driven design. The real architecture and strength of the project can now be shown by working from the database up through the different layers of the project. By demonstrating each layer, the hope is to show that while DOTS is a simple and straight forward idea on the surface, the real intention is to have a nice layout that almost any size website can be grown from and shared.
In the above diagram, we illustrate a data layer that hides the database but is available to all of our interfaces and APIs. This allows us to centralize our schema definitions so that all are always in sync and available to our communication layer. With this architecture, it is easy for each part of the communication layer to share information as the CRUD services are happening with each other. It is also easy to add new layers for scalability such as a caching layer to the project.
[key point] By doing the design this way, the DOTS piece is really nothing more then a shared group of information among all devices that can talk to our communication layer. The beauty of this, is that what appears to be the centralized theme of the project (the DOTS) is nothing more the a plug-in piece.
Take a grocery list, a honey-do list, centralized logs, even a group of a social network can all work in this pattern instead of Dots. And even better, the information is now shared among all devices that can hit an API level; smart phones, websites, tablets, servers, and even winform apps.
This is what makes Azure so Cool! For lack of a better phrase, one hosting service that does it all. In the past, one would need a network of owned or leased servers to accomplish this type of site and then scalability would always haunt the software. Now, we can have it all and “share the cake “ too .
Azure – Making the Database
We are going to tackle our model from a Data first design. I first like to make my databases in SQL Server or Express locally so that I can use the design mode of SQL Server.
We need to assume the programmer already knows how to make a database so let's start by taking our local database that was designed in SQL Server Express 2012 and showing how to get this into Azure. Let's start by right clicking on the Database and selecting Generate Scripts from the Tasks drop down.
Click next until the wizard asks how the scripts should be saved or published. Choose Clipboard but do not click next. Clicked the 'Advanced' button first.
In the Advanced Scripting Options, make sure you drop down the 'Script for the database engine type' and select 'SQL Azure Database' as shown.
From here, click OK and follow the rest of the prompts.
You now have the script into memory. It's now time to log into SQL Azure database. The SQL Azure server should have been setup in the first part of this article. Go ahead and login to this server through Management Studtio.
Open up a new Query window. Paste and run the script. That's it, you will now have a mirror copy of the database from your local SQL to SQL Azure.
Data Layer
Repository and Unit of Work Patterns
It was decided to use the Repository and Unit of Work Patterns to build our Data Access Layer (DAL). With the use of these patterns, all communications through any framework (e.g., WebAPI, WCF, MVC) will have central access point to the Data. This gives a clean and persistent interaction between the data and all CRUD services to the database. We also have only one place to make changes to our database schema maps instead of changing all projects when there's a database change.
Linq to Entities is going to be used as the Object-Relational Map (ORM) in our DAL mainly because Microsoft works very nicely with Azure and Entities. There's no reason to mix up this relationship for this article but note, if there is another favorite ORM, it wouldn't be hard to implement for this pattern.
Here's a really nice link to better explain and teach the Repository and Unit of Work Patterns.
Start the Project
Let's first build a new project in our solution and name it DOTS.Data. You can see where I'm going with the naming convention:
DOTS.Web - Web ProjectDOTS.Data – Data Access Layer Project- Later on, I'll introduce
DOTS.WebAPI and DOTS.WCF and so on...
Building our Repository Pattern
Now, let's build our .NET Entity data model of our database. Right click on our project -> Add New Item -> ADO.NET Entity Data Model -> Generate from Database -> Set Entities Connection to Azure Connection String.
Select the Azure connection string or make a new connection to the Azure database. We have DotsConnectionString that I had made previously.
In our Data First model, we are going to make the model from an existing database. We could easily do it the other way however, I usually make my database first. If you know your platform, you are programming against like in this case (Azure), then I like to do Data first modeling only because I can design and avoid any limitations of the database engine rather then trying to convert a model into a database. In this project, it's more of a preference than a right or wrong way of doing it.
Choose all the Tables so Maps can be made from them all.
Now a model diagram should be shown as in the one below:
Now time to make the Interface for our new Repository. Add New Item -> Interface -> Name it IRepository.cs.
The interface is what is going to guarantee the rules that our repository is going to have. Think of it as a contract to anyone that is working with the repository to make sure we are creating things write. Here's the code we have for this:
using System.Linq;

namespace DOTS.Data
{
    public interface IRepository<t> where T : class
    {
        IQueryable GetAll();
        T GetById(int id);
        void Add(T entity);
        void Update(T entity);
        void Delete(T entity);
        void Delete(int id);
    }
}
Ok, let's create the actual Repository that implements the interface from above. Add New Item -> Class -> Repository.cs.
And here's what my repository looks like so far:
using System;
using System.Data;
using System.Data.Entity;
using System.Linq;
namespace DOTS.Data
{
public class Repository<t> : IRepository<t> where T : class
{
protected DotsEntities DbContext { get; set; }
protected DbSet<t> DbSet { get; set; }
public Repository(DotsEntities dbContext)
{
if (dbContext == null) throw new NullReferenceException("dbContext");
DbContext = dbContext;
DbSet = dbContext.Set<t>();
}
#region Implementation of IRepository<t>
public IQueryable GetAll()
{
return DbSet;
}
public T GetById(int id)
{
var someEntity = DbSet.Find(id);
return someEntity;
}
public void Add(T entity)
{
DbSet.Add(entity);
}
public void Update(T entity)
{
var entry = DbContext.Entry(entity);
DbSet.Attach(entity);
entry.State = EntityState.Modified;
}
public void Delete(T entity)
{
var entry = DbContext.Entry(entity);
DbSet.Attach(entity);
entry.State = EntityState.Deleted;
}
public void Delete(int id)
{
var entity = GetById(id);
if (entity == null) return;
Delete(entity);
}
#endregion
}
}
There we go; now we can perform some CRUD operations to the database but our DAL is not done yet. We still have to make the Unit of Work. The Unit of Work will let us actually write the Entities out to the Database in a operational manner.
Building the Unit of Work Pattern
Finally, we get to build the Unit of Work Pattern. If the Repository is to store models for related tables, think of this as the object model of the Database that holds the Repositories.
Add New Item -> Class -> Name it Database.cs
Here's the code that's in the Unit of work. Notice mainly it just gives us access to the repositories under a centralized class that we can appreciate the meaning of.
using System;
using System.Collections.Generic;
using System.Linq;
using System.Text;
using System.Threading.Tasks;

namespace DOTS.Data
{
public class Database
{
private readonly DotsEntities _databaseContext = new DotsEntities();

public IRepository<map> Map
{
get { return new Repository<map>(_databaseContext); }
}

public IRepository<mapvalue> MapValue
{
get { return new Repository<mapvalue>(_databaseContext); }
}

public void Save()
{
_databaseContext.SaveChanges();
}
}
}
With the Unit of Work implementation, we can do CRUD operations easily. Let's look at how something like this would look. Here's some code that I used to test the Unit of Work. You can see how easy and intuitive it is to work with this model.
DOTS.Data.Database database = new Database();

DOTS.Data.Map newMap = new Map();
newMap.name = "TEST";
newMap.writeQuestion = "What is my Dogs Name";
newMap.writeAnswer = "Fido";
newMap.created = DateTime.Now;
database.Map.Add(newMap);

database.Save();
Data Access Layer Conclusion
This completes our Data Access Layer for now. Now we can jump into the Communication Layer. I did get a great start on building the Communication Layer so in the source, there is a working WebAPI project but I'm going to stray a little in the next challenge and link up the communication layer. I'll also hook up a WinForms app to our API which will show how Azure Virtual Machines can be a great place for testing Windows Apps.
The project is starting to come together and I'm learning a lot about writing these types of articles. I hope you enjoy the read and seeing it come together as well.
Fourth Challenge: Virtual Machines
Communication Layer
Coming soon..
Closing
DOTS is going to present many unique challenges for me. This project will be the first time I branch out of my database roots and attempt to also write a communication method or protocol. In doing this, I'm hoping to gain and pass a long some great knowledge of modern techniques of building websites and interacting with the cloud.
I also would like to thank my co-workers for their help in discussing and helping me come up with an idea for entering this contest.
Computers were my hobby before many had them in their homes. I've been programming in some fashion for over 20 years. I live in South Florida with my wife, my 3 year old daughter, and my 2 year old son. They keep us busy but when I do have personal time, I'm usually hacking away on some new technology.
"Capture the domain and the programming is easy" - unknown


 General
  News
News  Suggestion
  Question
  Bug
Bug  Answer
  Joke
Joke  Praise
  Rant
Rant  Admin
Admin 


