Table of Contents
Several years ago, I had to load navigation menu from database and create menu control using web forms, so the main idea of loading the menu data from database was filtering according to the user roles. As an end result, we'll have data filtered by role. Here we've to do it using ASP.NET Core 2.2 MVC application.
I came across this requirement in MVC 6 .NET Core to generate a Role based navigation menu dynamically from the database so it can be used to explore the website and admin panel for management to allocate roles, permissions and other maintenance of the application. In this system, number of roles are limited so role based authorization can be a fit.
Here are the components that you'll need to build and test the demo code provided.
Create your Web Application in Visual Studio 2019.
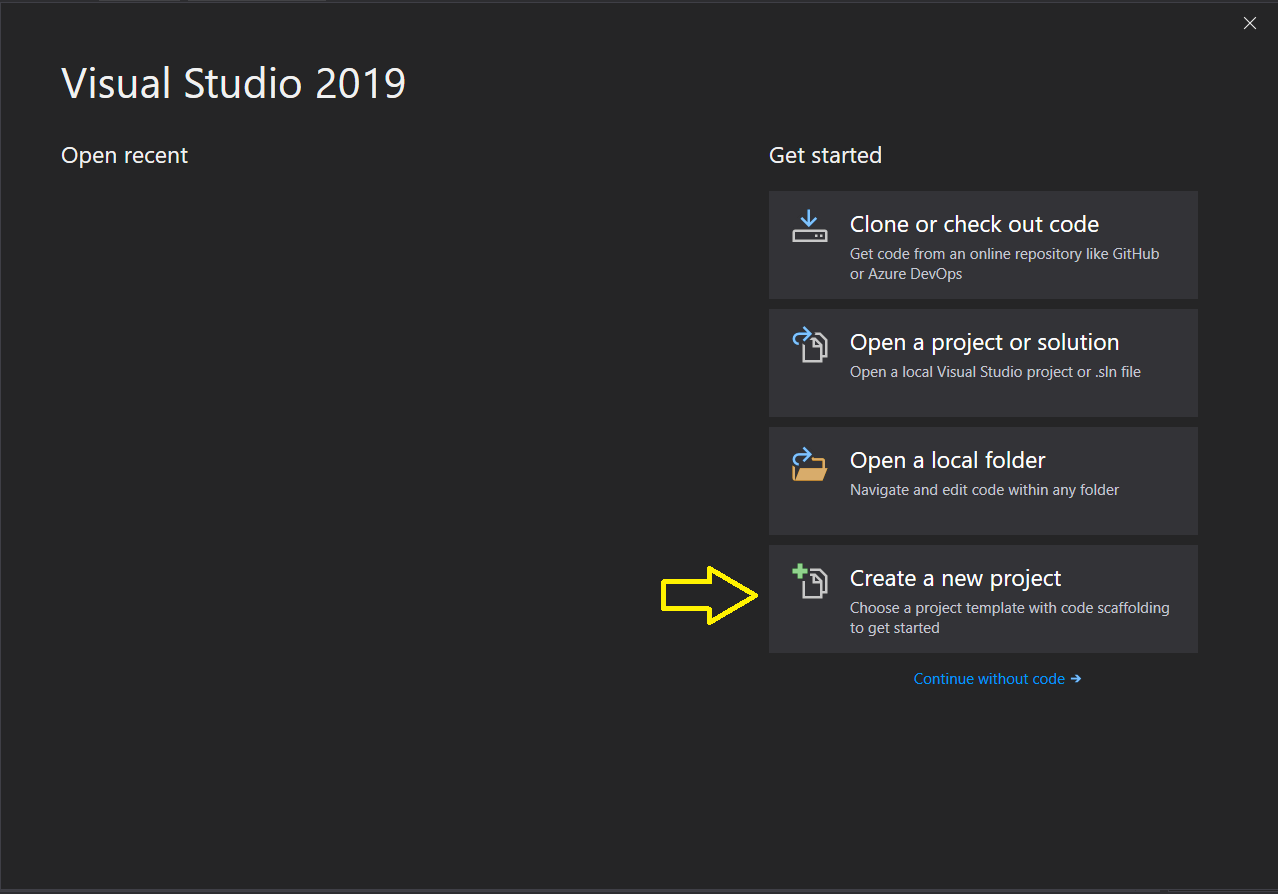
Select the language as C# and Project type as Web then Select the first template, ASP.NET Core Web Application and click Next.

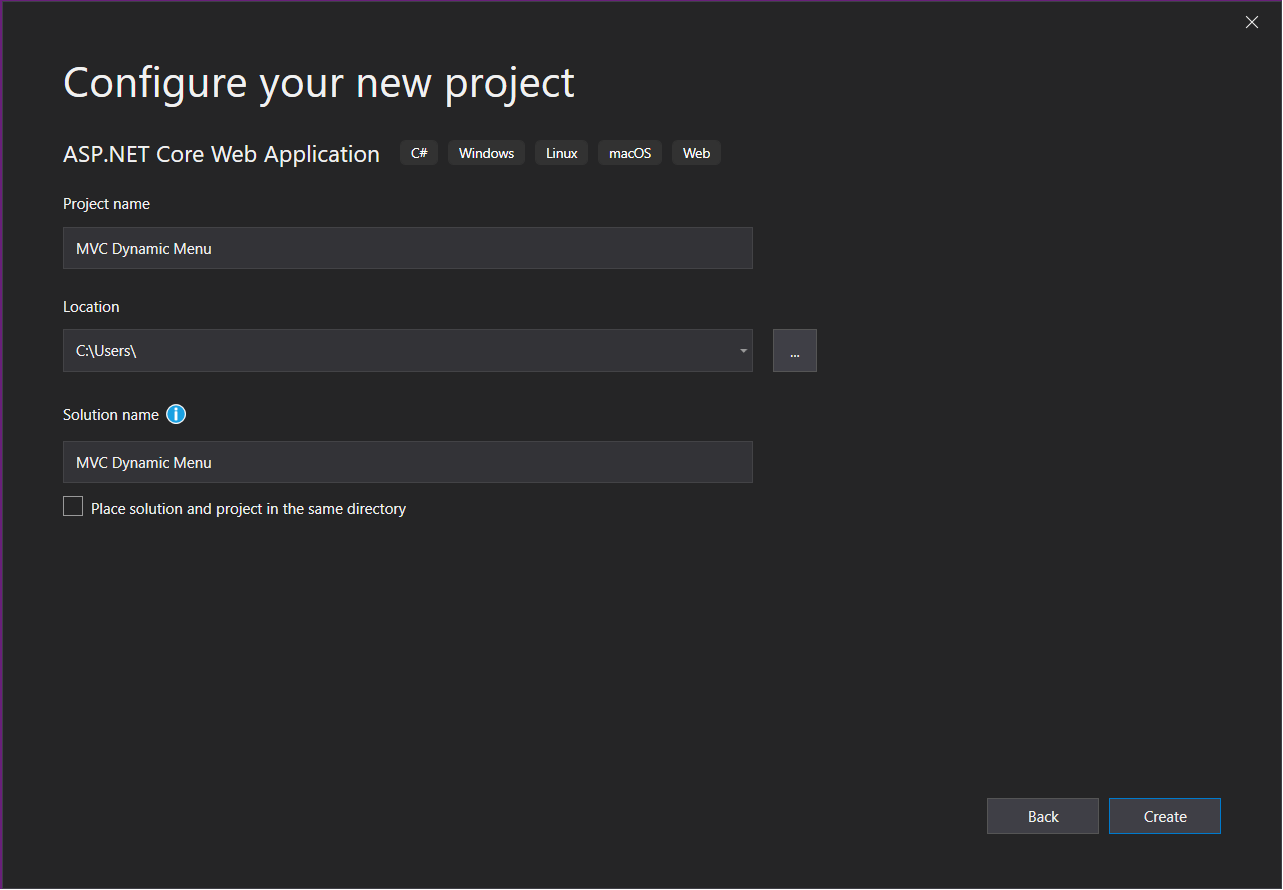
Provide a project name and select the physical path and then click on Create.
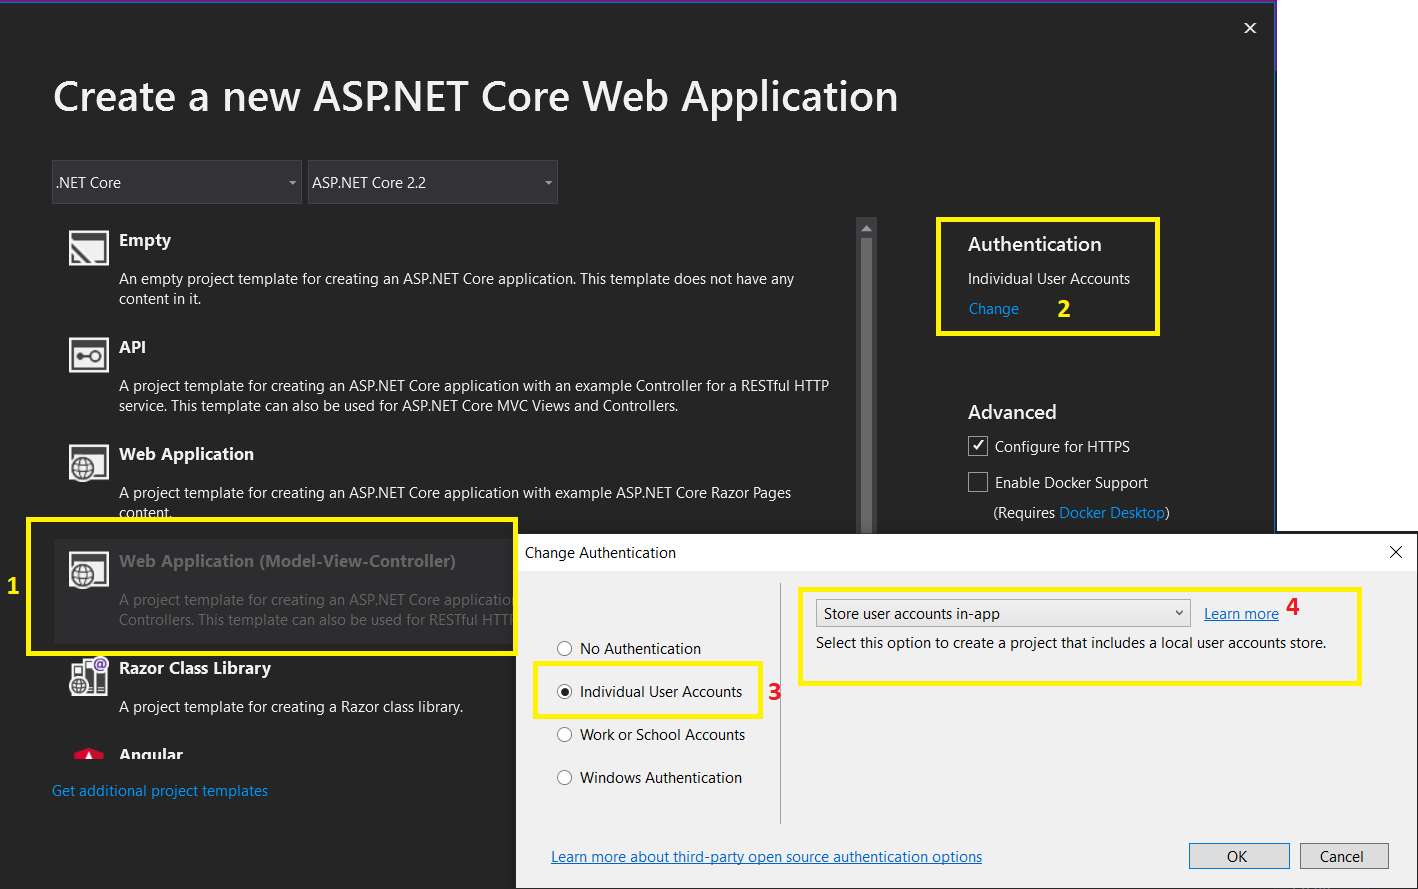
Select the Web Application (Model-View-Controller), then Click on the Change button on the right under Authentication. After that, select the Individual User Accounts, ok to close popup and then Create.
Now the project has been setup and can be run but we don't have any database created based on our model so first, we need to change our connection string in appsettings.json file. I'll be using the localhost as my server with Windows authentication, following is my connection string.
"DefaultConnection": "Server=localhost;Database=DynamicMenu;
Trusted_Connection=True;MultipleActiveResultSets=true"
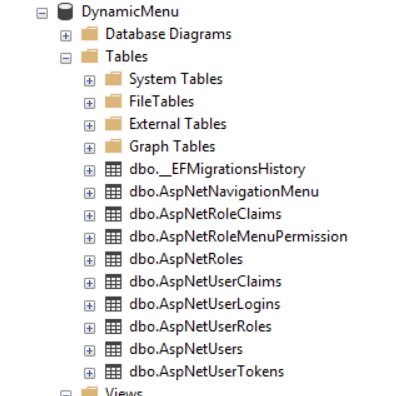
But if we create the database at this level, we'll have only Identity tables like shown below:
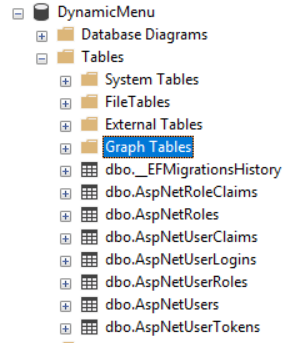
But in our case, we need two more tables which we'll create using code first by defining their entities and then add them to our context class.
[Table(name: "AspNetRoleMenuPermission")]
public class RoleMenuPermission
{
    [Key]
    [DatabaseGenerated(DatabaseGeneratedOption.Identity)]
    public Guid Id { get; set; }

    [ForeignKey("ApplicationRole")]
    public string RoleId { get; set; }

    [ForeignKey("NavigationMenu")]
    public Guid NavigationMenuId { get; set; }

    public NavigationMenu NavigationMenu { get; set; }
}

[Table(name: "AspNetNavigationMenu")]
public class NavigationMenu
{
    [Key]
    [DatabaseGenerated(DatabaseGeneratedOption.Identity)]
    public Guid Id { get; set; }

    public string Name { get; set; }

    [ForeignKey("ParentNavigationMenu")]
    public Guid? ParentMenuId { get; set; }

    public virtual NavigationMenu ParentNavigationMenu { get; set; }

    public string ControllerName { get; set; }

    public string ActionName { get; set; }

    [NotMapped]
    public bool Permitted { get; set; }
}

public class ApplicationDbContext : IdentityDbContext
{
    public ApplicationDbContext(DbContextOptions<ApplicationDbContext> options)
        : base(options)
    {

    }

    public DbSet<RoleMenuPermission> RoleMenuPermission { get; set; }

    public DbSet<NavigationMenu> NavigationMenu { get; set; }

    protected override void OnModelCreating(ModelBuilder builder)
    {
        base.OnModelCreating(builder);
    }
}
Now we need to run the migrations and then update the database, Enable-Migrations command has been obsolete, so we need to delete everything from Migrations folder and then run add migration command.
add-migration InitialVersion
It'll create some files in the Migrations folder then we need to run update-database command if your connection string is correct, then it'll create your database like below:
For more details on Seeding data, you can check my other article:
For the current scenario, our seed will have all the navigational menu items, Users, Roles and permissions. So it'll be a bit more complex.
Now we have our database in place with all the entities, so let's run the application in Development environment and it'll insert the seed data in the database.
We'll create a data service to communicate with the database, it's extremely simple, it has one main function GetMenuItemsAsync which returns Navigation menu view model after filtering by role.
public class DataAccessService : IDataAccessService
{
     private readonly ApplicationDbContext _context;

     public DataAccessService(ApplicationDbContext context)
     {
         _context = context;
     }

     public async Task<List<NavigationMenuViewModel>>
                       GetMenuItemsAsync(ClaimsPrincipal principal)
     {
         var isAuthenticated = principal.Identity.IsAuthenticated;
         if (!isAuthenticated)
             return new List<NavigationMenuViewModel>();

         var roleIds = await GetUserRoleIds(principal);
         var data = await (from menu in _context.RoleMenuPermission
                           where roleIds.Contains(menu.RoleId)
                           select menu)
                           .Select(m => new NavigationMenuViewModel()
                           {
                               Id = m.NavigationMenu.Id,
                               Name = m.NavigationMenu.Name,
                               ActionName = m.NavigationMenu.ActionName,
                               ControllerName = m.NavigationMenu.ControllerName,
                               ParentMenuId = m.NavigationMenu.ParentMenuId,
                           }).Distinct().ToListAsync();

         return data;
     }

     private async Task<List<string>> GetUserRoleIds(ClaimsPrincipal ctx)
     {
         var userId = GetUserId(ctx);
         var data = await (from role in _context.UserRoles
                           where role.UserId == userId
                           select role.RoleId).ToListAsync();

         return data;
     }

     private string GetUserId(ClaimsPrincipal user)
     {
         return ((ClaimsIdentity)user.Identity).FindFirst(ClaimTypes.NameIdentifier)?.Value;
     }
}
We need to register this service in the Startup.cs as well so Dependency Injection can serve it. It can be registered like this:
services.AddScoped<IDataAccessService, DataAccessService>();
We'll use View Component for loading navigational menu as a partial view:
public class NavigationMenuViewComponent : ViewComponent
{
    private readonly IDataAccessService _dataAccessService;

    public NavigationMenuViewComponent(IDataAccessService dataAccessService)
    {
        _dataAccessService = dataAccessService;
    }

    public async Task<IViewComponentResult> InvokeAsync()
    {
        var items = await _dataAccessService.GetMenuItemsAsync(HttpContext.User);

        return View(items);
    }
}
Create a Components folder in the Shared folder in Views. So in components, we can create NavigationMenu folder and then Default.cshtml view file. Here, that hierarchy is very important for it to work.

Here is the partial view HTML, here we'll keep our scope to 2 level menu only it can go to N level with recursion but to keep it limited here, we'll not use it.
@model List<Mvc.DynamicMenu.Models.NavigationMenuViewModel>
@{
    ViewData["Title"] = "NavigationMenu";
}
<a class="navbar-brand" asp-area="" asp-controller="Home" asp-action="Index">Dynamic Menu</a>
<button class="navbar-toggler" type="button" data-toggle="collapse"
 data-target="#navbarsExampleDefault" aria-controls="navbarsExampleDefault"
 aria-expanded="false" aria-label="Toggle navigation">
    <span class="navbar-toggler-icon"></span>
</button>
<div class="collapse navbar-collapse" id="navbarsExampleDefault">
    <ul class="navbar-nav mr-auto">
        <li class="nav-item">
            <a class="nav-link text" asp-area=""
             asp-controller="Home" asp-action="Index">Home</a>
        </li>
        <li class="nav-item">
            <a class="nav-link text" asp-area="" asp-controller="Home"
             asp-action="Privacy">Privacy Policy</a>
        </li>

        @*Menu Items from the database*@

        @foreach (var item in Model)
        {
            if (item.ParentMenuId == null) //Level one items will have null parent id
            {
                if (!string.IsNullOrWhiteSpace(item.ControllerName))
                {
                    <li class="nav-item active">
                        <a class="nav-link text" asp-area=""
                         asp-controller="@item.ControllerName"
                         asp-action="@item.ActionName">@item.Name</a>
                    </li>
                }
                var children = Model.Where(x => x.ParentMenuId == item.Id).ToList();
                if (children != null) //Level one item has children so append them
                {
                    <li class="nav-item dropdown">
                        <a class="nav-link dropdown-toggle" href="#" id="dropdown01"
                         data-toggle="dropdown" aria-haspopup="true" aria-expanded="false">
                         @item.Name</a>
                        <div class="dropdown-menu" aria-labelledby="dropdown01">
                            @foreach (var itm in children)
                            {
                                <a class="dropdown-item" asp-area=""
                                 asp-controller="@itm.ControllerName"
                                 asp-action="@itm.ActionName">@itm.Name</a>
                            }
                        </div>
                    </li>
                }
            }
        }
    </ul>
    <partial name="_LoginPartial" />
</div>
Now we'll create a controller named Administration with two actions, Roles and Users.
public class AdministrationController : Controller
{
     private readonly UserManager<IdentityUser> _userManager;
     private readonly RoleManager<IdentityRole> _roleManager;
     private readonly ILogger<AdministrationController> _logger;

     public AdministrationController(
             UserManager<IdentityUser> userManager,
             RoleManager<IdentityRole> roleManager,
             ILogger<AdministrationController> logger)
     {
         _userManager = userManager;
         _roleManager = roleManager;
         _logger = logger;
     }

     public async Task<IActionResult> Roles()
     {
            .......
     }

     public async Task<IActionResult> Users()
     {
            ........
     }
}
After the controller, we'll create views for these actions where we can show the list of Roles and Users respectively.
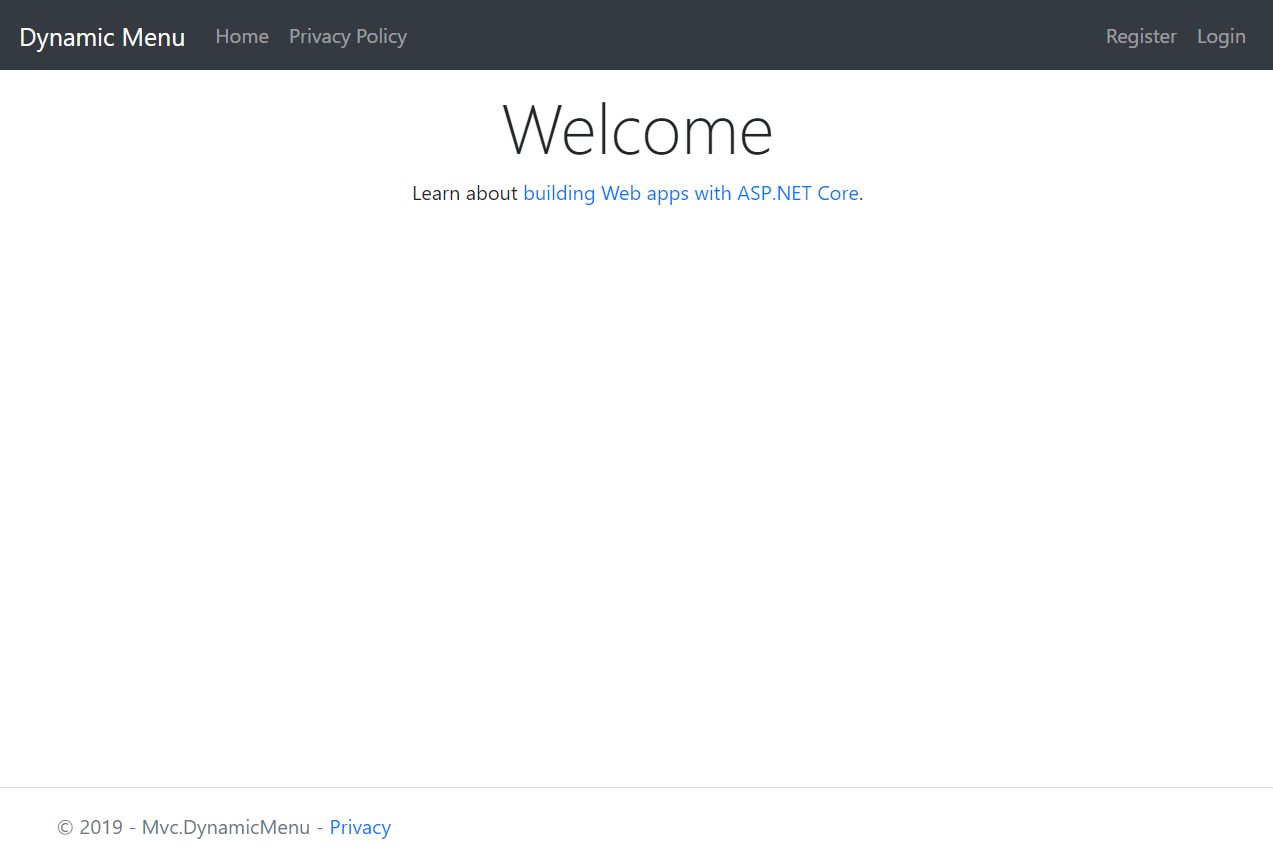
Let's start the application once again here's how it'll look like, for any visitor the page looks like this but it'll load the additional menu items according to the roles assigned to the user.
Let's login with the user admin@test.com. Now the page looks like below with additional menu items allowed to admin according to their roles.

So here is how that menu has been drawn with a partial view after login.
Now we have one problem if somebody knows the URL of the page like https://localhost/administration/roles, they can still access the page. So next, we'll see how to do Role based Authorization..
We have achieved our goal of creating navigational menu from database when we create our database through migrations and started our project under Development environment. Logged in User sees menu items according to their roles. The source code is attached. I encourage you to run and see it. All of you are most welcome to post comments if you have any questions/suggestions. Thanks for reading.
- 26th August, 2019: Initial version
This member has not yet provided a Biography. Assume it's interesting and varied, and probably something to do with programming.


 General
  News
News  Suggestion
  Question
  Bug
Bug  Answer
  Joke
Joke  Praise
  Rant
Rant  Admin
Admin 


