How to Extend NuPack to Complement its Behavior
4.50/5 (8 votes)
NuPack is a nuget package that injects a build action to create a nuget package at build time. It covers common patterns but can't handle specific needs or advanced features natively. Fortunately, it offers an extension API to complete its behavior.
Introduction
Installing NuPack nuget package on a project allows you to automate creation of nuget package. Indeed, it manages common library template and console application as build action.
General description can be found in this tip: How to create a nuget package on each Visual Studio build?
NuPack comes with an extension system based on nugets package, thanks to the package, NuPack Extension 4.0+.
NuPack Extension 4.0+
NuPack extension 4.0+ is a nuget package to install if you want to improve NuPack behavior. Indeed, after installation of this nuget package, you will be able to implement an interface named NuPack.Extension.IPlugin.

We can see interface is very simple and required to implement only Update and Dispose methods:
Updatemethod has 2 arguments: Setting that represents arguments passed to NuPack (solution, project, configuration, platform & assembly) andPackageBuilderthat is an object which comes with NuGet.Core nuget package.
Disposemethod comes withSystem.IDisposable interface. This method will be called only after full NuPack process. In this way, you will be able to do something more after nuget package creation. (publish to a nuget server for example)
How To: Step By Step
Let's create an extension to automatically set license URL to MIT license.
- Create a library project

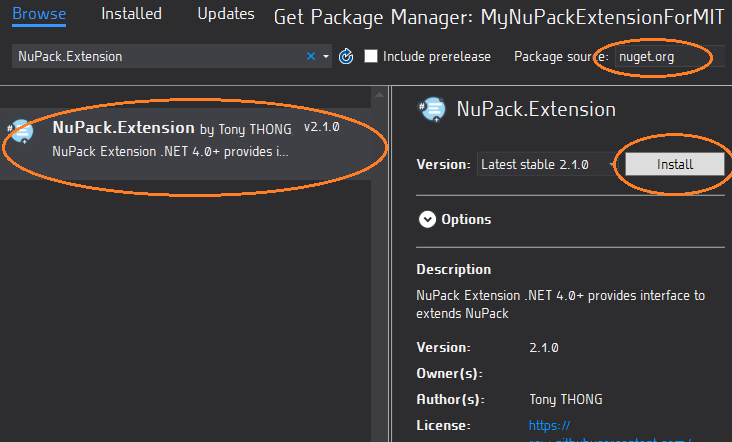
- Install NuPack Extension 2.1.0+

- Create a class and implement
NuPack.Extension.IPlugin.
- Install NuPack to create your nuget package containing your extension:

- Build the project to generate the nuget package.
Note: The generated nuget package has a custom structure defined by NuPack for extension recognition.
Test Extension
- Create a library project:

- Install NuPack 3.4.2+ and Install your extension (you can refer to this tip to create a local store to test your nuget package):

- Build project and open it with nuget package explore:

It sounds good, the extension works!
Conclusion
NuPack can help you to save time by producing your nuget package automatically at build time with Visual Studio / MSBuild. You can create an extension for NuPack materialized as a nuget package. As the extension is a nuget package, it can easily be versioned, deployed and updated. This technique offers the possibility of performing very advanced processing and simply controlling the behavior of NuPack by composing with the extensions.
