
Gadget Maker IDE
4.30/5 (7 votes)
This article explains how to create a Gagdet using an IDE


Introduction
I have created an IDE using Visual C# 2010 (Express Edition) that automates the process of creating a Windows Vista Gadget. This IDE has the common features found in an IDE, for example, editing the HTML/JavaScript code using an editor, editing the gadget manifest using a GUI interface, inserting generic code and building the gadget. I have used SharpZipLib, a free C# compression library to compress the gadget files.
Background
Windows Vista Gadgets are small applications which are hosted on the Sidebar. The code for a gadget is defined using HTML and JavaScript, while properties of the gadget are defined using an XML file. In the IDE, I have used a Rich Text Box to create/edit the HTML and JavaScript code. To specify the gadget properties, I have created a GUI interface using Text Box controls. Common operations like opening files, saving files, cutting text, copying text, pasting text and setting foreground and background colors and setting fonts are performed using menu commands. A gadget is created by compressing the files that make up the gadget.
Using the Code
Following are the steps to use the IDE:
- Select the 'File -> New' menu command from the Gadget tab and type the code for the gadget. Alternatively, use the 'Gadget -> Insert Template' menu command from the Gadget tab to insert a default template which can be edited if required.
- Save the file as an HTML file using the 'File -> Save' command.
- Click on the Properties tab and edit values for the Gadget properties or use the default values. Ensure that the value of
Sourceproperty is the same as the HTML file name (without path). - Save the properties by clicking on the 'Save Gadget Manifest' button.
- You can view the Gadget XML file by clicking on the 'View Gadget Manifest' button.
- Select the 'Gadget -> Build Gadget' menu command from the Gadget tab to build the gadget.
- Double click the gadget file to install it.
I have used the following code to define a default template which is inserted by using the 'Insert Template' command from the Gadget Menu. This default template can be used to create a simple 'Hello World' gadget. It can be modified as per the requirement of the user. The entire template code is stored in a string variable and returned from the GetTemplate() function.
private string GetTemplate()
{
    string template="";
    try
    {
        template = "<html>\n";
        template += "<head>\n";
        template += "<title>My Gadget</title>\n";
        template += "<style>\n";
        template += "body\n";
        template += "{\n";
        template += "margin: 0px;\n";
        template += "width: 130px;\n";
        template += "height: 80px;\n";
        template += "}\n";
        template += "#gadgetContent\n";
        template += "{\n";
        template += "width: 130px;\n";
        template += "top: 24px;\n";
        template += "text-align: center;\n";
        template += "position: absolute;\n";
        template += "font-family: Verdana;\n";
        template += "font-size: 10pt;\n";
        template += "}\n";
        template += "</style>\n";
        template += "</head>\n";
        template += "<body>\n";
        template += "<span id=\"gadgetContent\">\n";
        template += "<!--\n";
        template += "Your content goes here\n";
        template += "-->\n";
        template += "<marquee><h2 style=\"color:red\">Hello World</h2></marquee>\n";
        template += "</span>\n";
        template += "</body>\n";
        template += "</html>\n";
    }
    catch (Exception ex)
    {
        MessageBox.Show(ex.Message, "Error", MessageBoxButtons.OK, MessageBoxIcon.Error);
    }
    return template;
}
The return value of the GetTemplate() function is assigned to the text property of the editor control.
Following is the code to set the template on the Rich Text Editor:
private void insertTemplateToolStripMenuItem_Click(object sender, EventArgs e)
{
    try
    {
        if (txtEditor.Modified)
        {
            if (MessageBox.Show("Do you want to save the current file?",
            "Confirm file save", MessageBoxButtons.YesNo,
            MessageBoxIcon.Question) == DialogResult.Yes)
            {
                saveToolStripMenuItem_Click(sender, e);
            }
        }
        txtEditor.Text = GetTemplate();
        txtEditor.Modified = true;
        txtEditor.Tag = "";
        this.Text = "Gadget Maker";
        MessageBox.Show("Now you can edit the gadget content and layout",
        "Edit", MessageBoxButtons.OK, MessageBoxIcon.Information);
    }
    catch (Exception ex)
    {
        MessageBox.Show(ex.Message, "Error", MessageBoxButtons.OK, MessageBoxIcon.Error);
    }
}
The following code is used to save the gadget settings as gadget.xml file. The properties are appended into a string variable and saved into the gadget.xml file using a StreamWriter object.
private void btnSave_Click(object sender, EventArgs e)
{
    try
    {
        string xml = "<?xml version=\"1.0\" encoding=\"utf-8\"?>";
        xml += "<gadget>";
        xml += "<name>" + txtGadgetName.Text + "</name>";
        xml += "<namespace>" + txtNamespace.Text + "</namespace>";
        xml += "<version>" + txtVersion.Text + "</version>";
        xml += "<author name=\"" + txtAuthorName.Text + "\">";
        xml += "<info url=\"" + txtInfoURL.Text + "\"/>";
        xml += "</author>";
        xml += "<copyright>" + txtCopyright.Text + "</copyright>";
        xml += "<description>" + txtDescription.Text + "</description>";
        xml += "<hosts>";
        xml += "<host name=\"" + txtHostName.Text + "\">";
        xml += "<base type=\"" + txtBaseType.Text + "\" apiversion=\"" +
        txtVersion.Text + "\" src=\"" + txtSource.Text + "\"/>";
        xml += "<platform minPlatformVersion=\"" + txtMinPlatformVersion.Text + "\"/>";
        xml += "<permissions>" + txtPermissions.Text + "</permissions>";
        xml += "</host>";
        xml += "</hosts>";
        xml += "</gadget>";
        FileStream manifestfile = new FileStream(Path.GetDirectoryName
        (txtEditor.Tag.ToString()) + "\\gadget.xml",
        FileMode.Create, FileAccess.Write, FileShare.None);
        StreamWriter writer = new StreamWriter(manifestfile);
        writer.WriteLine(xml);
        writer.Close();
        manifestfile.Close();
        MessageBox.Show("Gadget Manifest Saved", "Message",
        MessageBoxButtons.OK, MessageBoxIcon.Information);
    }
    catch (Exception ex)
    {
        MessageBox.Show(ex.Message, "Error",
        	MessageBoxButtons.OK, MessageBoxIcon.Information);
    }
}
The following code compresses the HTML and XML files into a .gadget file using the SharpZipLib compression library. The gadget file is saved in the same folder where you have saved the HTML file and has the same name as the HTML file.
private void buildToolStripMenuItem_Click(object sender, EventArgs e)
{
    try
    {
        if (txtSource.Text.Trim().Length == 0)
        {
            MessageBox.Show("File not saved. Please save file first.",
            "Error", MessageBoxButtons.OK, MessageBoxIcon.Error);
            return;
        }
        ZipOutputStream zs = new ZipOutputStream(File.Create
        (Path.GetDirectoryName(txtEditor.Tag.ToString()) + "\\" +
        Path.GetFileNameWithoutExtension(txtEditor.Tag.ToString()) + ".gadget"));
        FileStream fs1 = File.OpenRead(txtEditor.Tag.ToString());
        byte[] b1 = new byte[fs1.Length - 1];
        fs1.Read(b1, 0, b1.Length);
        ZipEntry entry1 = new ZipEntry(Path.GetFileName(txtEditor.Tag.ToString()));
        entry1.DateTime = DateTime.Now;
        entry1.Size = fs1.Length - 1;
        fs1.Close();
        zs.PutNextEntry(entry1);
        zs.Write(b1, 0, b1.Length);
        FileStream fs2 = File.OpenRead(Path.GetDirectoryName
        (txtEditor.Tag.ToString()) + "\\gadget.xml");
        byte[] b2 = new byte[fs2.Length - 1];
        fs2.Read(b2, 0, b2.Length);
        ZipEntry entry2 = new ZipEntry(Path.GetFileName
        (Path.GetDirectoryName(txtEditor.Tag.ToString()) + "\\gadget.xml"));
        entry2.DateTime = DateTime.Now;
        entry2.Size = fs2.Length - 1;
        fs2.Close();
        zs.PutNextEntry(entry2);
        zs.Write(b2, 0, b2.Length);
        zs.Close();
        MessageBox.Show("Build Completed. Gadget saved as " +
        Path.GetDirectoryName(txtEditor.Tag.ToString()) + "\\" +
        Path.GetFileNameWithoutExtension(txtEditor.Tag.ToString()) +
        ".gadget", "Build Completed", MessageBoxButtons.OK, MessageBoxIcon.Information);
    }
    catch (Exception ex)
    {
        MessageBox.Show(ex.Message, "Error",
        MessageBoxButtons.OK, MessageBoxIcon.Information);
    }
}
Double clicking on the gadget file will display the following screen:
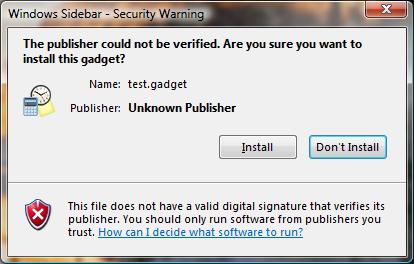
Clicking on the Install button will install the gadget on the sidebar.
Points of Interest
This application is developed using Visual C# 2010 Express Edition. It can be executed by double clicking on the GadgetMaker.exe file from the bin/Debug or bin/Release folder.
History
- 29th September, 2011 - Initial version