
ASP.NET Core Blazor Filtering and Sorting using Entity Framework and Web API
5.00/5 (6 votes)
This article will explain in detail about, how to create an ASP.NET Core Blazor Filter and Sorting for HTML Table using Entity Framework and Web API.
Introduction

This article will explain in detail how to create an ASP.NET Core Blazor Filter and Sorting for HTML Table using Entity Framework and Web API.
This article will explain:
- How to create a ASP.NET Core Blazor Web application
- How to install the Package for using Entity Framework and creating
DBContextclass - How to get result from Web API and bind result in Blazor client Razor view
- Adding Sorting and Filtering features for the HTML table
Read my previous article which explains in detail about ASP.NET Core Blazor CRUD using Entity Framework and Web API
Background
Prerequisites
Make sure you have installed all the prerequisites on your computer. If not, then download and install all, one by one. Note that since Blazor is the new framework and we must have installed preview of Visual Studio 2017 (15.7) or above.
- Install the .NET Core 2.1 Preview 2 SDK. (You can find the all versions from this link)
- Install the latest preview of Visual Studio 2017 (15.7)
- Install the ASP.NET Core Blazor Language Services for Blazor Extensions
Using the Code
Step 1 - Create a Database and a Table
We will be using our SQL Server database for our WEB API and EF. First, we create a database named StudentsDB and a table as StudentMaster. Here is the SQL script to create a database table and sample record insert query in our table. Run the query given below in your local SQL Server to create a database and a table to be used in our project.
USE MASTER
GO

-- 1) Check for the Database Exists .If the database is exist then drop and create new DB
IF EXISTS (SELECT [name] FROM sys.databases WHERE [name] = 'StudentsDB' )
DROP DATABASE StudentsDB
GO

CREATE DATABASE StudentsDB
GO

USE StudentsDB
GO

-- 1) //////////// StudentMasters

IF EXISTS ( SELECT [name] FROM sys.tables WHERE [name] = 'StudentMasters' )
DROP TABLE StudentMasters
GO

CREATE TABLE [dbo].[StudentMasters](
        [StdID] INT IDENTITY PRIMARY KEY,
        [StdName] [varchar](100) NOT NULL,
        [Email]  [varchar](100) NOT NULL,
        [Phone]  [varchar](20) NOT NULL,
        [Address]  [varchar](200) NOT NULL
)

-- insert sample data to Student Master table
INSERT INTO [StudentMasters]   ([StdName],[Email],[Phone],[Address])
     VALUES ('Shanu','syedshanumcain@gmail.com','01030550007','Madurai,India')

INSERT INTO [StudentMasters]   ([StdName],[Email],[Phone],[Address])
     VALUES ('Afraz','Afraz@afrazmail.com','01030550006','Madurai,India')

INSERT INTO [StudentMasters]   ([StdName],[Email],[Phone],[Address])
     VALUES ('Afreen','Afreen@afreenmail.com','01030550005','Madurai,India')

     select * from [StudentMasters]
Step 2 - Create ASP.NET Core Blazor Application
After installing all the prerequisites listed above and ASP.NET Core Blazor Language Services, click Start >> Programs >> Visual Studio 2017 >> Visual Studio 2017 on your desktop. Click New >> Project. Select Web >> ASP.NET Core Angular Web Application. Enter your project name and click OK.

Select Blazor (ASP.NET Core hosted) and click ok.

After creating ASP.NET Core Blazor Application, wait for a few seconds. You will see the below structure in solution explorer.

What is New in ASP.NET Core Blazor Solution?
When we create our new ASP.NET Core Blazor application, we can see there will be 3 projects that will be automatically created in the solution Explorer.
Client Project
The first project is created as the Client project and it will be as our Solutionname.Client and here we can see our Solutionname as “BlazorASPCORE”. As the project named as client and this project will be mainly focused for all the client-side view. Here, we will be adding all our page views to be displayed in the client side in browser.

We can see as few sample page has been already added here and we can also see a shared folder same like our MVC application where will be having the Sharedfolder and Layout page for the Master page. Here, in Blazor, we have the MainLayout which will be work like the Master page and NavMenu for the left side menu display.
Server Project
As the name indicates, this project will be used as a Server project. This project is mainly used to create all our Controllers and WEB API Controllers to perform all business logic and perform CRUD operation using WEB APIs. In our demo application, we will be adding a Web API in this Server project and all the WEB API in our Client application. This Server project will work like get/set the data from Database and from our Client project, we bind or send the result to this server to perform the CRUD operation in database.

Shared Project
As the name indicates, this project works like a shared project. This project works as a Model for our Server project and for the Client project. The Model declared in this Shared project will be used in both the Server and in the Client project. We also install all the packages needed for our project here, for example to use the Entity Framework, we install all the packages in this Shared project.

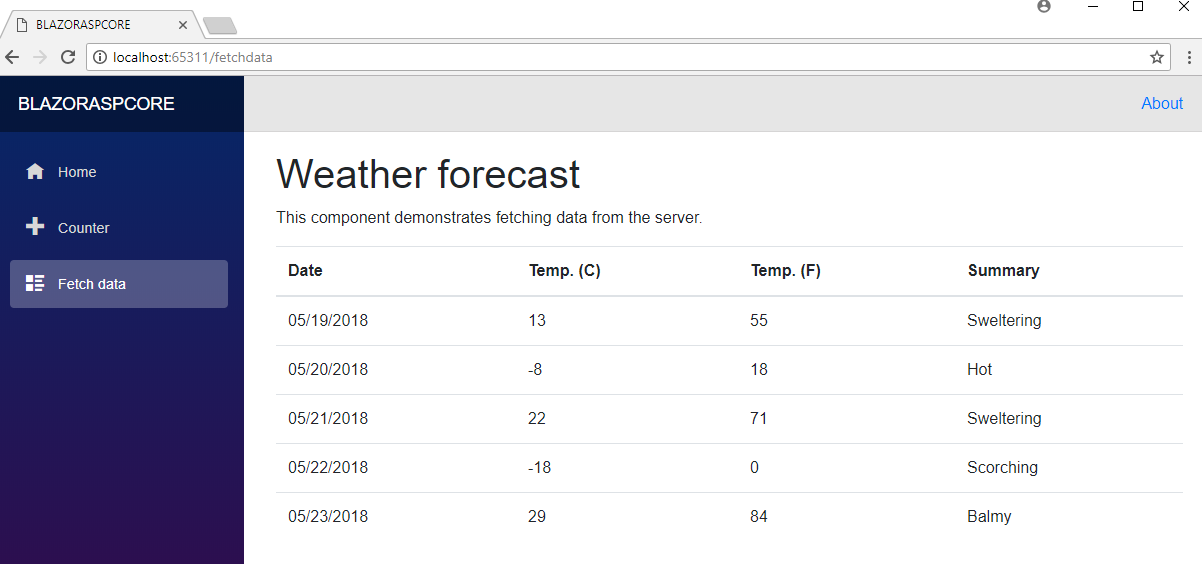
Run to Test the Application
When we run the application, we can see that the left side has navigation and the right side contains the data. We can see as the default sample pages and menus will be displayed in our Blazor web site. We can use the pages or remove it and start with our own page.
Now let’s see how to add new page perform the CRUD operation for maintain student details.
Using Entity Framework
To use the Entity Framework in our Blazor application, we need to install the below packages.
Install the Packages
Go to Tools and then select -> NuGet Package Manager -> Package Manager Console.

You can see the Console at the bottom of the VS 2017 IDE and in right side of the combobox on the console, select the Default project as your shared project ”Select Shared”.

- You can see the PM> and copy and paste the below line to install the Database Provider package. This package is used to set the database provider as SQL Server:
Install-Package Microsoft.EntityFrameworkCore.SqlServer
We can see as the package is installed in our Shared folder.
Install the Entity Framework.
- You can see the PM> and copy and paste the below line to install the EF package.
Install-Package Microsoft.EntityFrameworkCore.Tools
To Create DB Context and set the DB Connection string.
- You can see the PM> and copy and paste the below line set the Connection string and create DB Context. This is an important part as we give our SQL Server name, Database Name and SQL server UID and SQL Server Password to connect to our database for performing the CRUD operation. We also give our SQL Table name to create the
Modelclass in our Shared project.Scaffold-DbContext "Server= YourSqlServerName;Database=StudentsDB;user id= YourSqlUID; password= YourSqlPassword;Trusted_Connection=True;MultipleActiveResultSets=true" Microsoft.EntityFrameworkCore.SqlServer -OutputDir Models -Tables StudentMasters
Press enter create connection string, Model Class and Database Context.

We can see StudentMasters Model class and StudentsDBContext class has been created in our Shared project. We will be using this Model and DBContext in our Server project to create our Web API to perform the CRUD operations.
Creating Web API for Get Student Details
To create our WEB API Controller, right click Controllers folder. Click Add New Controller.

Here, we will be using Scaffold method to create our WEB API. We select API Controller with actions, using Entity Framework.

Select our Model and DatabaseContext from the Shared project.

Select our StudentMasters Model from the Shared Project for performing the CRUD operation.

Select the Data Context Class as our StudentsDBContext from the Shared project. Our Controller name will be automatically added, if you need you can change it and click the ADD.

We will be using only the Get method from our Web API.

To test Get method, we can run our project and copy the GET method API path. Here, we can see our API path to get api/StudentMasters/.
Run the program and paste API path to test our output.

Now we will bind all this WEB API Json result in our View page from our Client project.
Working with Client Project
First, we need to add the new Razor view page
Add Razor View
To add the Razor view page, right click the Pages folder from the Client project. Click on Add >> New Item.

Select Razor View >> Enter your page name. Here, we have given the name as Students.chtml.

In Razor view Page, we have 3 parts of code as first is the Import part where we import all the references and models for using in the view, HTML design and data bind part and finally, we have the function part to call all the web API to bind in our HTML page and also to perform client-side business logic to be displayed in View page.
Import Part
First, we import all the needed support files and references in our Razor View page. Here, we have first imported our Model class to be used in our view and also imported HTTPClient for calling the Web API to perform the CRUD operations.
@using BLAZORASPCORE.Shared
@using BLAZORASPCORE.Shared.Models
@page "/Students"
@using Microsoft.AspNetCore.Blazor.Browser.Interop
@inject HttpClient Http
HTML Design and Data Bind Part
Next, we design our Student details page to bind the student details from the Web API to HTML table.
Adding Sorting Features in Table Heading
In the Table heading part for each heading, we add the Sorting Image. In Sorting Image Button Click event, we call the Sorting function and pass each Sorting Column name to the click event. In Function code part, we sort the Web API and display the result by ascending and in descending order by each column header soring image click.
<table style="background-color:#FFFFFF; border-style:inset;border-width:1px;
border-color:#6D7B8D; padding:2px;width:100%;table-layout:fixed;" cellpadding="1" cellspacing="1">
        <tr style="background-color:#2d364d ; color:#FFFFFF ;border-style:dashed;
         border-width:2px;border-color:0A2464;" >
            <td width="30" align="center"></td>
            <td width="80" align="center">
                <img src="@ImageSortname" onclick="@(async () => await StudentSorting("StdId"))"
                 height="24" width="24"/>
                Student ID

            </td>
            <td width="240" align="center">
                <img src="@ImageSortname" onclick="@(async () => await StudentSorting("StdName"))"
                 height="24" width="24"/>
                Student Name
            </td>
            <td width="240" align="center">
                <img src="@ImageSortname" onclick="@(async () => await StudentSorting("Email"))"
                 height="24" width="24"/>
                Email
            </td>
            <td width="120" align="center">
                <img src="@ImageSortname" onclick="@(async () => await StudentSorting("Phone"))"
                 height="24" width="24"/>
                Phone
            </td>
            <td width="340" align="center">
                <img src="@ImageSortname" onclick="@(async () => await StudentSorting("Address"))"
                 height="24" width="24"/>
                Address
            </td>
        </tr>
Adding Filtering Features in Table Heading
In the Table heading part, we add a new row. In table row, we add the Textbox for each column to perform the filtering for the binded result. In Textbox onChange event, we call the method to perform the Filtering operation from the code function part.
<tr style="height: 30px; background-color:#336699 ; color:#FFFFFF ;">
            <td width="30" align="center"></td>
            <td width="80" align="center">Filter : </td>
            <td width="240" align="center">
                <input width="70" <a href="mailto:onchange=@OnstdNameChanged">
                 onchange=@OnstdNameChanged</a> oninput="(this.dispatchEvent
                 (new CustomEvent('change', {bubbles: true})))" />
            </td>
            <td width="240" align="center">
                <input width="70" <a href="mailto:onchange=@OnEmailChanged">
                 onchange=@OnEmailChanged</a> oninput="(this.dispatchEvent
                 (new CustomEvent('change', {bubbles: true})))" />
            </td>
            <td width="120" align="center">
                <input width="70" <a href="mailto:onchange=@OnPhoneChanged">
                 onchange=@OnPhoneChanged</a> oninput="(this.dispatchEvent
                 (new CustomEvent('change', {bubbles: true})))" />
            </td>
            <td width="340" align="center">
                <input width="70" <a href="mailto:onchange=@OnAddressChanged">
                 onchange=@OnAddressChanged</a> oninput="(this.dispatchEvent
                 (new CustomEvent('change', {bubbles: true})))" />
            </td>
        </tr>
Bind the Result
We bind the Web API result in HTML component part.
@foreach (var StudentMasters in stdMaster)
        {
            <tr style="border-style:dashed;border-width:2px;border-color:#659EC7;">
                <td align="center" style="border: solid1px#659EC7; padding: 5px;table-layout:fixed;">

                </td>
                <td align="center">

                    <span style="color:#9F000F">
                        @StudentMasters.StdId
                    </span>
                </td>
                <td align="center">
                    <span style="color:#9F000F">
                        @StudentMasters.StdName
                    </span>
                </td>
                <td align="center">
                    <span style="color:#9F000F">
                        @StudentMasters.Email
                    </span>
                </td>
                <td align="center">
                    <span style="color:#9F000F">
                        @StudentMasters.Phone
                    </span>
                </td>
                <td align="center">
                    <span style="color:#9F000F">
                        @StudentMasters.Address
                    </span>
                </td>
            </tr>
        }
Function Part
Function part to call all the web API to bind in our HTML page and also to perform client-side business logic to be displayed in View page.
Init Method
In the Init method, we get the result of Web API for student details and store it in the StudentMaster object and we using this object to be bound in our HTML table using the foreach statement.
@functions {
    StudentMasters[] stdMaster;
    StudentMasters stdmst = new StudentMasters();
    int ids = 0;
    int studentIDs = 0;
    string ImageSortname = "Images/sortAsc.png";

    protected override async Task OnInitAsync()
    {
        stdMaster = await Http.GetJsonAsync<StudentMasters[]>("/api/StudentMasters/");
    }
Sorting Method
In Sorting image, click on each column heading, we call this method and pass the column name to this method. In this method depending on column name, we do Sorting the Web API result and bind the result in the HTML table. We also do the vice versa sorting of Ascending and descending.
//Sorting
    protected async Task StudentSorting(string SortColumn)
    {
        stdMaster = await Http.GetJsonAsync<StudentMasters[]>("/api/StudentMasters/");

        if (ids == 0)
        {
            ImageSortname = "Images/sortDec.png";
            ids = 1;

            switch (SortColumn)
            {
                case "StdId":
                    stdMaster = stdMaster.OrderBy(x => x.StdId).ToArray() ;
                    break;
                case "StdName":
                    stdMaster = stdMaster.OrderBy(x => x.StdName).ToArray();
                    break;

                case "Email":
                    stdMaster = stdMaster.OrderBy(x => x.Email).ToArray();
                    break;
                case "Phone":
                    stdMaster = stdMaster.OrderBy(x => x.Phone).ToArray();
                    break;
                case "Address":
                    stdMaster = stdMaster.OrderBy(x => x.Address).ToArray();
                    break;
            }
        }
        else
        {
            ImageSortname = "Images/sortAsc.png";
            ids = 0;

            switch (SortColumn)
            {
                case "StdId":
                    stdMaster = stdMaster.OrderByDescending(x => x.StdId).ToArray();
                    break;
                case "StdName":
                    stdMaster = stdMaster.OrderByDescending(x => x.StdName).ToArray();
                    break;

                case "Email":
                    stdMaster = stdMaster.OrderByDescending(x => x.Email).ToArray();
                    break;
                case "Phone":
                    stdMaster = stdMaster.OrderByDescending(x => x.Phone).ToArray();
                    break;
                case "Address":
                    stdMaster = stdMaster.OrderByDescending(x => x.Address).ToArray();
                    break;
            }
        }
    }
Filtering Method
In each column heading part, we have added a new row for performing the Filtering of the HTML grid. In each column filter Textbox Change event we pass the Textbox value. We call a common filtering method studentFilteringList and in this method, we pass the filtering column Textbox value and column Name.
// For Filtering by Student Name
    void OnstdNameChanged(UIChangeEventArgs args)
    {
        string values = args.Value.ToString();
        studentFilteringList(values, "StudentName");
    }

    // For Filtering by Email
    void OnEmailChanged(UIChangeEventArgs args)
    {
        string values = args.Value.ToString();
        studentFilteringList(values, "Email");
    }

    // For Filtering by Phone
    void OnPhoneChanged(UIChangeEventArgs args)
    {
        string values = args.Value.ToString();
        studentFilteringList(values, "Phone");
    }

    // For Filtering by Adress
    void OnAddressChanged(UIChangeEventArgs args)
    {
        string values = args.Value.ToString();
        studentFilteringList(values, "Address");
    }
Here, we create a common function named as studentFilteringList and in this method, we get the filtering column Textbox value and column Name. We do filtering from the Web API and bind the filtering result to the HTML Table.
    //Filtering
    protected async Task studentFilteringList(String Value,string columnName)
    {
        stdMaster = await Http.GetJsonAsync<StudentMasters[]>("/api/StudentMasters/");

        if (Value.Trim().Length >0)
        {
            switch (columnName)
            {
                case "StudentName":
                    stdMaster = stdMaster.Where(x => x.StdName.Contains(Value)).ToArray();
                    break;

                case "Email":
                    stdMaster = stdMaster.Where(x => x.Email.Contains(Value)).ToArray();
                    break;
                case "Phone":
                    stdMaster = stdMaster.Where(x => x.Phone.Contains(Value)).ToArray();
                    break;
                case "Address":
                    stdMaster = stdMaster.Where(x => x.Address.Contains(Value)).ToArray();
                    break;
                default:
                    stdMaster = await Http.GetJsonAsync<StudentMasters[]>("/api/StudentMasters/");
                    break;
            }
        }
        else
        {
            stdMaster = await Http.GetJsonAsync<StudentMasters[]>("/api/StudentMasters/");
        }
    }
Build and Run the Application
Points of Interest
Note as when creating the DBContext and setting the connection string, don’t forget to add your SQL connection string. Hope you all like this article and in the next article, we will see more examples to work with Blazors and it's really very cool and awesome to work with Blazor.
History
- 2018-05-28 - BlazorFilterSorting.zip