
Android and iOS Mobile Device Development with Azure Mobile Services using HTML5 and JavaScript
Tutorial showing how to build an iOS or Android app using Azure Mobile Services with HTML5 and JavaScript in Visual Studio.
In this tutorial I’m going to show you how you can build a cross-platform mobile app with Azure Mobile Services using HTML5 and JavaScript. I'll be using the following sample code:
I’m going to adapt the sample todo app that’s part of the Get started with Mobile Services tutorial. You’ll notice that there are already tutorials for iOS, Android and Windows Phone 8 but the problem with these, excluding WP8, is that you need to use an environment other than Visual Studio. This might be OK if you’re already familiar with Java, Objective C, Eclipse, and XCode, but is obviously less than ideal if you’re not.
Never fear though: if your background is almost any flavour of .NET web development there’s a much easier solution: just use HTML5 and JavaScript, which you probably already know, to develop your app, and integrate with AMS from there.
Pre-Requisites
To complete this tutorial you’ll need:
- A non-Express edition of Visual Studio 2010 or 2012 (you need to be able to install add-ins),
- The Nomad for Visual Studio add-in, which allows you to develop for Android and iOS from within Visual Studio. You can get a 7-day free trial from http://www.vsnomad.com/.
- I’ve attached a zip file containing the complete example code for the mobile app, but you’ll still need to set up an Azure Mobile Service – see Part 1: Setting Up The Azure Mobile Service below.
Part 1: Setting Up The Azure Mobile Service
This is straightforward and should take less than 5 minutes following the instructions at http://www.windowsazure.com/en-us/develop/mobile/tutorials/get-started-html/. If you don’t have an Azure account you can sign up for 3 months free using the Free trial link at the top of the page.
You need to follow the instructions in the Create a new mobile service and Create a new HTML app sections. You do not need to carry out the steps under Host and run your HTML app.
Once you’ve done all this you should have a zip file whose contents look like Figure 1.

You don’t need to worry about the server folder because we’ll shortly package up the HTML, JavaScript code, and styles as part of an app rather than serve them up from a web server.
Remember: there’s a complete sample app attached to this post so you can use that instead if you don’t want to work through the steps to create the sample yourself.
Part 2: Create the Mobile App in Visual Studio with Nomad
If you haven’t already installed the Nomad for Visual Studio add-in, please do so now. Just double-click on the installer you downloaded and follow the instructions.
Now open up Visual Studio and click File > New > Project.
From the list of templates in the New Project dialog, select VS Nomad Project, then choose a name and location, and click OK (see Figure 2).

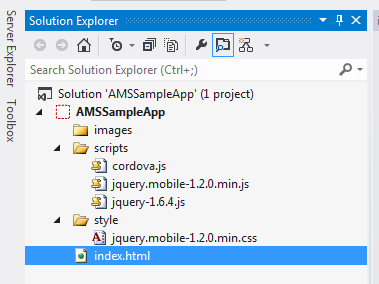
You should now have a new Nomad project for your app, with the contents as shown in Figure 3.
The first thing we need to do is get the JavaScript and styles we need into the project so, from the zip file you downloaded earlier, copy the app.js file into the scripts folder of your project. Once you’ve copied it you need to add it to the project in Visual Studio. Just right-click the scripts folder in Solution Explorer, then click Add > Existing Item, choose app.js, and click Add.
Now do the same for styles.css, but put it in the style folder rather than the scripts folder.
We now need to update to a later version of jQuery and add the AMS client JavaScript. The first thing to do is delete the version of jQuery we already have in the project, so go ahead and get rid of jquery-1.6.4.js.
Open up the index.html file from the zip file. Towards the bottom you’ll find the following script tags:
<script src='http://www.codeproject.com/ajax.aspnetcdn.com/ajax/jQuery/jquery-1.9.1.min.js'></script>
<script src='https://yourhostnamehere.azure-mobile.net/client/MobileServices.Web-1.0.0.min.js'></script>
Open up your web browser and navigate to the jQuery URL, then save off the script into the scripts folder of your project. Do the same for the MobileServices.Web-1.0.0.0.min.js script. Go back into Visual Studio and add them to your project the same way you did for app.js and styles.css.
Your project should look like Figure 4.

Now open up index.html in your project, delete all its contents, and replace it with the contents of the index.html file from the zip file you downloaded.
We’re almost there – we just need to tweak the project’s index.html file slightly so it’s pulling in the right stylesheet, scripts, and also to ensure the todo list fills the screen on your device when you run the app.
First off, find the <link> tag for the stylesheet in the document <head>, and update it to read:
<link rel='stylesheet' href='style/styles.css' /><span style="font-size: 14px;"> </span>
Then, at the bottom of the <body> update the three <script> tags to read:
<script src='scripts/jquery-1.9.1.min.js'></script>
<script src='scripts/MobileServices.Web-1.0.0.min.js'></script>
<script src='scripts/app.js'></script>
Finally, go back up to the top of the <body> and find the following tag:
<div id='wrapper'>
Delete the id attribute in this tag and you’re all set to build the app.
Part 3: Build and Deploy your Mobile App
You’ll notice that Nomad has added a Build item to your Visual Studio toolbar (see Figure 5), and that you have the option to build for either Android or iOS.

Here I’m going to show you how to build and deploy your app to Android, which is simpler. Building for iOS requires slightly more preparation, so please see http://www.vsnomad.com/documentation/ios-index.html for full instructions.
Build and Deploy to Android
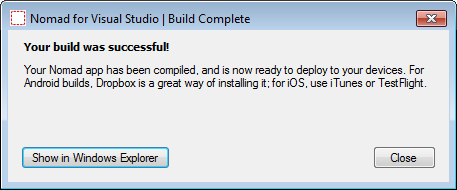
First, click Build > Build for Android on the toolbar (ignore Visual Studio’s Build menu). Nomad will build your application in the cloud (see Figure 6), and notify you when your build has completed successfully (see Figure 7), or tell you about any errors.

You can hide this if you want and Nomad will still tell you when your build completes. You should find, for this simple app, the build takes only 10 seconds or so.
Once the build is complete, click the Show in Windows Explorer button in the Nomad for Visual Studio | Build Complete dialog. You should now be looking at the distrib folder under your Visual Studio project, which should contain your app in a file called android-app.apk.
The easiest way to deploy your app to an Android device is to use a service like Dropbox or Skydrive, both of which have Android apps. I use Dropbox so that’s what I’ll show you here. If you don’t have an account for either, you can sign up for a free Dropbox account with a couple of GB of storage in less than 5 minutes.
Once you’ve got Dropbox installed on both your computer and Android device, just copy android-app.apk into the Dropbox folder on your computer. Open the Dropbox app on your device, log in if you need to, and navigate to whatever sub-folder you copied android-app.apk into. Now open android-app.apk.
At this point one of two things will happen:
- You’ll get a warning that you’re trying to install an app that isn’t from the Play Store and it’ll refuse to go any further until you go into your device settings and allow installation of apps from unknown sources. You’ll probably find this under Settings > Personal > Security > Device Administration > Unknown sources, although this may vary depending upon your device and Android version – have a dig around; it will be there somewhere.
- You’ll get a prompt about allowing the application access to various services and data stores on your device. If this happens all is well, and you just need to click Install, and then Open.
All being well, your app will start up and you’ll see something that looks a bit like Figure 8.

Your todo list will obviously be empty although, as you can see, I’m likely to be quite busy for the next while.
Conclusion
If you’ve got this far, congratulations: you’ve managed to build and deploy your first cross-platform mobile app that uses Azure Mobile Services with Nomad for Visual Studio.
Obviously it wasn’t a particularly exciting application but you should be able to see that using the AMS APIs is a fairly straightforward affair, and you should be in a position to create more interesting and useful apps for both business and pleasure built on these services.