Silverlight Application for Beginners
4.25/5 (3 votes)
In this article you will learn How to develop Silverlight Application
Introduction
Hi friends this is my first Silverlight application. This article is for beginners to a Silverlthe web. It is delivered as a cross browser, cross platform plugin that exposes programming framework and features that are ight application. Silverlight is a Rich Internet Application (RIA) for subset of .NET framwork and WPF.This is my first article on Code Project. If I make any mistakes please be kind to me.
Using the Code
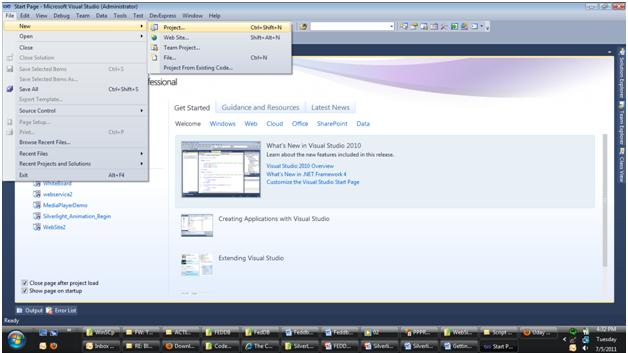
First we need to open Visual studio IDE and Choose the new prject from the file menu.File-->New--> Project
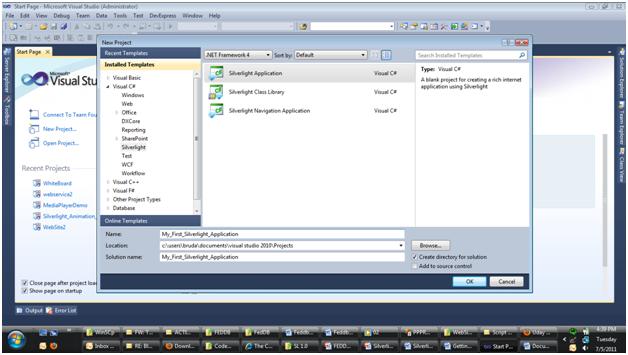
After cliking project this will show the window of New Project. In that you need to select Silverlight in leftmenu and then you need to select the Silverlight Appliction.Down below you specify the Project name.He I am Naming this Project as a My_First_Silverlight_Application
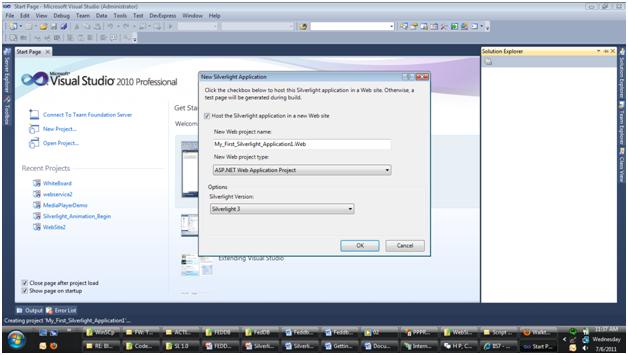
In Solution Explorer you will see following things. App.xaml is the Important sile in silverlight application which declares the application starting point for WPF/Silverlight apps. And it is completely different from ASP.NET App.Config file.
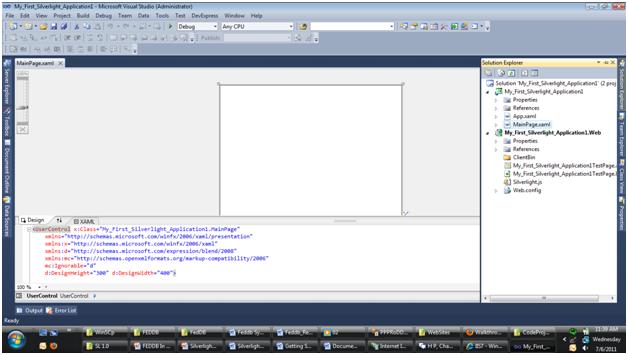
There is a file called MainPage.xaml. In that one we will be creating our UI and it will be having its own *.cs file where we will write our own business logic as per requirements.
To know more about XAML please follow the links.
http://msdn.microsoft.com/en-us/library/cc189036%28v=vs.95%29.aspx
http://www.codeproject.com/KB/silverlight/xaml.aspx
Let us add canvas object in Grid as shown.
<Grid x:Name="LayoutRoot" Background="White">
  <Canvas Height="145" HorizontalAlignment="Left" Margin="78,27,0,0" Name="canvas1" VerticalAlignment="Top" Width="182" >
   </Canvas>
     </Grid>
Now we will add one button inside the canvas.
<Button Content="Click ME" FontSize="12" Height="28" x:Name="FirstButton" Width="133" Canvas.Top="53" Canvas.Left="31" />
Here for button I have added the Name as FirstButton, the Name property which will bahaves as a ID parameter in .NET Applications.Now we will add label to grid
<dataInput:Label Content="Please Click the Button" Height="33" Margin="16,32,1,128" x:Name="label1" Grid.Row="1" Canvas.Left="15" Canvas.Top="-26" />For creating an event in Silverlight we need to type and select the event which one we want. In this article I have used
click_event for Button and MouseLeftButtonDown and MouseEnter events for a label as shown below
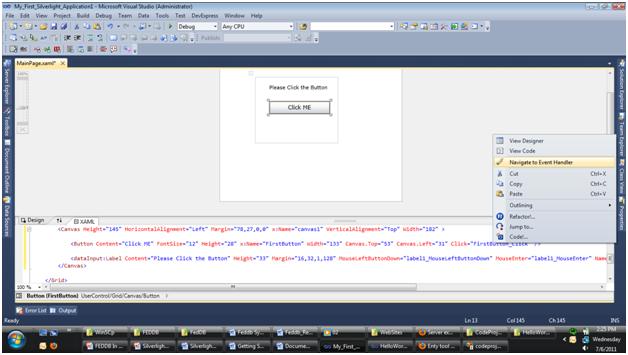
<Button Content="Click ME" FontSize="12" Height="28" x:Name="FirstButton" Width="133" Canvas.Top="53" Canvas.Left="31" Click="FirstButton_Click" />
  <dataInput:Label Content="Please Click the Button" Height="33" Margin="16,32,1,128" MouseLeftButtonDown="label1_MouseLeftButtonDown" MouseEnter="label1_MouseEnter" Name="label1" Grid.Row="1" Canvas.Left="15" Canvas.Top="-26" />
To go to the Backend i.e. *.cs file to write business logic just right click on event then click on Navigate to eventhandler. This will take you to the event respective *.cs file as shown and automatically creates the event in *.cs file.
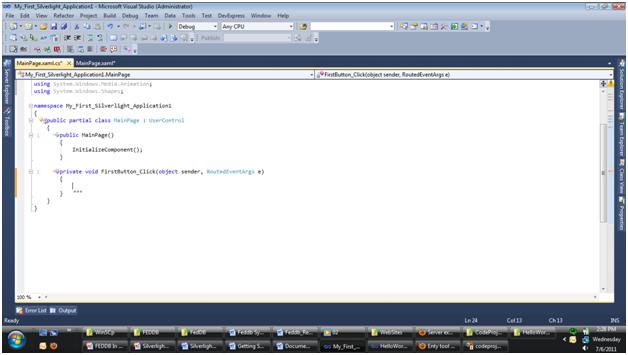
private void FirstButton_Click(object sender, RoutedEventArgs e)
 {
 	label1.Content = "Hello World!!!!";
 	double dc = 10;
	System.Windows.Thickness abc = new Thickness(dc);
	FirstButton.Margin = abc;
  }
When this event is fired it will first rename the label to "Hello World!!!!", then the event will thicken the button margin. Then we assign double dc to 10 because the Thickness class will accept the double and this thickness we have to assign it to the button margin. Let us write event for MouseEnter and MouseLeftButtonDown event for the label as shown below:
private void label1_MouseLeftButtonDown(object sender, MouseButtonEventArgs e)
{
	//when mouse left button is clicked on lable then lable content
	// will be changed to  "Hello!!!!! Please Click The Button"
	label1.Content = "Hello!!!!! Please Click The Button";
	double dc = 80;
	System.Windows.Thickness abc = new Thickness(dc);
	//buttons margin will be changed
	FirstButton.Margin = abc;
}
private void label1_MouseEnter(object sender, MouseEventArgs e)
{
	//when mouse enterd in to the lable region then label
	//content will be changed to "Please Click The Button"
	label1.Content = "Please Click The Button";
	double dc = 40;
	System.Windows.Thickness abc = new Thickness(dc);
	//buttons margin will be changed
	FirstButton.Margin = abc;
}
Now Run the Project. On each event the margin of button is changing and the label content is changing without refreshing the page.
Please do not forget to rate this article
